Models
Overview
Models are central to data modeling. They contain data resources that connect to source data and pipeline resources and transform the source data into cube dimensions or measures.
Models also incorporate a connection to a model server (that holds credentials for connecting to the data warehouse database and the cube).
Model architecture
Data modeling architecture and operation
The diagram below summarizes the architecture and operation of a data model in Data Hub. The letters on the diagram are explained the explanatory text.
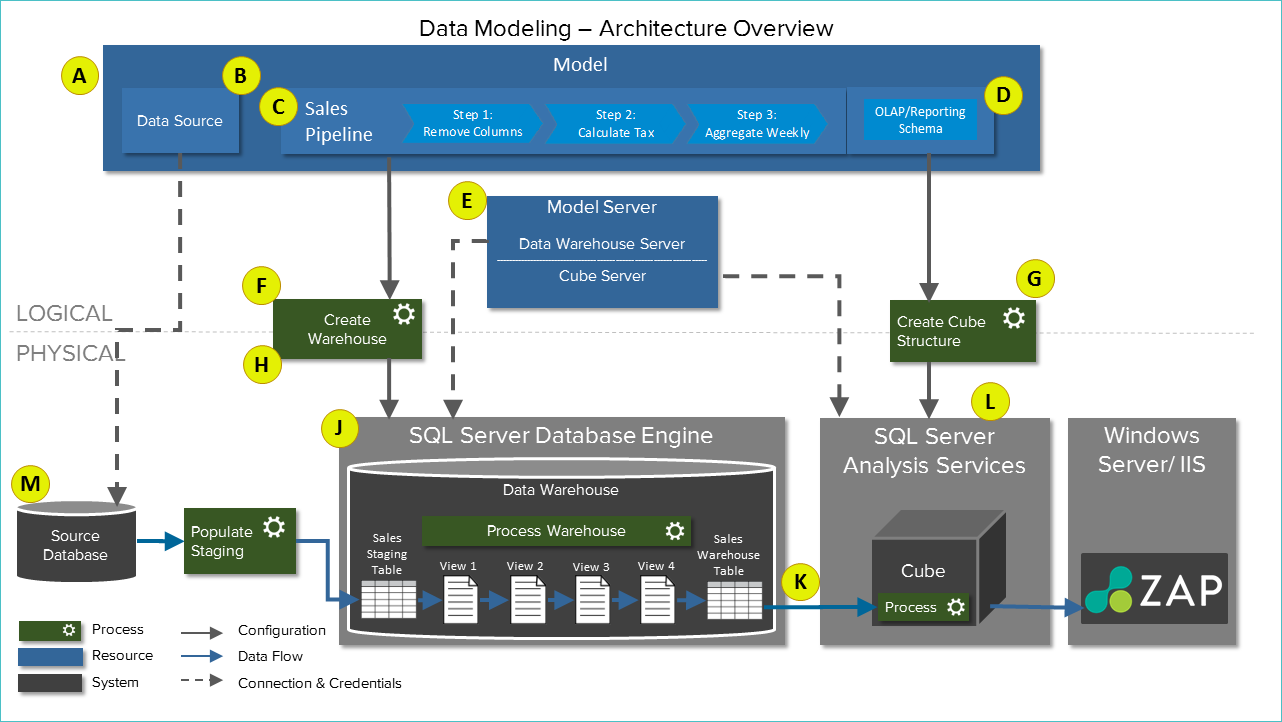 |
The diagram above is divided into two sections:
Logical Structure (upper part of the diagram, blue background).
The logical structure is the data model that you build in Data Hub. It stores settings needed to manipulate the source data into a cube and connection credentials for the various servers used. The logical structure is stored entirely within the Data Hub metadata database.
Physical Structure (lower part of the diagram, gray background).
The physical structure consists of physical databases: source data, data warehouse, and the cube. These may be hosted on various physical servers or accessed via the Internet.
Processes (F, G, H, and K) are links between the two structures. Processing a completed model executes these processes to transform the model’s settings into the data warehouse and the cube. The source data is then pushed through the data warehouse and into the cube.
Refer to the table below for explanatory text for lettered items in the diagram above.
Lettered Item | Item Name | Description |
|---|---|---|
A | Model Resource | The central resource for data modeling, which contains data source resources. |
B | Data Source | A sub-resource of a model resource. It acts as a credential repository and holds a connection to a source of data for use in building a model. |
C | Pipeline Resource | A sub-resource of a model resource and the heart of data modeling. Allow you to manipulate data from each table in the source data, using a series of steps, and then specify how the data will appear in the cube. |
D | Cube Configuration | Settings that control how each field in the pipeline’s result appears in the cube. They are accessible from the Properties pane. |
E | Model Server Resource | Works with the model resource to provide a credential repository for connections to the data warehouse database and the cube. It is not a sub-resource of the model. |
F | Warehouse Creation Process | Implements the pipeline in the Data Warehouse database. |
G | Create Cube Structure Process | Creates the empty cube structure and uses the cube server credentials from the model server to write to the cube. |
H | Process Warehouse Process | Loads data from each source table into the corresponding Staging table for that pipeline. |
J | Data Warehouse | The area where the manipulations specified in the model’s pipelines are performed. |
K | Populate Cube Process | Takes data from the warehouse table for each pipeline and uses it to populate the existing cube structure in the cube. |
L | OLAP Cube | The final result of the model. Once created, this cube can be used as a basis for analyses, charts, dashboards, and other resources in Data Hub. |
M | Source Database | Supplies the raw data that will be manipulated. One database or numerous databases can be used. |
Model creation wizard
The first step in creating a new data model via a data source is to start the model creation wizard. Once the wizard is accessed, you can determine the data source used to create the new data model.
This overall process uses a wizard (known as the model creation wizard) to guide you through each step.
The wizard will guide you through the model creation process, including connecting to an existing data source, specifying the details for the new model, deciding which tables you want to include from the source (as pipelines), and configuring the calendar hierarchies for the date dimension, before validating and processing the model.
Model sections
Below are four resources that work together to create a model (as labeled above).
Model server (labeled E)
Model (labeled A)
Data source (labeled B)
Pipeline (labeled C)
The data source and pipeline resources are sub-resources of the model resource. From a user perspective, creating a model is all about creating and configuring these four resources. In fact, most of the effort is in configuring the pipeline resources.
Model organization using resource explorer
Once a model is created, you can view all its contents using the model tab. You can also alter the model by renaming it or adjusting its properties.
Data model nodes, displayed in Resource Explorer, contain all the sub-resources of a data model, such as pipelines and data sources. In this regard, they behave similar to folders in the ZAP Data Hub interface, as shown below.
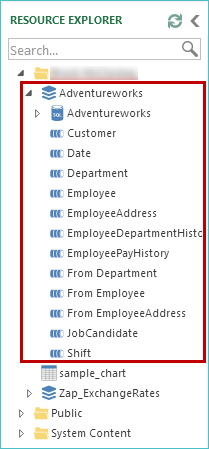 |
If you attempt to manage a data model like a folder (by opening it), the model tab is opened in the design canvas, unlike a folder, which, when clicked, displays folder contents and provides access to ribbon commands (e.g., cut, copy, paste).
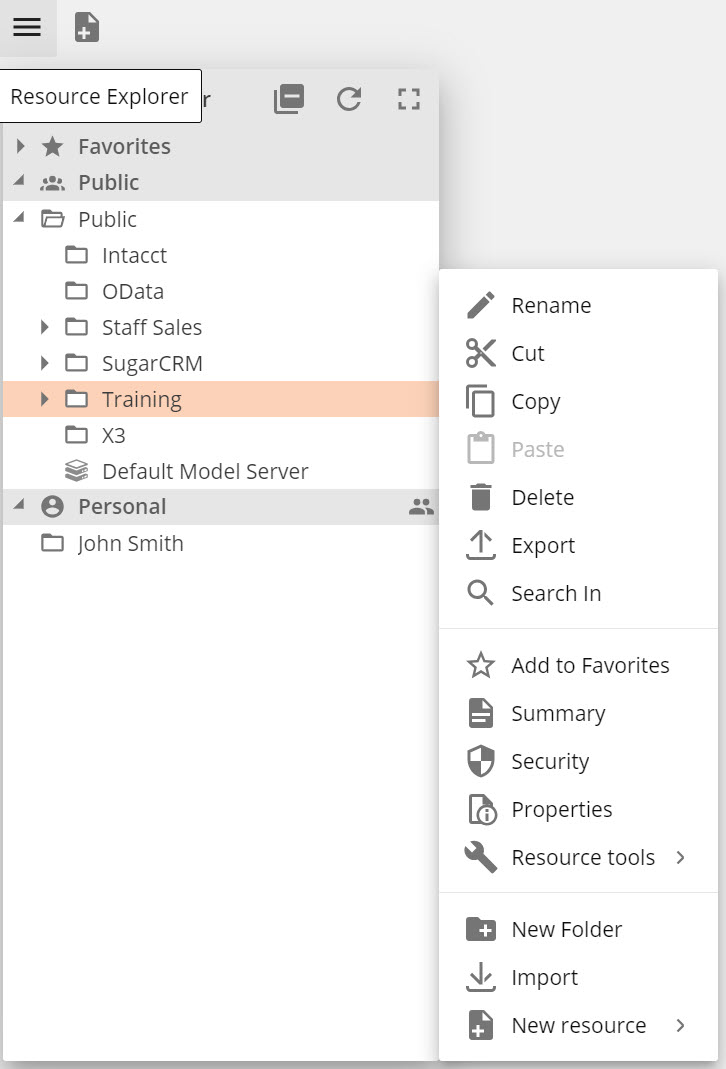
A right-click menu, accessed from the Resource Explorer, provides easy access to these commands for data models. Most of the menu items are equivalents to buttons on the Folder ribbon, except the Get Link command, which is the equivalent of the Share button on the Home ribbon.
An example of the right-click menu, with some of the available options displayed, is shown below.
These right-click options provide the ability to create sub-folders and move sub-resources within data models. Data model nodes hold all the sub-resources of a data model, such as pipelines and data sources, and behave similarly to folders in this regard. For large data models, it may be useful to create a more complex structure by adding sub-folders for different sub-resource types or different organization divisions and then moving the data model's sub-resources to the sub-folders.
Delete buttons
You can remove individual items in a model (such as data sources, pipelines, relationships, etc.) using the Delete buttons that appear throughout the interface. Examples of each type of delete button are shown (and highlighted) below.
Delete verification dialog box
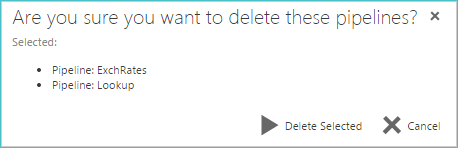
When removing subresources (pipelines and data sources) from a model, a verification dialog box appears, allowing you to verify the deleting action.
In the following example, two pipelines have been selected for removal.
 |
Change the model server
You can change the model server's model using the Model server drop-down list.
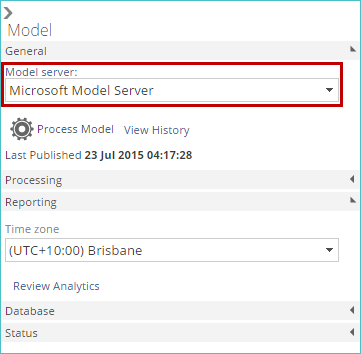 |
Model servers can be defined during the model creation process or created independently.
Process the model
Before they can be used with other resources, models must be processed using the Process Model button.
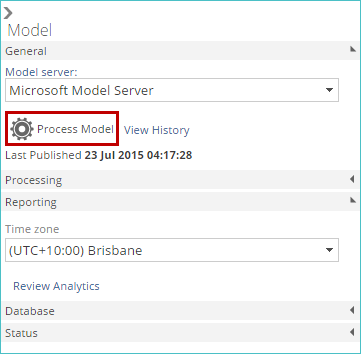 |
Model size and storage limits
Once a model has been processed for the first time, its size and storage limits can be seen in the General section of the Model panel.
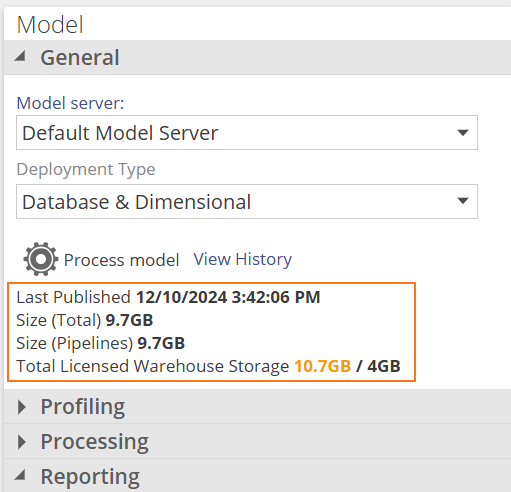 |
The following details are displayed:
The last time the model was published. A model gets re-published when any changes in the structure has been detected. If a model processes every day to refresh data, but the structure hasn't been changed in 6 months, this date will be 6 months in the past.
The total size of the model (data warehouse).
The size of just the pipelines that make up the model.
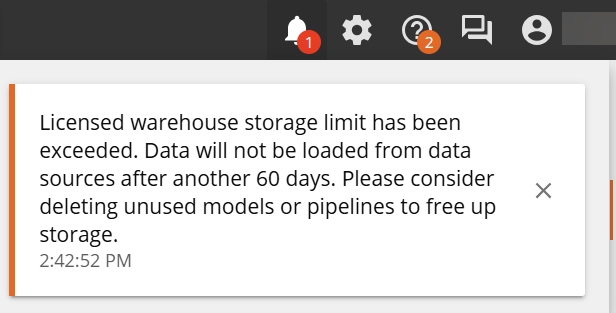
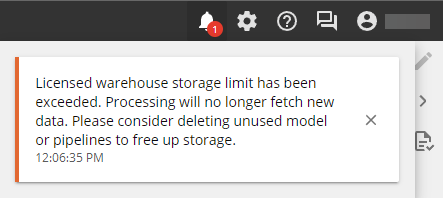
The Total licensed limit of the data warehouse. Once this is exceed by the total size of all models, a grace period will commence to allow users to rectify the exceeded limit. After the grace period source migration will be suspended until the exceeded limit is rectified. Read how to adjust storage limits and data warehouse storage sizes
Model settings
Set model profiling properties
When profiling and previewing model data, you can use either a sample of the data or the entire set of processed data from the model, resulting in more accurate previews. This behavior is controlled with the Use Processed Data check box in the Profiling area of the model's Properties pane.
By default, the check box is selected. This means that the entire set of processed data is used, if available.
If the model has not yet been processed, there is no processed data available, so a sample of the data must be used. The check box setting has no effect in this case.
 |
Note
If your model data (and the corresponding table) are large and processed the model, having the check box selected can make the preview creation process slow. In this case, you may want to deactivate (clear) this check box so that only a sample of the data is used.
Set model reporting properties
These properties allow you to specify time zone details for your model and provide access to reporting and solution-related analytics options.
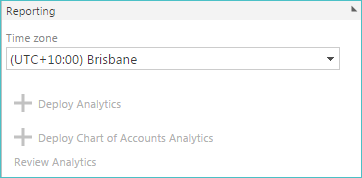
The Time zone drop-down list sets the timezone for reporting dates.
This property also controls the value of the TimeZone parameter.
Set model database properties
These properties allow you to specify the database and related model properties.
The following settings are available:
Database Name - Use this property to change the name of the actual database that your model creates.
A database name is the name of the object representing a model, pipeline, or column.
The Name property of a model, pipeline, or column is the name displayed to users of the model.
By default, the database name is derived from the Name property and may and is often identical to it. You may want to specify an object's Database Name property explicitly when:
The object is referenced by an application (e.g., SQL Server Reporting Services), and the exact name is important.
Ensure existing operations that refer to the database (such as SQL Server queries or Data Hub analysis reports – which use MDX) still work despite changing an object's display name.
Note
If you rename an existing database, a new, empty database will be created for your model. The original database remains on your warehouse server but is no longer used by the data model. The new database will need to be initialized, and the model reprocessed to populate it.
Take Ownership - This button appears when there is an ownership conflict with the selected database, allowing you to use it for the current model.
Important
This feature will overwrite the current contents of the database when the model is processed. If another data model uses the database, it will no longer have access to it.
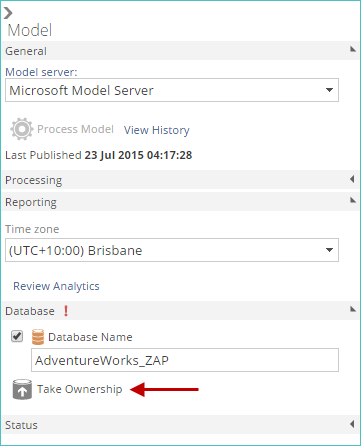
This button only appears when there is an ownership conflict. Otherwise, it is hidden.
Initialize - If the warehouse needs to be created or configured, this button appears, allowing you to complete the required operation.
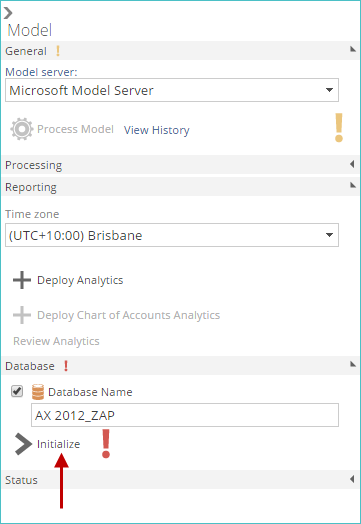
The button only appears when initialization is necessary. Otherwise, it is hidden. Scenarios requiring initialization include the following:
After importing a model to a new server, in this case, a new, empty warehouse database is created (if needed) and then configured. The model will need to be reprocessed to populate the warehouse with data.
If the warehouse's physical name has been changed. In this case, a new, empty warehouse database is created (if needed) and then configured. The model will need to be reprocessed to populate the warehouse with data.
If the Initialize button fails to create and/or configure the warehouse, a Download Script button appears on the Properties pane (as shown below).
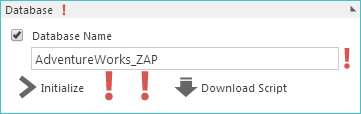
When clicked, a script is downloaded to your local system, allowing you to perform the warehouse initialization manually. When performing this manual initialization, it may be helpful to search for the following possible causes (in the order listed below):
The primary cause is most likely a permission problem. In this case, it is recommended that you first investigate the issue by downloading the script and running it against the warehouse database server. The script should make troubleshooting the issue much easier. For more assistance, contact your local database administrator.
Note
The script is downloaded as a text file with a .sql extension. A user with sysadmin or similar privileges can use SQL Server to run the script against the warehouse database server.
If permissions are not the issue, the problem could be connectivity issues between the system running Data Hub and the warehouse database server. In this case, you should access the model server used by the model and click the Test Connection button to determine if the connection is still valid.
If permissions or the model server connection are not the issues, the warehouse database server might have run out of disk space. For more assistance, contact your local database administrator.
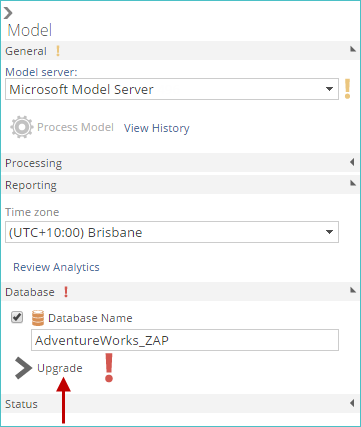
Upgrade - This allows you to update the model's data warehouse to the latest version. After upgrading your installation of ZAP Data Hub to a newer version, this action may be required. For this reason, this button rarely appears.
Collation - When a data source provides its own collation, the model will default to that collation, meaning that it uses the same collation settings as the source. This behavior prevents duplicate values in the warehouse (due to the case or accent sensitivity difference between the source and the warehouse server). It is also useful when combining data sources using different collations. Override this behavior in the model using this setting. When the collation is applied, the warehouse is recreated.
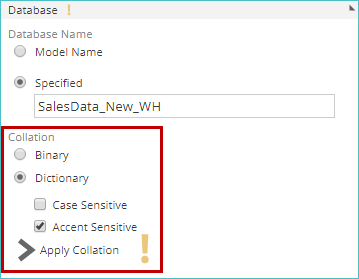
Select the collation that the data warehouse and cube will use.
Binary - This option sorts and compares data based on the bit patterns defined for each character. Binary sort order is case-sensitive and accent-sensitive. It is the fastest sorting method.
Dictionary - This option sorts and compares data that is based on characters. It can be configured to be case-sensitive and/or accent-sensitive using the corresponding checkboxes.
Once you have selected your collation sort option, click the Apply Collation button.
Important
Changing the collation setting in an already deployed model will require a full refresh.
Optimized for warehouse reporting - When enabled, the model's data warehouse is optimized for direct querying from other third-party applications, such as Microsoft Power BI and Tableau. The changes made by selecting this setting only impact the data warehouse structure. There is no impact on the corresponding cube.
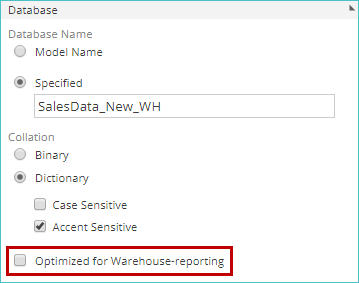
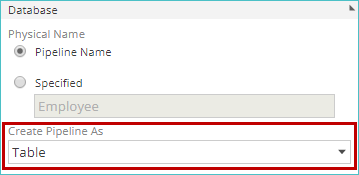
This setting optimizes the data warehouse by performing the following actions:
Updates the state of the model's pipelines from view to the table if the Optimize for Warehouse Reporting option is selected in the Create Pipeline As field on the pipeline task pane. This setting can be viewed or modified for individual pipelines using the Create Pipeline As setting in the Database section of the pipeline's Properties pane.
Creates relationships in the warehouse if both pipelines in the relationship have Create Pipeline As set to Table or Optimize for Warehouse Reporting.
Creates new primary keys for dimensions with composite keys.
Creates foreign key constraints for relationships marked as "For Reporting" on the Properties pane, under the pipeline Relationships tab.
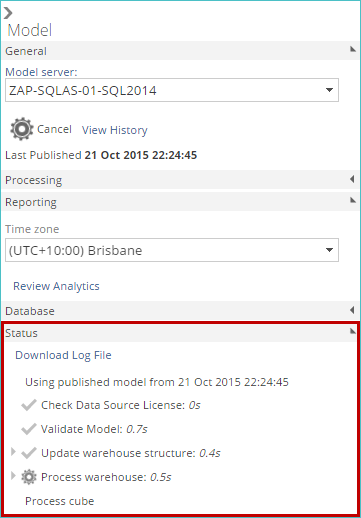
View model status
During model processing, use the Status area to view task status.
 |
Data source parameters tab
The PARAMETERS tab displays data source-level parameters.
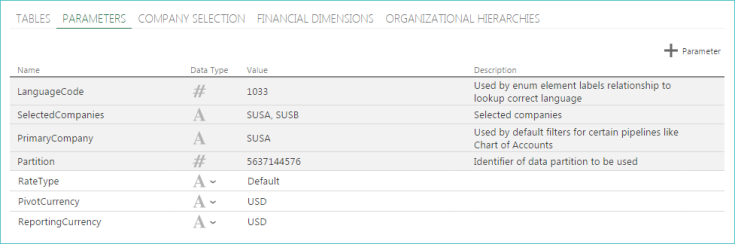 |
You can edit the data type, value, and description of parameters using the corresponding columns in the list of parameters.
Note
Parameters that have a gray background cannot be edited.
Displayed information
The following information is displayed in the list:
Name of the pipeline.
The number of rows in the warehouse table for each pipeline.
Path of the pipeline. This refers to the location of the pipeline relative to its model folder. If the pipeline is in the same folder as the model, no entry appears in the Path column. However, if a subfolder has been added within a model, and the pipeline is within that subfolder, the subfolder's name appears in the Path column.
In the following example, the Employee pipeline has been added to a subfolder called HR. Notice that the subfolder's name appears in the Path column on the Pipelines list.
 |
The data source associated with the pipeline. Warehouse pipelines are marked as (Warehouse).
The table name for each pipeline as it appears in the original source.
Appendix
Warehouse ownership conflicts
If the specified cube and warehouse are already being used by another model (if they were not created by the model currently being created), a Take Ownership button appears on the wizard's Create Model screen.
 |
Clicking this button allows you to mark both the cube and the warehouse as being created by creating the model. This action effectively permits overwriting the model database and cube.
Important
You should only use this button if you are sure that the cube and warehouse should be overwritten and associated with the new model. The model that was using the warehouse and cube will now report an error if you try to use it.
A typical case where taking ownership of an existing cube and warehouse would be used to save time when a large, completed database and cube are migrated from a development server to a production server, and the Data Hub instance on the production server needs to take them over, rather than reprocessing the model to recreate them.
If the take ownership action fails to take ownership of the current data warehouse and cube successfully, a Download Script button appears on the wizard.
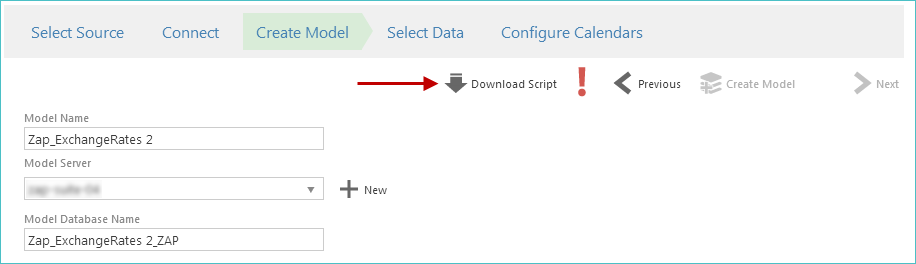 |
When clicked, a script is downloaded to your local system, allowing you to perform the warehouse initialization manually. When performing this manual initialization, it may be helpful to search for the following possible causes (in the order listed below):
The primary cause is most likely a permission problem. In this case, it is recommended that you first investigate the issue by downloading the script and running it against the warehouse database server. The script should make troubleshooting the issue much easier. For more assistance, contact your local database administrator.
Note
The script is downloaded as a text file with a .sql extension. A user with sysadmin or similar privileges can use SQL Server to run the script against the warehouse database server.
If permissions are not the issue, the problem could be due to connectivity issues between the system running Data Hub and the warehouse database server. In this case, you should access the model server used by the model and click the Test Connection button to determine if the connection is still valid.
If permissions or the model server connection are not the issue, the warehouse database server might have run out of disk space.
Many other possible issues may prevent you from taking ownership of the warehouse.