Sage Intacct
The ZAP Sage Intacct Data Source models all endpoints exposed by Sage Intacct’s API. All definitions exposed by the API are included in the data source, including user-defined tables and user-defined columns. This guide details the minimum configuration required to connect to Sage Intacct from the Sage Intacct Data Source. This guide also includes additional information on error troubleshooting and best practices.
Pre-requisites
ZAP Data Hub in the cloud, or ZAP Data Hub on-premises version 10.2 and above.
An administrator account to configure your Sage Intacct instance.
To connect to Sage Intacct, the following configuration is required:
Subscribe to Web Services
Authorize theZAP SenderId
Configure user permissions
ZAP provides general guidance in this article and only offers limited assistance for the following steps which are subject to change by Sage Intacct. Please contact your partner or ZAP Support for any issues with configurations.
Configuration
Web Services
To enable Web Services access in your Sage Intacct instance, please follow these steps:
From the menu, navigate to Applications -->> Company -->> Admin -->> Subscriptions
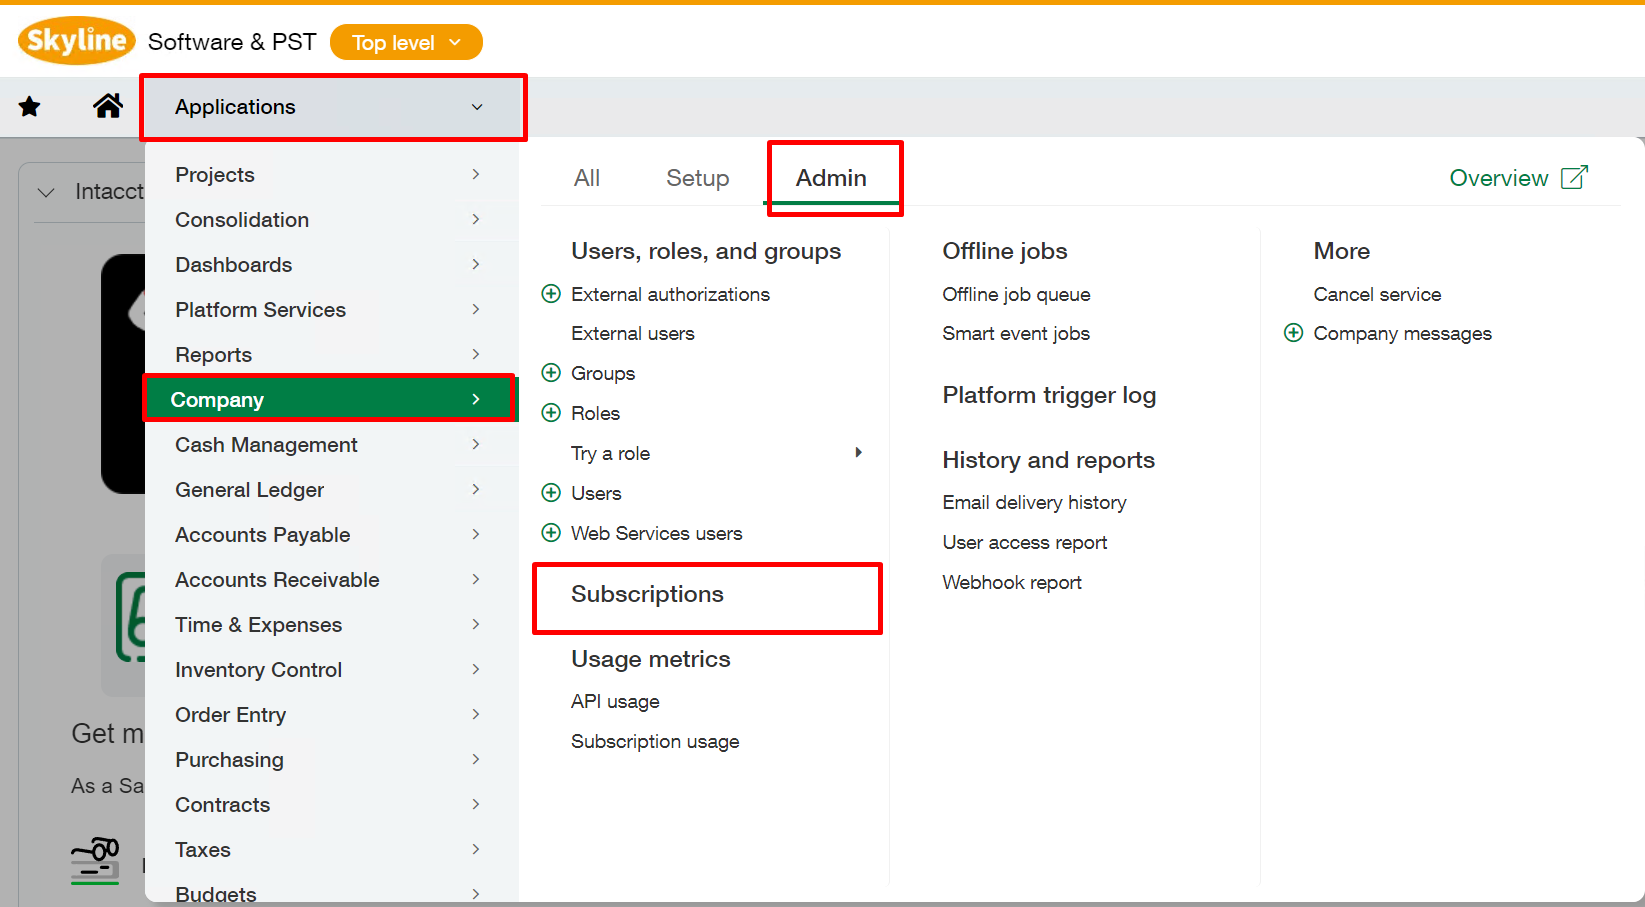
At the bottom of the list, locate and enable Web Services

Ignore the warning about additional charges since this is applicable for the ZAP Sender ID, which is handled by ZAP.
Click Done on the Subscriptions page to apply your change.
Authorize ZAP's Sender ID
To enable Web Service access to ZAP, add the ZAP Sender ID to the allowed list, by following the next steps:
From the menu, navigate to Applications -->> Company -->> Setup -->> Company.

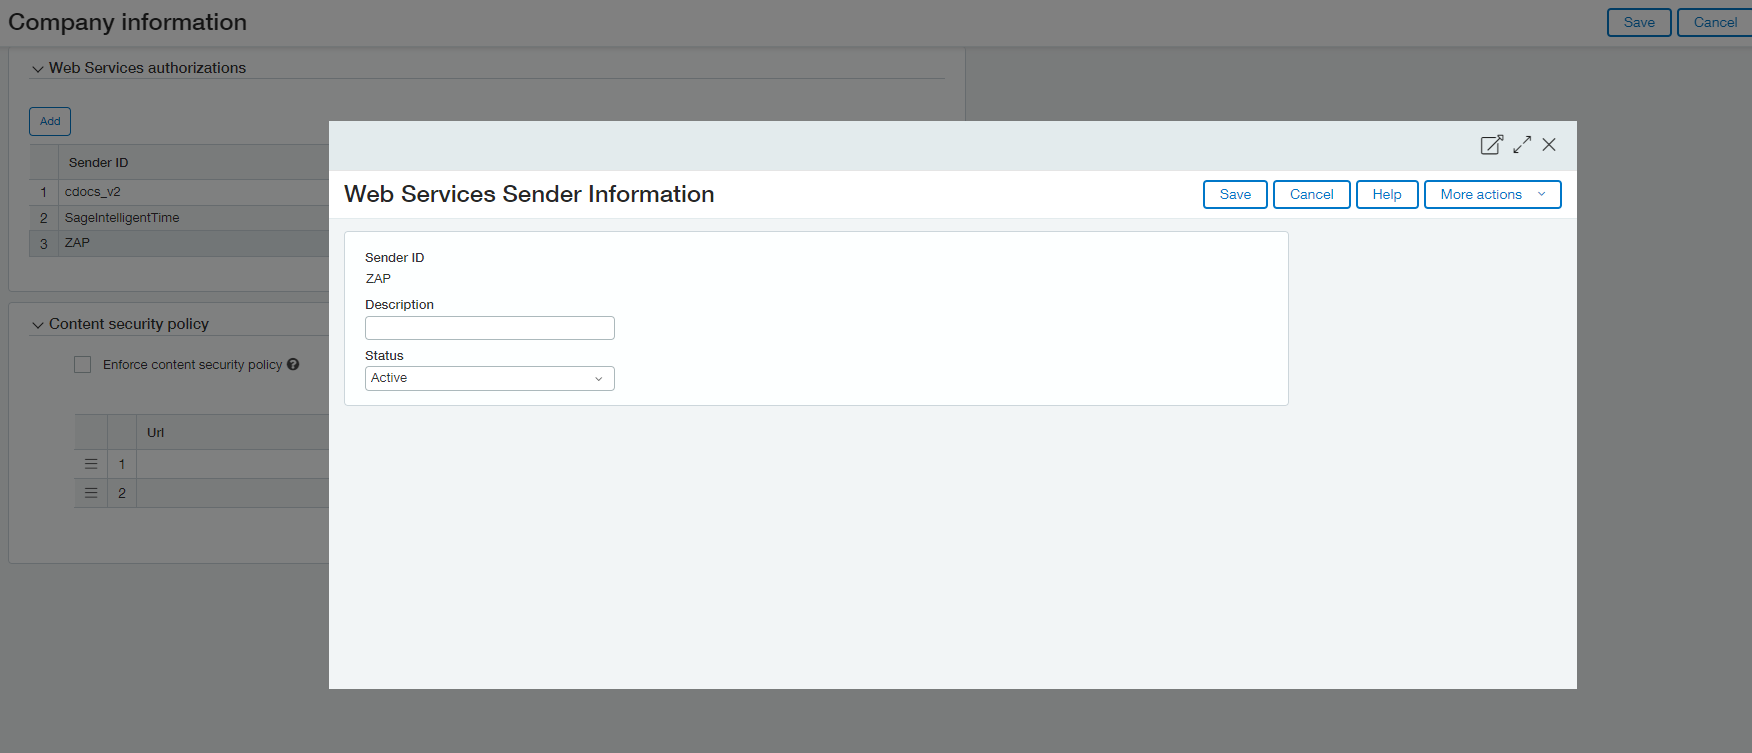
Click Edit and navigate to Security -->> Web Services Authorizations section, located at the bottom of the page.
Click the Add button and add the following:
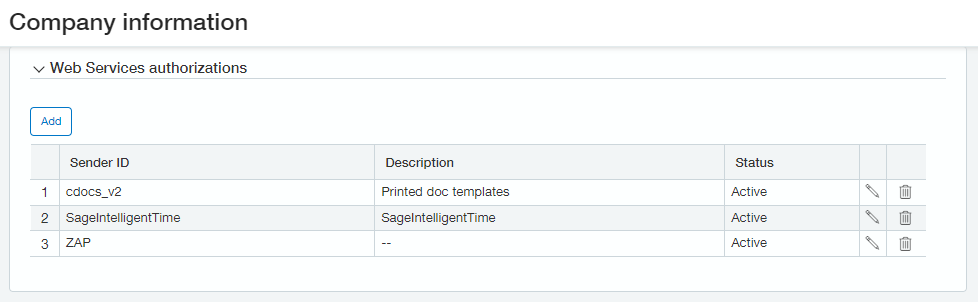
Click Save on the Company information page.
Configure user permissions
The Sage Intacct data source requires a user with minimum permissions. Two types of users may be used:
Web Services user: Sage Intacct supports a different type of user account optimized for web service integrations.
It is strongly recommended to use a web service users to prevent LOCKEDOUT scenario with a standard user, as multiple logins from multiple locations may occur with the data source.
Standard User: A standard user account
Create a dedicated read-only role:
The first step is to create a dedicated read-only role to ensure that only the required permissions for the endpoints required by ZAP are enabled.
From the menu, navigate to Applications -->> Company -->> Admin -->> Roles.
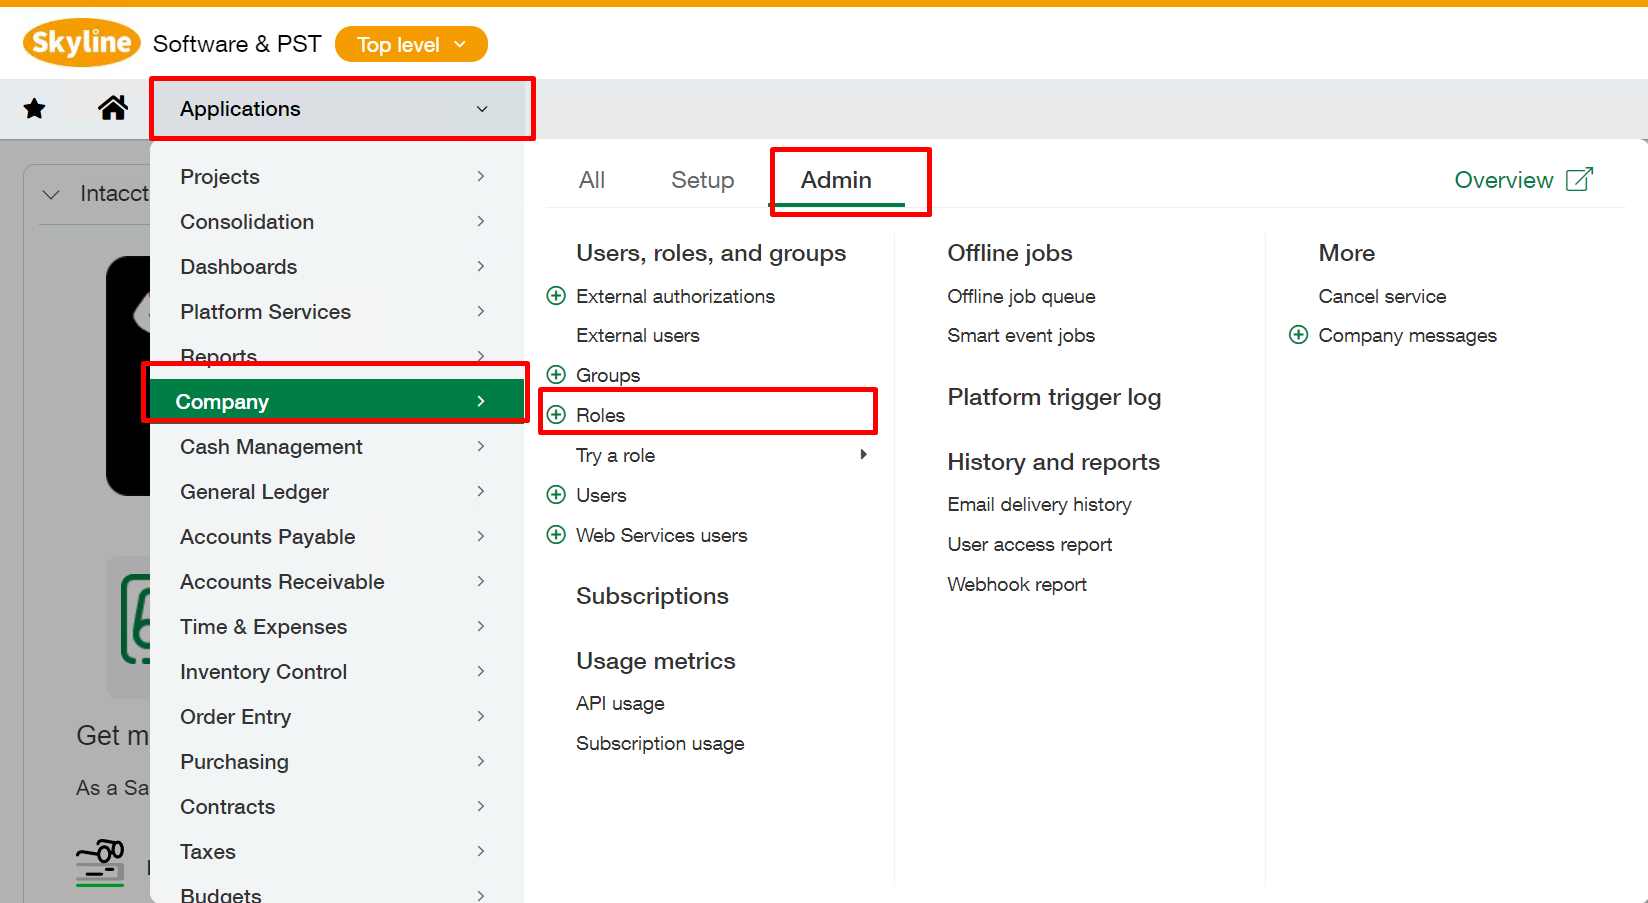
Click Add to create a new role.
Input a Name for your role and click Save.
Using the Module Permissions table, check the necessary boxes for each module where applicable.
Administration module permissions are mandatory. Assign additional permissions according to the table only for the modules included in your subscription.
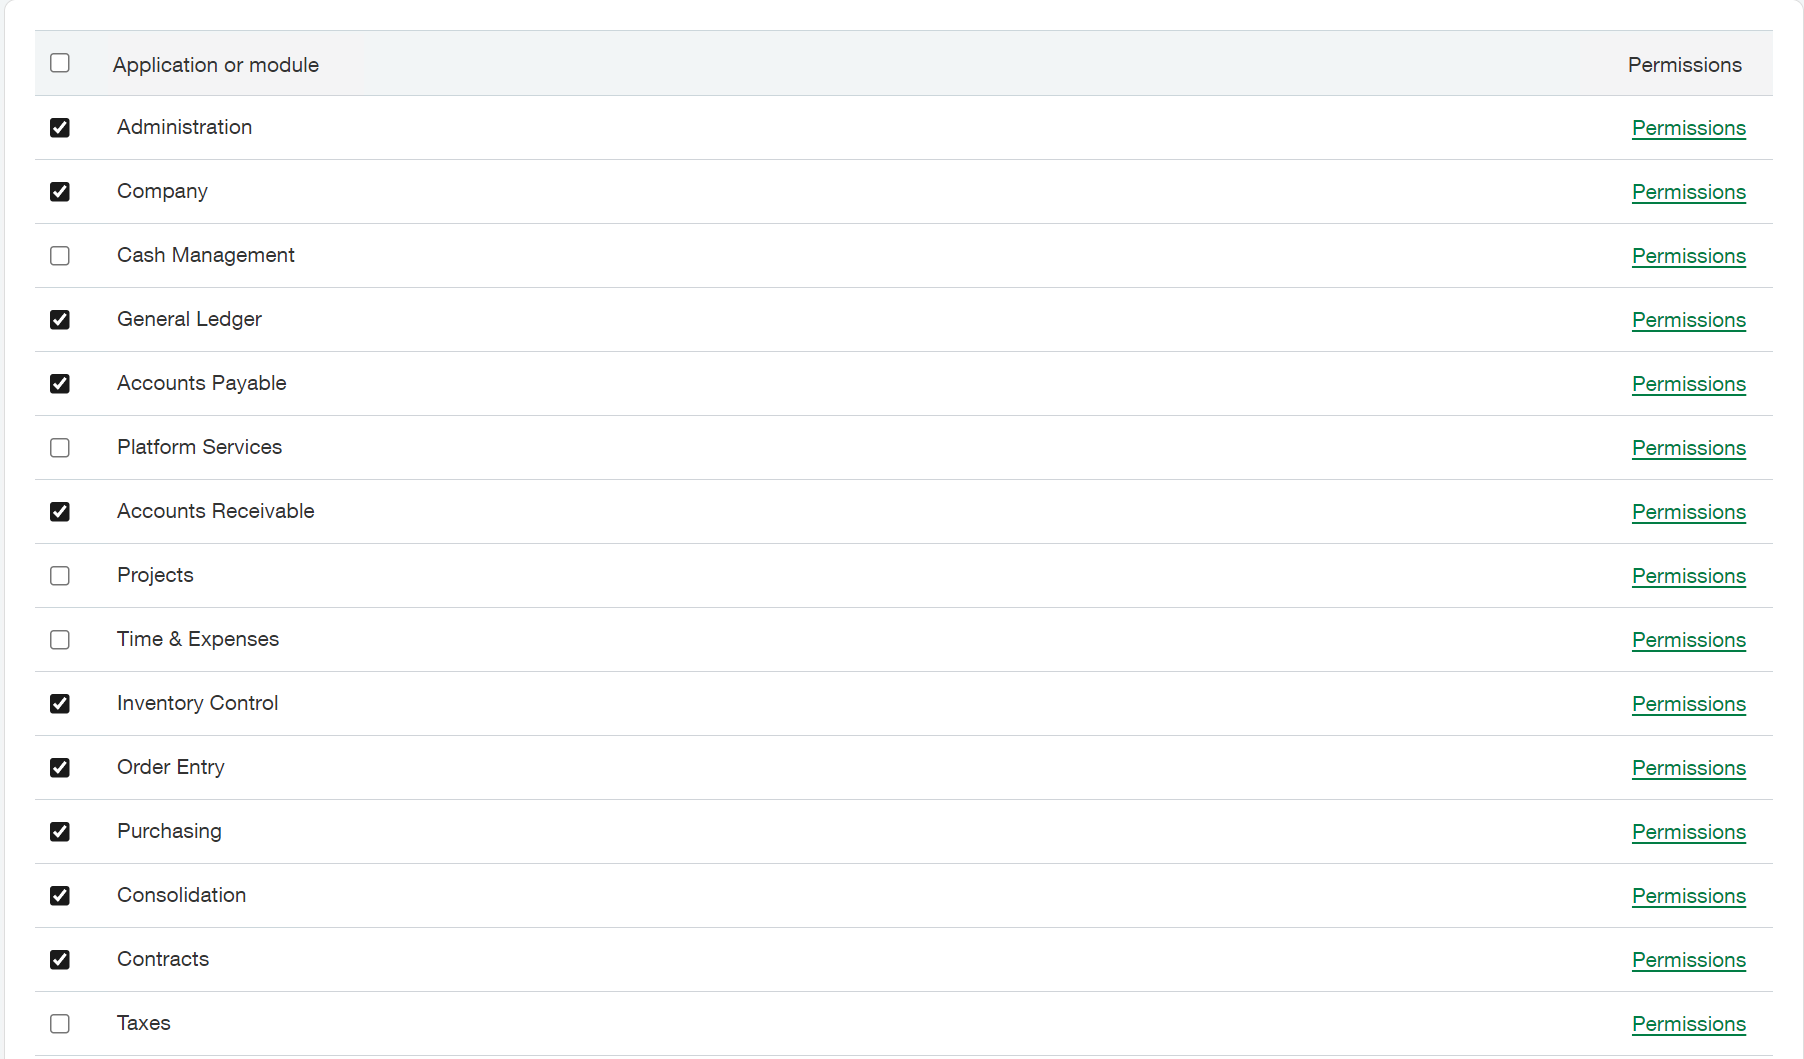
Click Permissions on each module to see the permissions.
Enable the required permissions.
Click Save.
Repeat for every other applicable module.
Click Save.
Module | Permission | Permission types |
|---|---|---|
Administration | ||
Application subscriptions | List | |
API usage | View | |
Company info | View | |
Subscription usage | View | |
Company | ||
Departments | View | |
Locations | View | |
Location groups | View | |
Class | View | |
Class groups | View | |
Employees | View | |
Transaction currencies | View | |
General Ledger | ||
Journal entries | View | |
User-defined books | View | |
Accounts | View | |
Account groups | View | |
Budgets | View | |
Journals | View | |
GAAP adjustment journals | View | |
Tax adjustment journals | View | |
Accounts Payable | ||
Vendors | View | |
Vendor groups | View | |
Bills | View | |
Adjustments | View | |
Account Receivable | ||
Manage payments | View | |
Customers | View | |
Customer groups | View | |
Invoices | View | |
Adjustments | View | |
Inventory Control | ||
Inventory transaction definitions | List |View | |
Warehouse | View | |
Items | View | |
Item GL groups | View | |
Units of measure | View | |
Bin size | View | |
Inventory totals | List | View | |
Inventory transactions | List | View | |
Maintain inventory valuation | List | View | |
Order Entry | ||
Order Entry transaction definitions | View | |
Order Entry transactions | List | View | |
Purchasing | ||
PO transaction definitions | View | |
Purchasing transactions | List | View | |
Consolidation | ||
Manage books | View | |
Contracts | ||
Process contract schedules | List | View |
Create a Web Services user
The following steps involve the creation of a dedicated Web Services User.
From the menu, navigate to Applications -->> Company -->> Admin -->> Web Services User

Click Add
On the User information tab, input values for the following mandatory fields:
User ID
Last name
First name
Email address
Select Business as the User type
Keep the value Limited for Admin privileges
If it is set to Full, the user will have access to all endpoints with all permissions.
This can be used to diagnose permission issues.
Click on the Roles information tab and select the applicable read-only Role defined earlier.
Click Save.
Ignore any warning that there will be a charge for creating the User as this applies to the ZAP Sender ID
Connecting to the data source
To add an Intacct data source to an EXISTING Data Model:
Open an existing Data Model from RESOURCE EXPLORER.
Expand Data Sources.
Click Add Data Source.
To add an Intacct data source to a NEW Data Model:
Select source
In the Select Source step:
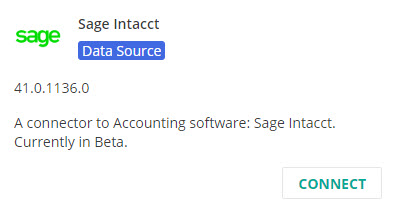
Under the Apps (API) section, select Sage Intacct.
From the source type pop-up, click Connect on the Sage Intacct entry tagged Data Source.
Connect
To set up the connection between Data Hub and Sage Intacct complete the following fields:
Provide your Username, password and company identifier. Go to Configuration to understand how to configure company information and user access.
Click Test Connection
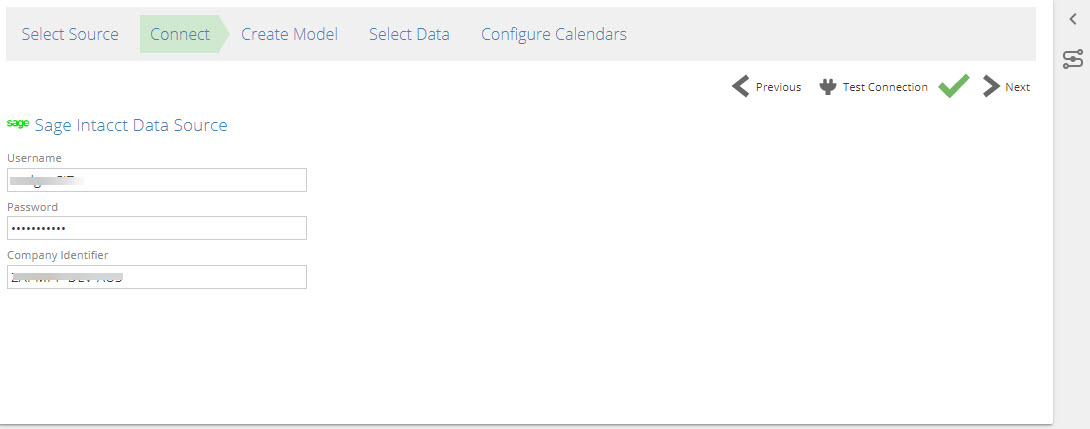
Click Next to continue to the Create Model step.
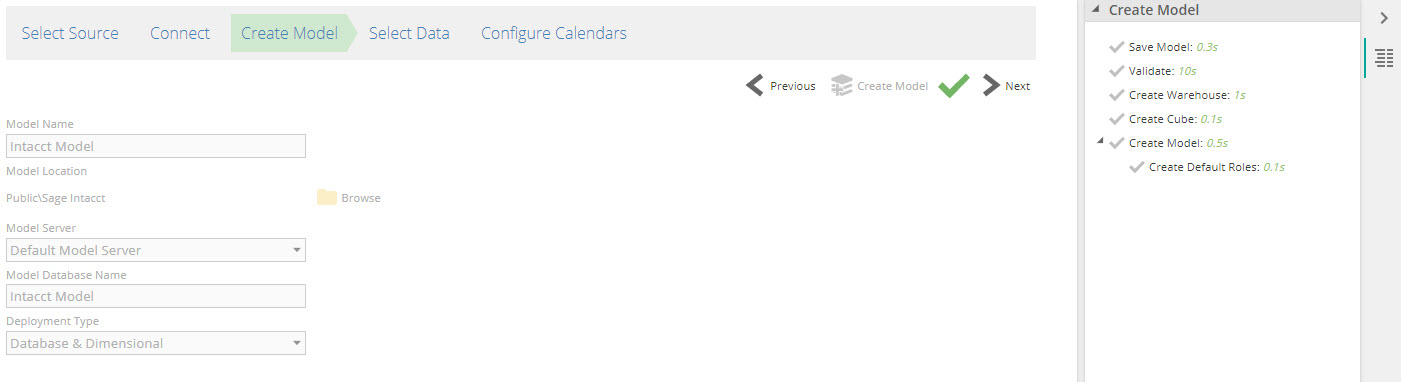
Once the model name and location have been specified, click Next to continue to Data selection.
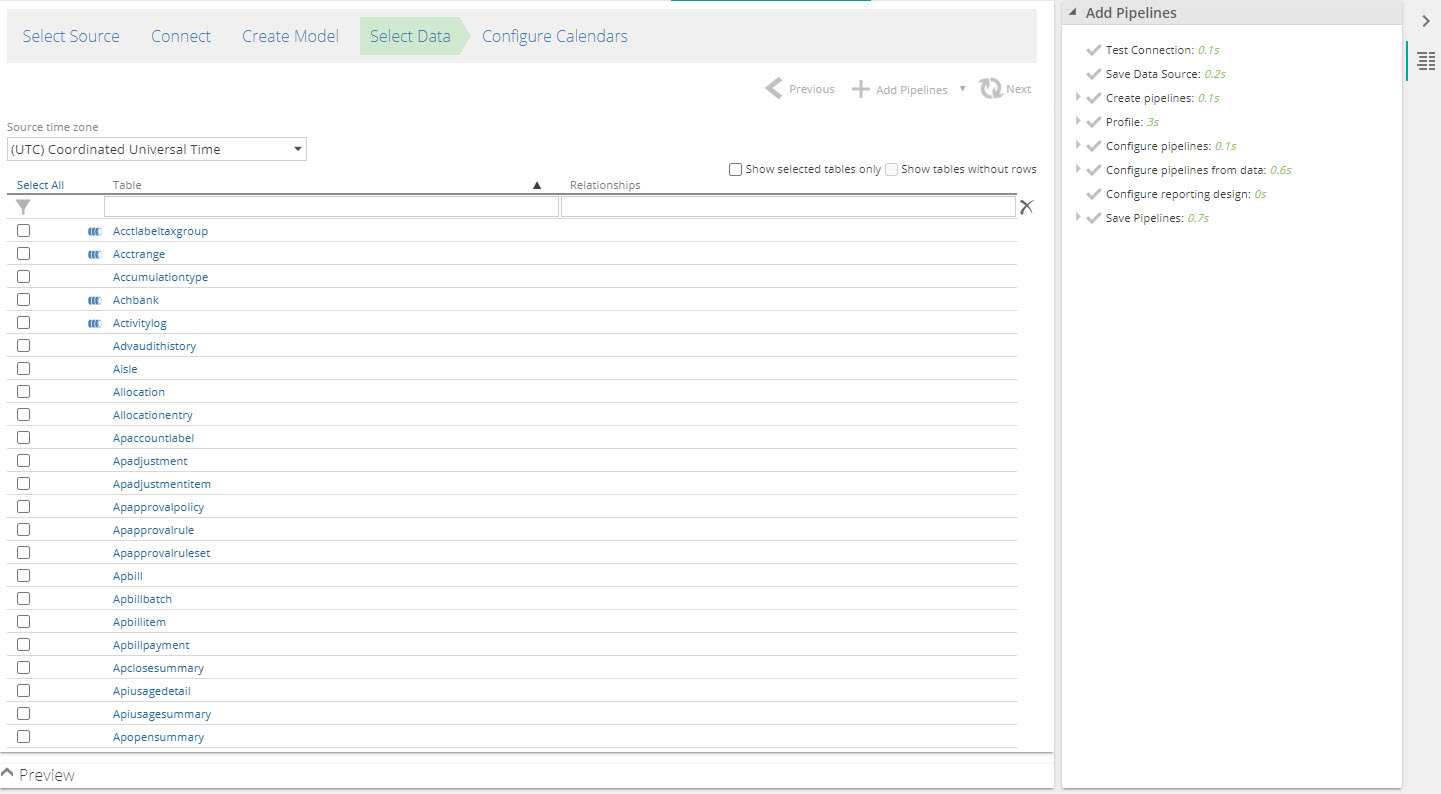
Select data
Select tables to be added as pipelines using the check box column.
If the Finish button was not used to add pipelines, click Finish to complete adding the Sage Intacct data source.
Select data screen elements
Select Data screen contains the following elements:
Select All/Clear
If no table check boxes are currently selected: Select All can be used to select all of the tables in the source database.
If one or more table check boxes are selected: Clear (x) can be used to clear all the selected tables.
Show selected tables only - Hides all tables where the check box column is currently cleared (not selected).
Show tables without rows - When selected, this item shows all source tables, including tables that do not contain data.
Add Pipelines - Select Add Pipelinesto add all selected tables to the data model as individual pipelines. The Add Pipelines drop-down menu provides two options:
Add Pipeline as Union of Tables creates a single pipeline from the union of selected tables from this data source.
Add Pipelines is the same function as the Add Pipelines button.
Note
If all of the tables in the data source are selected, the pipeline will always perform a union on all tables from the data source, even if the table list changes. For example, if the data source contains only tables of sales for USA, UK, and Europe, selecting them all will union the three tables into a single pipeline. If a fourth table with sales for Australia is later added, it will automatically be included in the union for the pipeline.
Finish - Adds the selected tables as individual pipelines and finalizes adding the SAP Business One data source. Once the request has been processed, Data Hub opens the Data Model Overview.
The filter row - The first row of the Select Data table is the filter row. Use the fields to filter rows based on the column contents. To clear all filters entered, either delete the entered text or use the Clear filter icon at the end of the row.
Troubleshooting errors
You may experience issues previewing or migrating data from Sage Intacct. It may be related to a missing configuration, API limits, or other API issues. ZAP is providing the following resolutions for common Sage Intacct error codes as guidance only.
Error messages / codes | Reason | Resolution |
|---|---|---|
XMLGW_JPP0001 | The number of concurrent requests has been reached in your Sage Intacct instance. | Wait some time before running your process or preview again or enable Pipeline retries for the affected pipeline with a suitable delay for the time between entries. |
XMLGW_JPP0007 | The Sage Intacct API did not send a response. This is a rare event. | Preview of process again. |
XL03000006: Invalid Web Services Authorization | The sender ID is not authorized for the company. | An incorrect or invalid user credential is used. Ensure that you have authorized the ZAP Sender ID and that the user credentials are correct |
XL03000006: Sign-in information is incorrect | You have entered invalid company login credentials. | An incorrect or invalid user credential is used. Ensure the user credentials are correct. |
PL0400005: You do not have permission for API operation QUERY on objects of type <object> | The user does not have the appropriate permissions on the <object> endpoint. | Ensure you have the required permissions (List and/or View) enabled on the <object> in the appropriate module. |
BL04000172: <user> is not authorized to execute this function | The user type is not set to Business and/or the admin privileges are not set to at least Limited. | Ensure the user type for the connection is set to Business and the admin privileges are set to at least Limited. |
XL03000006: The provided field is not supported for querying entity <object> <columns>. | These <columns> are not accessible by the SAGE Intacct API even though they show as columns | If you are previewing on the source screen, you must instead create a new pipeline for this table and only select the columns that are accessible. If it fails to add the pipeline, then please seek out ZAP Support for assistance. |