Data Model Process API (HTTP)
The Model process API enables processing of data models without using Data Hub or needing a login to Data Hub. It accepts parameters to assist model processing for special scenario's. Processing only a subset of companies or a group of pipelines servicing reporting for a specific department may be examples of such scenario's.
Prerequisites
In order for the API to work, the following is required:
Generated API user and password in Data Hub, or a valid Data Hub user.(Details explained in Authentication)
Existing model or deployed solution (located in public folder ONLY), manually published at least once or for subsequent changes. (Processing isn't required, just publishing)
Authentication
Basic Authentication
In Data Hub add a new API user from API Integration in Settings.

Add a new API User.
Important
Make sure to copy the password before you shift focus away from this window. The password will not be visible after that.
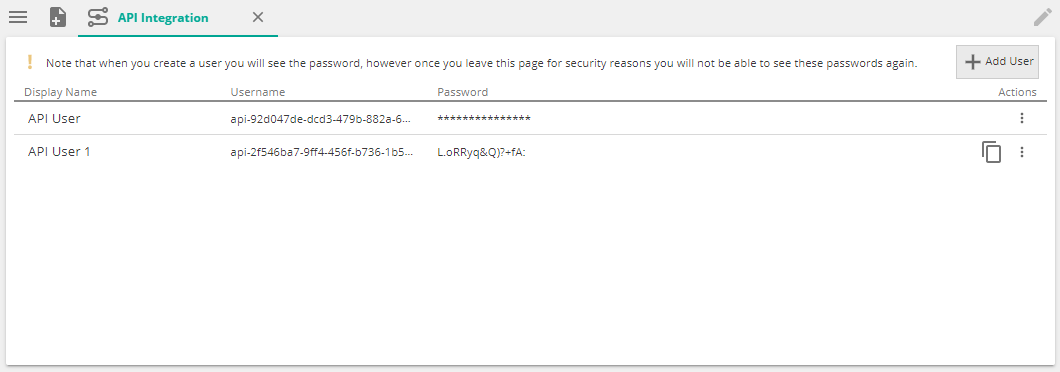
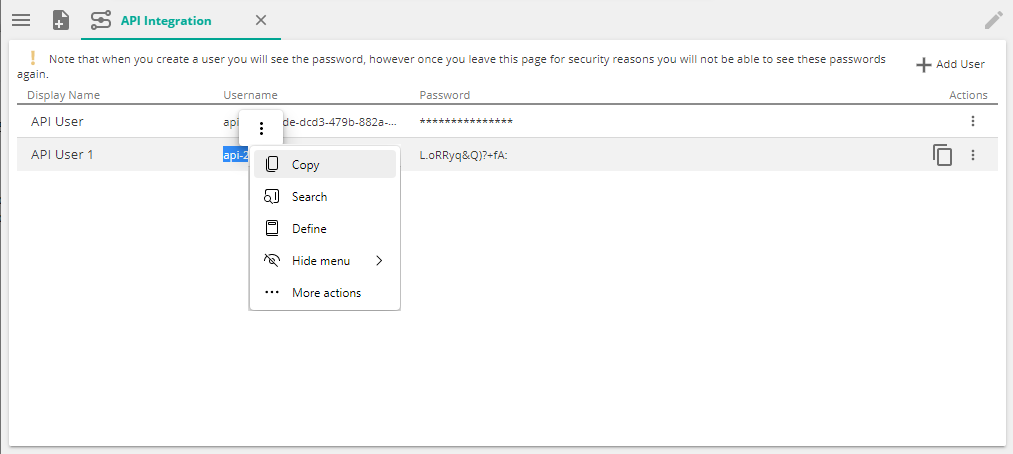
Copy the username and password.
Default Authentication
Use ZAP's default authentication.
Building and testing Endpoints
An API Interface is provided to facilitate building and easy testing and in addition also provide detailed, technical documentation about the API. The API interface is available at https://DataHubInstance/api.
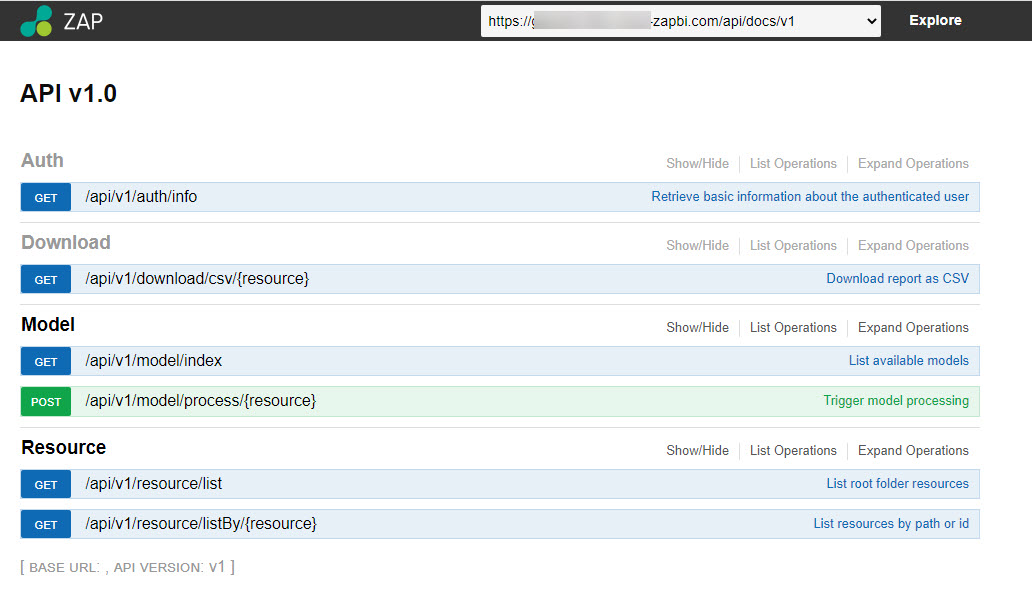
GET methods retrieve requested information
POST methods interact with Data Hub and perform specific actions.
Model Process HTTP Method
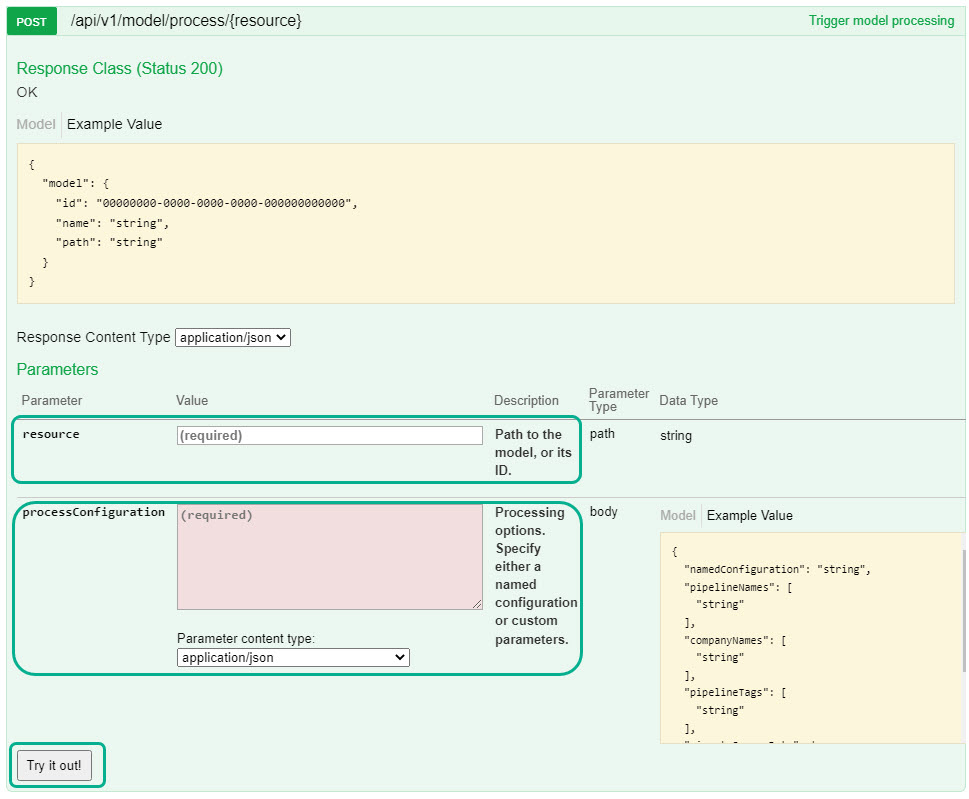
To build and test the Model Process endpoint, complete the following:
resource (required) - This is the model that you want to process. Run the Get method under the Model section to return a list of all models on the instance. You can provide either the resource id or path
Note
While the resource path is easy to read and identify, using the id is recommended, since this will remain constant and will require less API integration maintenance in the long run.

processConfiguration (required) - Two options are available for the processConfiguration, choose only one.
Process Configuration Name - specify the name of any existing process configuration. This option will be able to process the cube if this setting is enabled in the configuration.
Individual Parameters - specify as many or as little of the individual parameters as you want for processing in place of the configuration.
Note
If you specify a configuration and individual parameters, parameters will be ignored, only one of the two options can be used.
Important
Process Cube is always false when using individual parameters.
To see a list of available parameters, click on Model. Only these parameters can be used. More detail on any of these processing options are available in Processing options
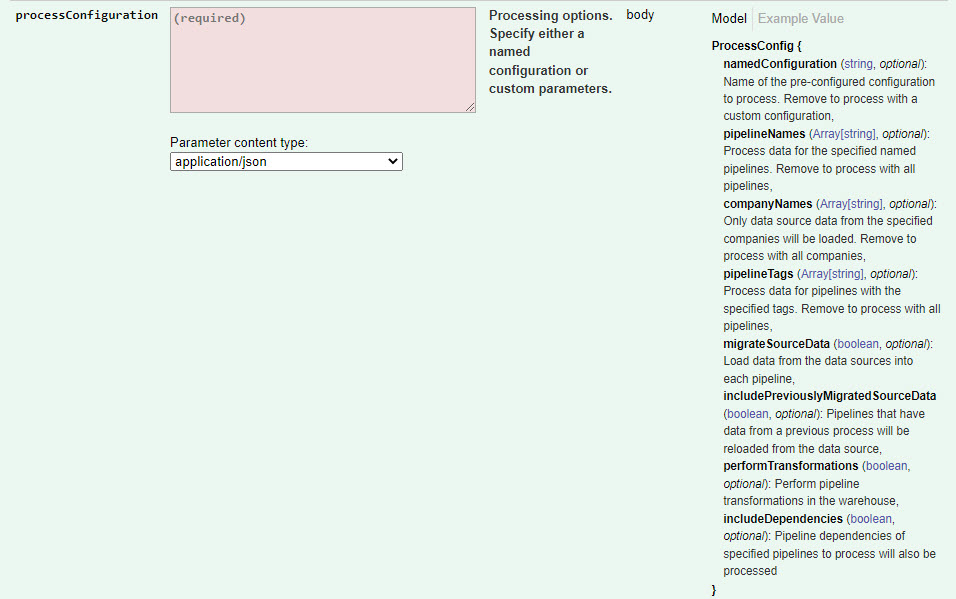
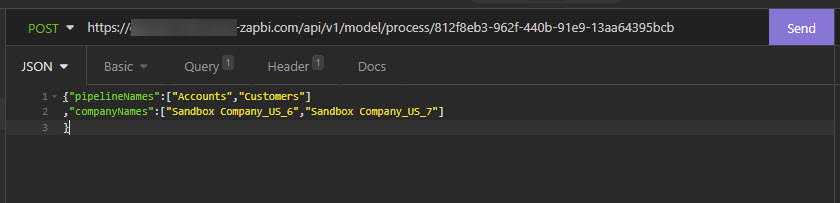
Parameters should be specified in JSON format
Important
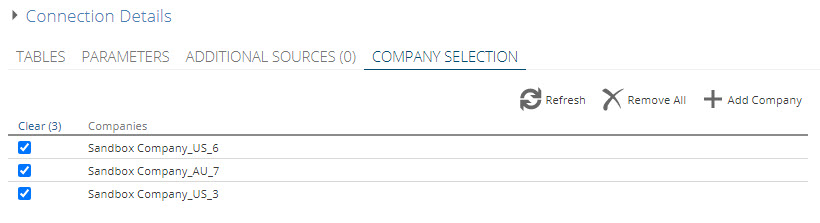
When using the companyNames parameter, copy the company names from the data source screen - company tab to have the correct resource name
Note
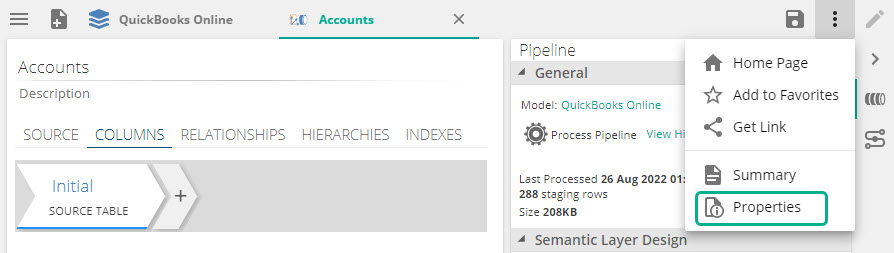
pipelineTags are found on the pipeline grid of the model screen in the Tags column.
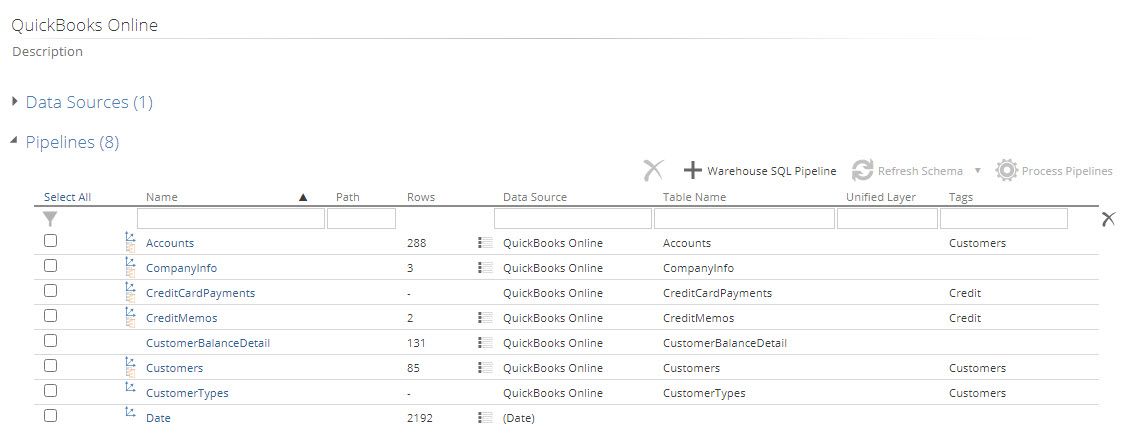
To add tags, go to pipeline properties.
Response Content Type should be application/json
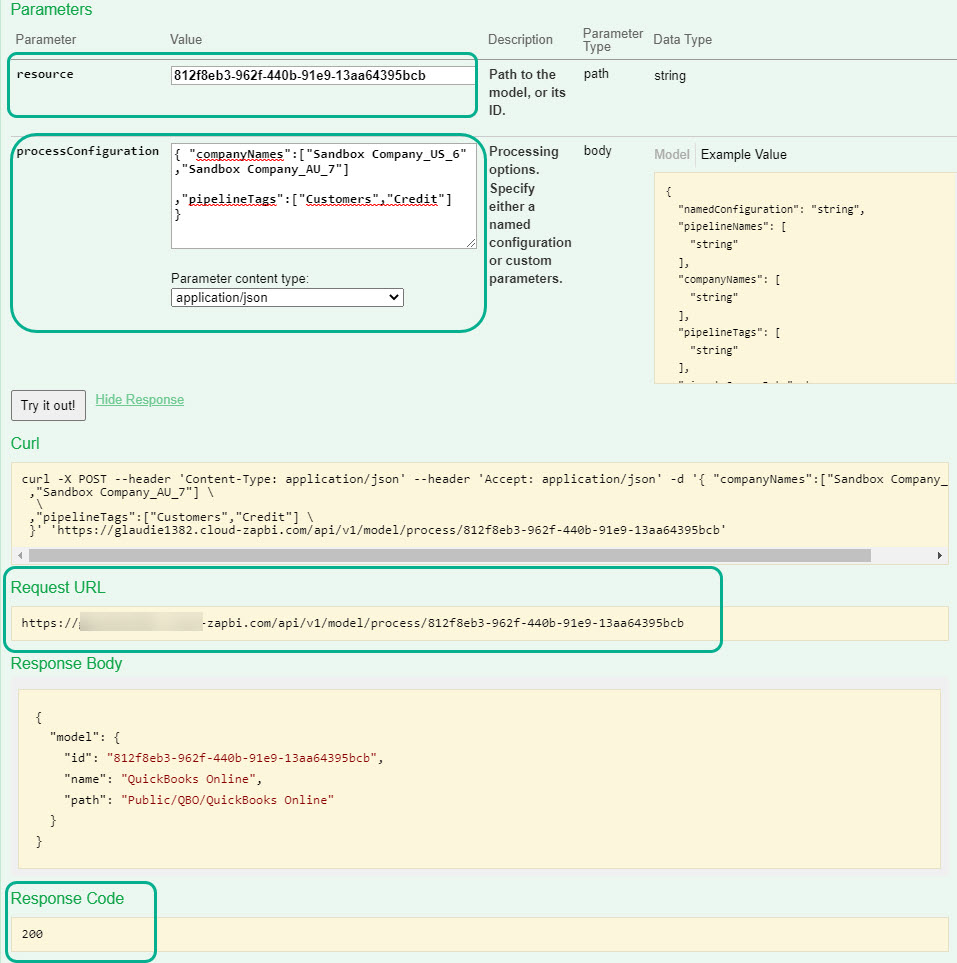
Click Try it Out. This will return a Request URL, a Response Body and a Response Code
Note
Response Code 200 is a successful request. This means the HTTP method worked and your model should be processing with the parameters specified. Refer to trouble shooting for further info on Response Codes.
Call the API
Copy your request URL and JSON parameters, and set the authentication in any API tool like Postman or Insomnia to run the request.
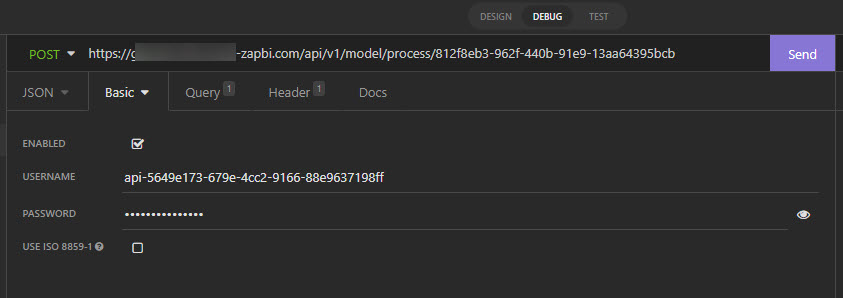
Request method: POST. Copy the Request URL from the API testing page inside Data Hub.

Authentication type: Basic. Provide the API username and password from Data Hub for the authentication.
Copy the parameters setup in the API testing page in Data Hub into the Body, selecting the body type to be JSON
Click Send to call the API. A response code of 200 is expected when the request succeeded, and model processing should start or be queued shortly.

Troubleshooting
The model process API uses a POST request only, so receiving feedback is minimal. As described below, 200 means successful, but any other codes should be investigated. Server unreachable, incorrect credentials or Endpoint URI's could be common reasons for a request not coming back with a 200 response code.
Recommendation: When using this for the first time its worth testing in Data Hub and verify that your model starts processing to ensure you created the endpoint and credentials correctly.
Note
Search the web for HTTP response codes to understand the response messages. e.g. Mozilla HTTP response codes
Example:
HTTP 200 OK success status response code indicates that the request has succeeded. A 200 response is cacheable by default.
HTTP 202 Accepted response status code indicates that the request has been accepted for processing, but the processing has not been completed; 202 is non-committal, meaning that there is no way for the HTTP method to later send an asynchronous response indicating the outcome of processing the request
HTTP 404 Not found response status code indicates that the server cannot find the requested resource. This could be due to any part of the URI being incorrect or misspelt, or if the Model resource is in a personal folder.