REST API
REST introduction
The Data Hub REST connector is a generic connector that provides the ability to connect to many 3rd party REST APIs. Unlike other data source connectors that provide a pre-defined list of tables or endpoints, or an Odata API that enumerates all available endpoints, this connector does not enumerate endpoints.
In order to extract and retrieve data from any such API, a json collection of endpoints needs to be defined and uploaded into the Data Hub REST connector.
Such a collection can be defined in any API development application, but ZAP recommends using Postman, for its ease of use and graphical interface. Each API provider has its own custom schema and provides documentation to enable users to understand it and build endpoints that can retrieve data from it.
Configure the REST connector
On the Select Source screen, click REST , then CONNECT.
Complete the details on the Connect Screen. If there is no authentication used, click Test Connection. If OAuth2 authentication is required, continue to Configure Authentication
Note
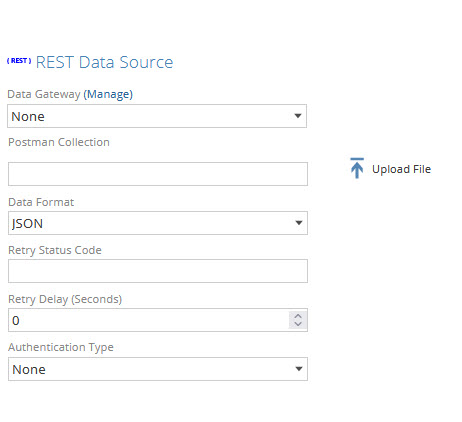
The REST Data source UI includes several fields:
Data Gateway: optional and should not be required for this data source.
Postman Collection: expects a JSON file created in an API-development tool like Postman. Read more about creating collections
Data Format: specifies what output the REST API returns, which can be XML, JSON or CSV.
Retry Status code: Retry-After policy
Retry Delay (seconds): Retry-After policy
Authentication Type: more information about Configure Authentication
Configure Authentication
In order to ensure that client requests access data securely, Authentication needs to be specified. There are several authorization models available. When using a third party API, the required authentication will be specified in the API provider documentation.
Authentication types supported in Data Hub:
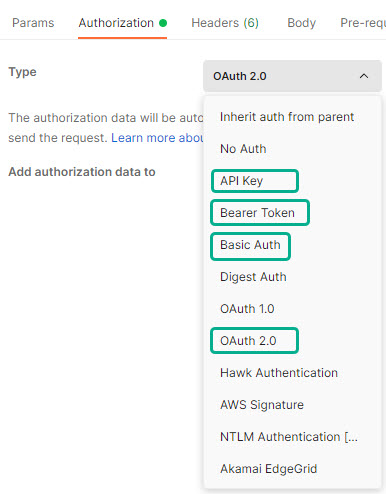
None: For this type, Data Hub delegates all authentication to Postman. Postman can send all authentication details along with any requests. Authorization data can be included in the header, body, or as parameters to a request. You enter your authorization details in the Authorization tab, then Postman automatically populates the relevant parts of the request for your chosen authorization type. More details can be found on this postman link.

Of the available authorization types, Data Hub supports only four: API Key, Basic Auth, Bearer Token and OAuth2.0. For OAuth2.0, we support Auth inheritance
Interactive Login: is authorization code grant OAuth. The authorization code is a temporary code that the client will exchange for an access token.
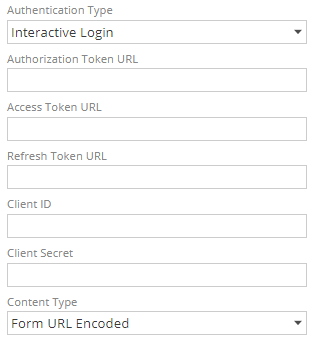
Authorization Token URL: the URL used to sign in to the OAuth provider and grant access to the application.
If ‘redirect_ui’, ‘response_type’, client_id’ or ‘state’ query parameters are specified, they will be replaced by the values of the below field. Any other query parameters are allowed (e.g. scope).
Access Token URL: The URL used to request the access token.
Refresh Token URL: The URL used to refresh the access token.
The Refresh Token URL is usually the same as the Access Token URL.
Client ID: The Client ID provided by the OAuth application.
Client Secret: The Client Secret provided by the OAuth application.
Content Type: The body content type used when requesting OAuth token:
Form URL Encoded: default value that should work for most OAuth applications.
JSON: use JSON to force the request to use JSON format.
Once signed in, the OAuth access token is used to replace any Postman variables in the collection labelled ZAPAccessToken. For example, an Authorization header could be used with the value: Bearer {{ZAPAccessToken}}.
Service credentials: is password grant OAuth The user’s credentials are exchanged for an access token.
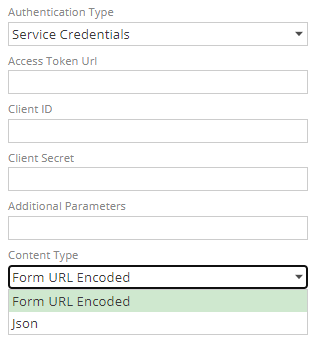
Access Token URL: The URL used to request the access token.
Client ID: The Client ID provided by the OAuth application.
Client Secret: The Client Secret provided by the OAuth application.
Additional Parameters: Optional additional parameters required by some API's e.g. scope or resource.
Content Type: The body content type used when requesting OAuth token:
Form URL Encoded: default value that should work for most OAuth applications.
JSON: use JSON to force the request to use JSON format.
Once signed in, the OAuth access token is used to replace any Postman variables in the collection labelled ZAPAccessToken. For example, an Authorization header could be used with the value: Bearer {{ZAPAccessToken}}.
Password: authentication is basic authentication. More details here.
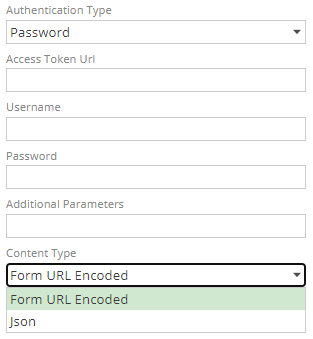
Access Token Url: The URL user to request the access token.
Username/Password: User credentials
Additional parameters: Optional additional parameters required by some API's e.g. scope or resource.
Building and using Postman collections
Endpoints / Requests are HTTP "queries" similar to writing a query to retrieve data from a database. Requests will have a base URL which is the API site, usually an object name for the entity you are querying and lastly you can add parameters. Parameters allowed for each API is defined in their documentation. ZAP has defined a set of their own parameters which is called variables that can be used to further filter and manipulate the requests. Read more about custom ZAP variables.
Collection and Request examples are available in this ZAP Postman workspace.
For example:
Database query: "Select * from Employees where active='true' "
HTTP request: "https//Site/api/Employees?show_active=true"
Creating a collection and a basic endpoint request.
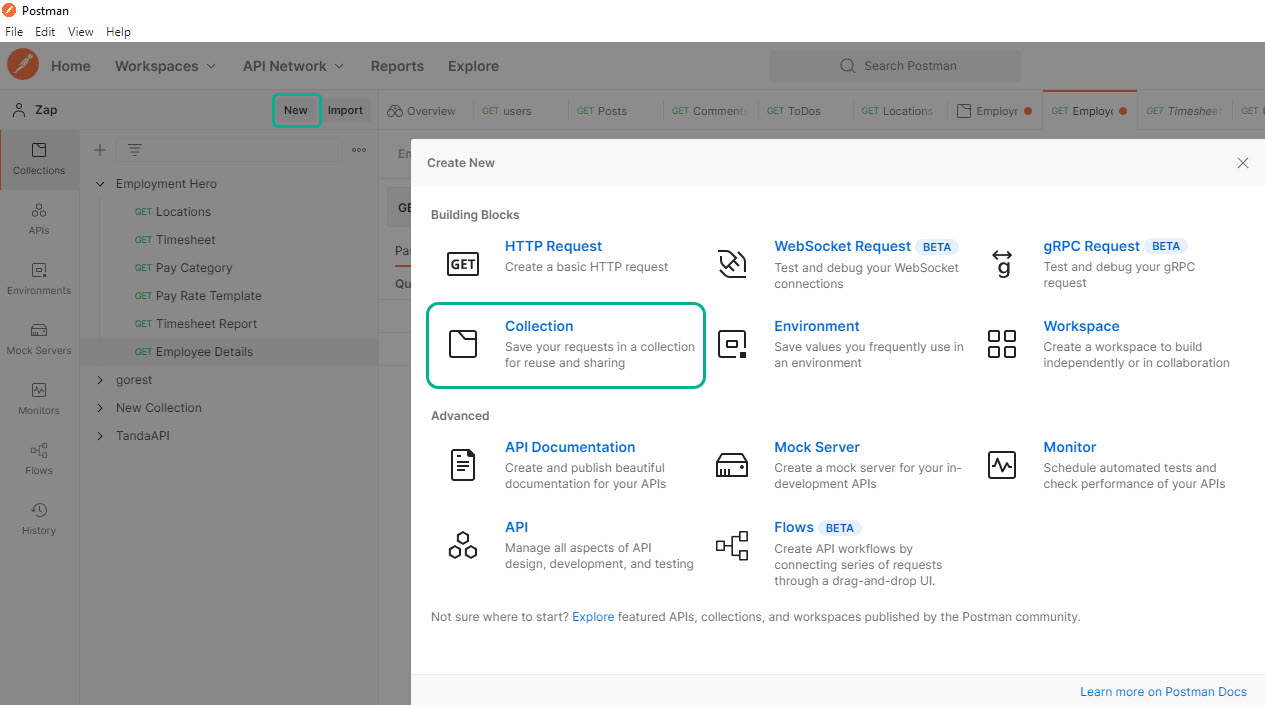
In postman, once you have a workspace, create a new collection.
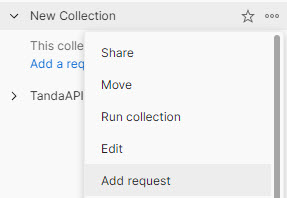
Right click the new collection to add a new request.
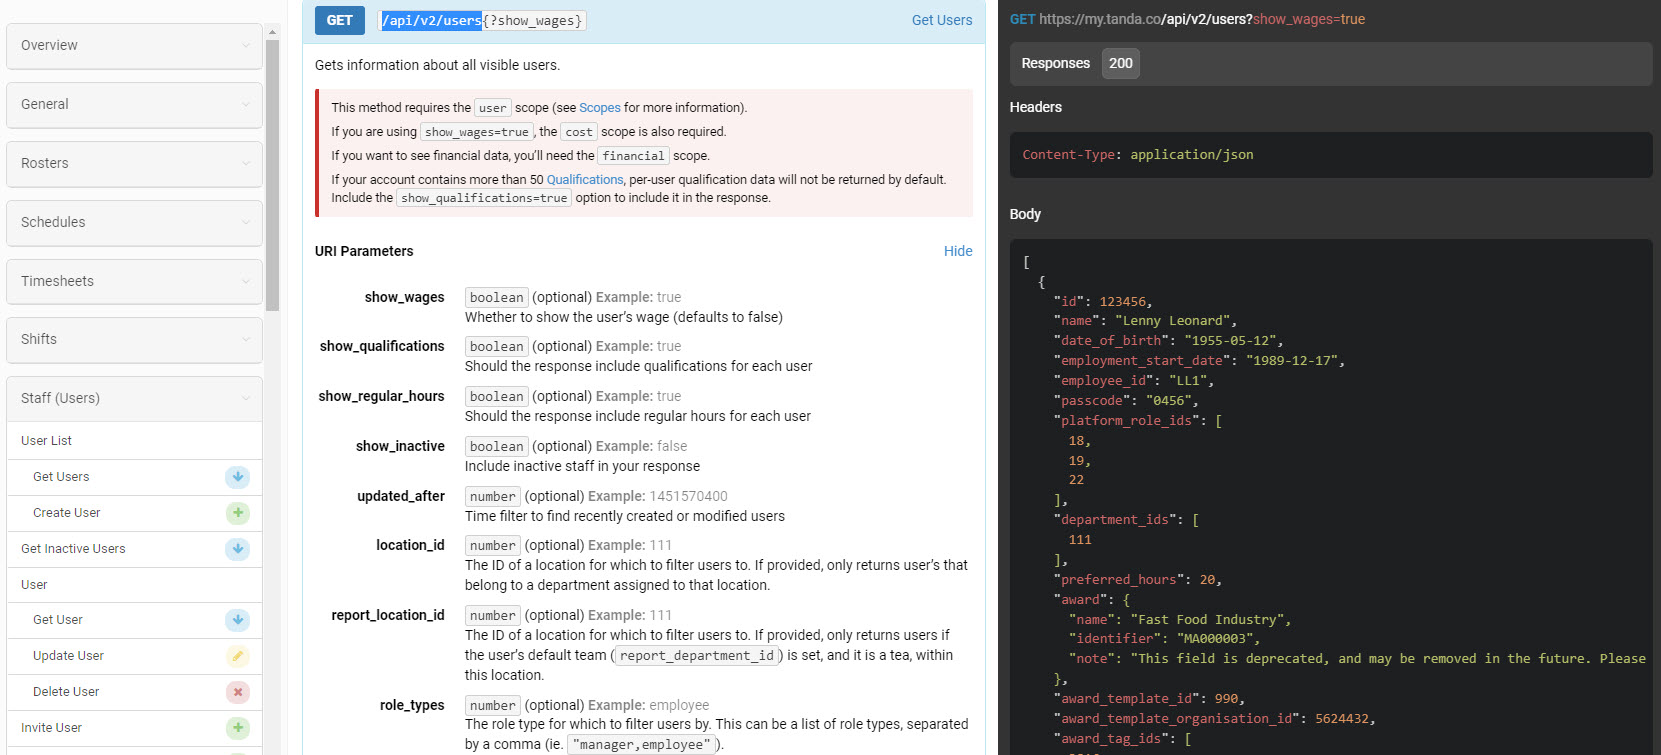
On the new request build the endpoint , using your API documentation for direction. All allowed endpoints and parameters will be provided by your API.
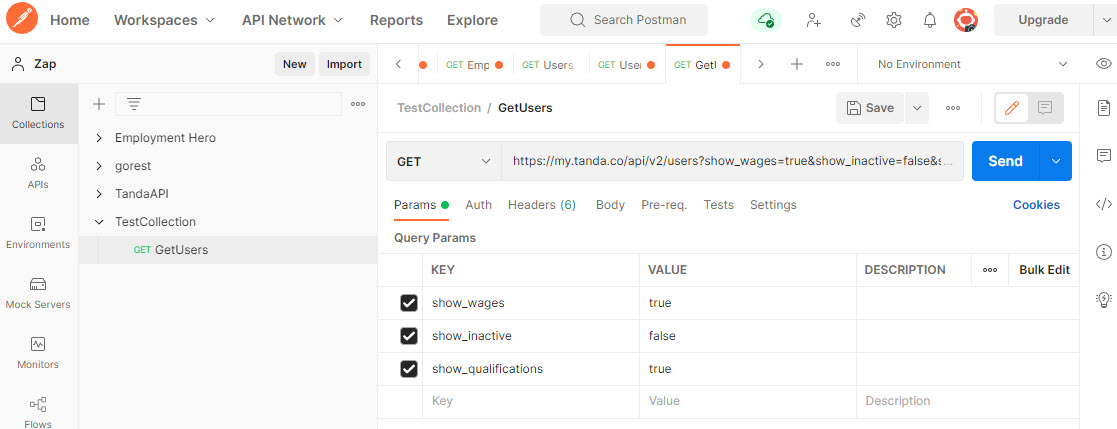
My sample API - documentation
My sample API - endpoint
Note
A basic simple endpoint will consist of 3 parts:

The API platform address: Your API documentation will provide the base endpoint that will always be part of the first section of each endpoint.

The object you want to query: For example a Users object. Syntax could very slightly here, based on each different API used.

Parameters: For example Users wages and qualifications. Parameters are defined and documented by the API you are using.
Example 1:
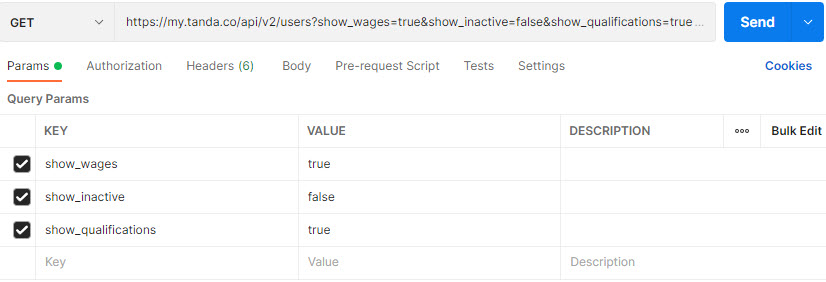
Example 2:
For more information on creating Postman Collections, go to Creating collections
Export a collection
Once your collection is ready, you can export it. Use this file to import into the REST connector in Data Hub

To read more about exporting a Postman collection, go to Export collections
ZAP Variables
ZAP variables are variables that can be interpreted by Data Hub, and turned into http requests which provide additional functionality that may not be possible by simply generating json collections in a tool like Postman. Defined ZAP variables like {{page}} and {{link}} are specified in Postman. They are then interpreted and executed alongside the other endpoints when the entire json collection is uploaded into Data Hub.
Pagination
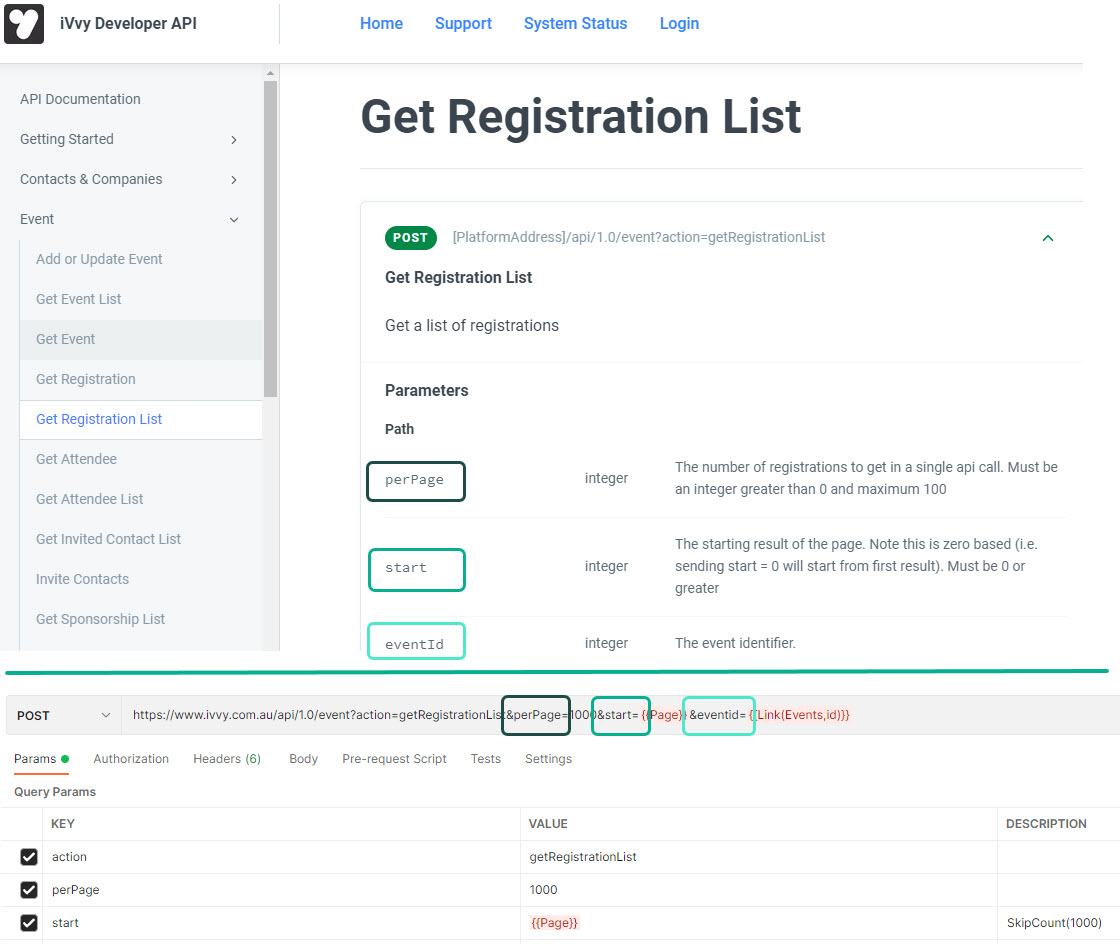
Some endpoints that return many rows such as transactional endpoints may only return data in pages, and limit the number of rows to a specific number per page. The API documentation will explain how pagination is supported and should be used when designing the Request. There are different ways that APIs can paginate data, and ZAP supports the below three types:
{{SkipCount(PageSize)}} - (PageSize) is the expected maximum page size (in records). Variable values are a fixed sequence, based off the variable, that stops when a page with row count less than PageSize is returned.
In the above example, API defined variables perPage and Start are specified and the ZAP variable {{page}} with value Skipcount(n) is used to provide a dynamic value that will be interpreted by Data Hub. Data hub will iterate through the source records and retrieve all records in increments of 1000 until all records have been returned.
If a source has 3700 records, the variable will increment as follows: 0, 1001, 2001, 3001
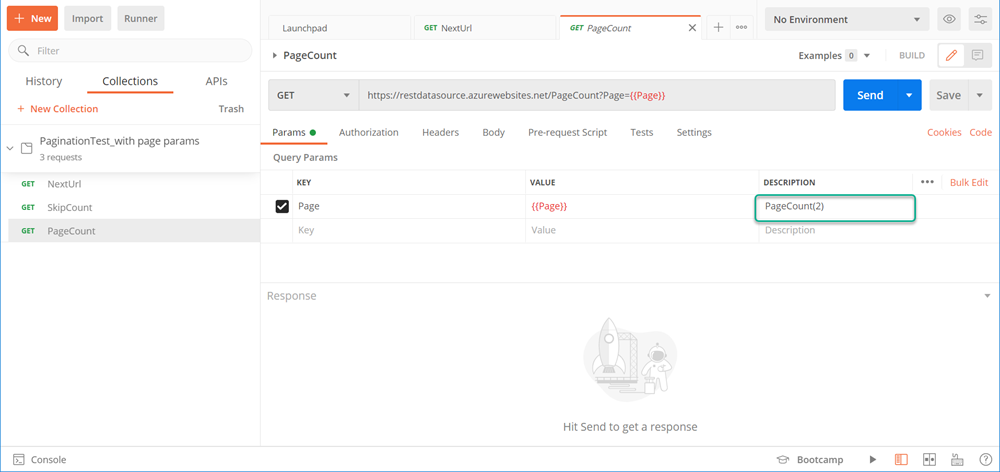
{{PageCount(PageSize)}} - page count will increment by 1 until a page with row count less than maximum page size is returned.
If a source has 3700 records, and the specified variable is set to PageCount(1000), the variable value will be 1,2,3,4. Page 4 will only return 700 records.
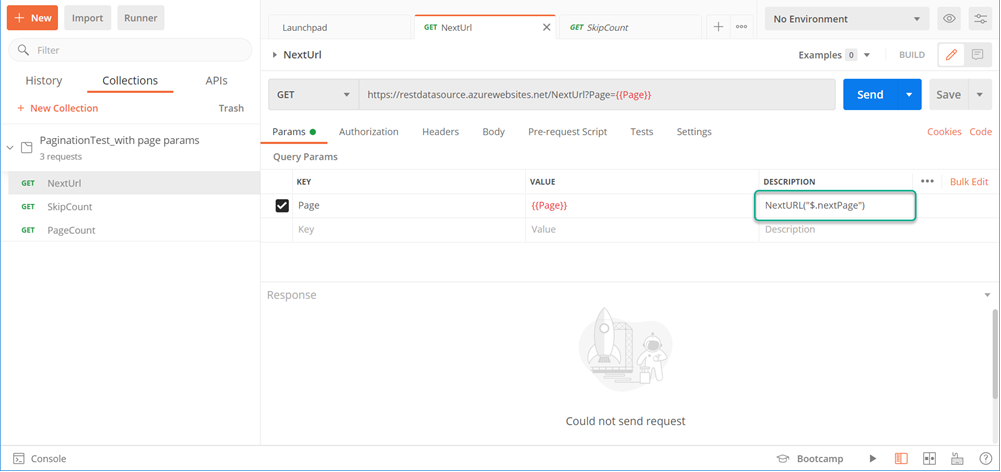
{{NextURL(JSONPath)}} - is used when the endpoint returns the full address for the next page and needs a path to the next URL. JSONPath is the path to the next URL
Link
The link variable makes it possible to create a composite request, i.e. a request that requires data provided by another request of the collection.
Syntax:
{{Link(OtherEndpointName, ColumnName)}}
OtherEndpointName is the name of another endpoint in the Postman collection.
ColumnName is the name of the column from OtherEndpointName that provides the values required by the calling Request.
Example
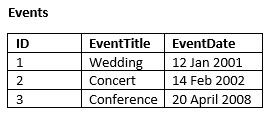
In this example, we have an events table. We will define two requests, one will return all the events, we will call it Events. The second request will call the first request to return event registrations which we will call EventRegistrations .
The first request may return 20 events, including an ID for each event. Using the the {{Link}} variable is required in order to run as many API requests (20 in this example) to the endpoints as there are events rows in the Events endpoint. Iteration is required because Event Registrations requires specifying one eventid.
NOTE: You can link to an endpoint that has its own link. Cyclic links should return an error.
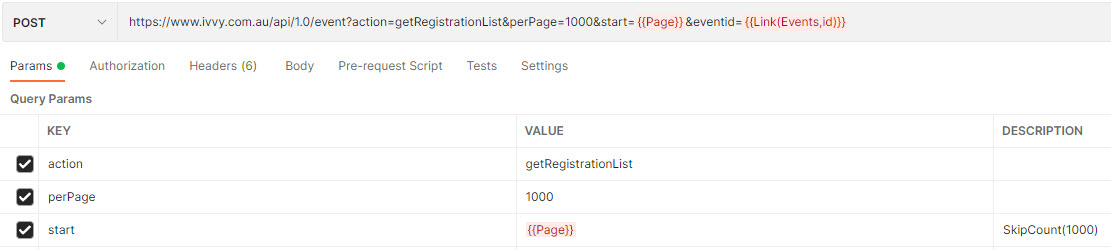
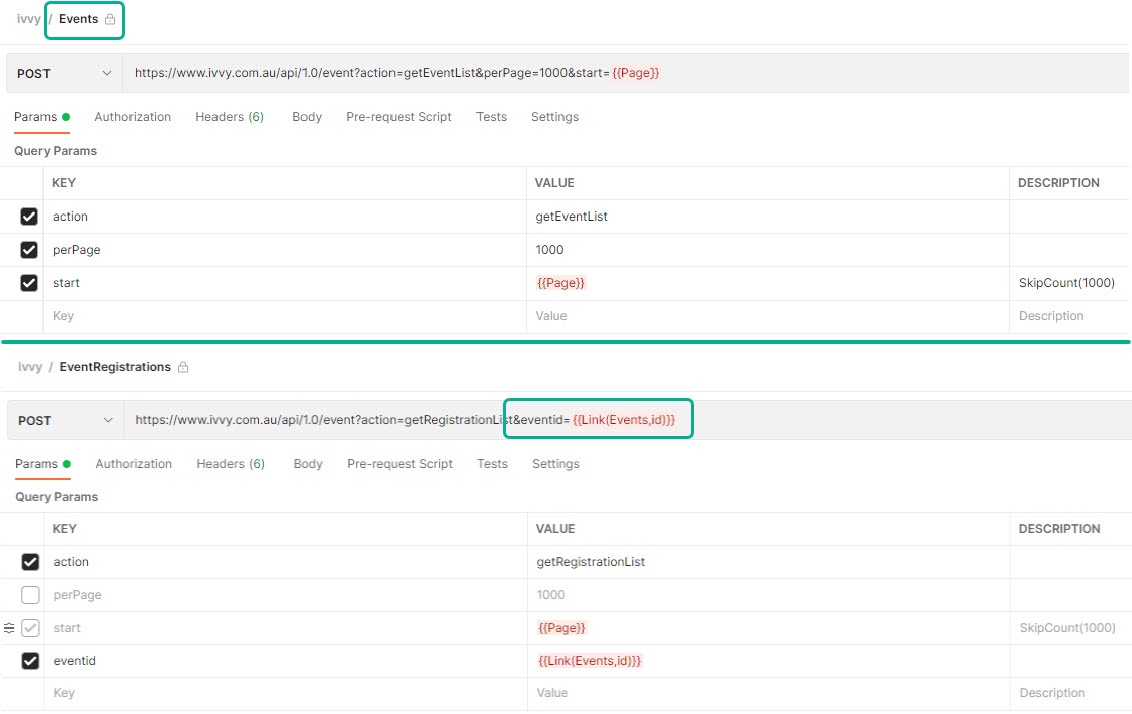
First Endpoint: https://www.ivvy.com.au/api/1.0/event?action=getEventList saved as Events. This will become the linked endpoint.
Link Endpoint: https://www.ivvy.com.au/api/1.0/event?action=getRegistrationList&eventid={{Link(Events,id)}}. This endpoint will be interpreted and the following endpoints will be run by Data Hub.
https://www.ivvy.com.au/api/1.0/event?action=getRegistrationList&eventid=1
https://www.ivvy.com.au/api/1.0/event?action=getRegistrationList&eventid=2
https://www.ivvy.com.au/api/1.0/event?action=getRegistrationList&eventid=3
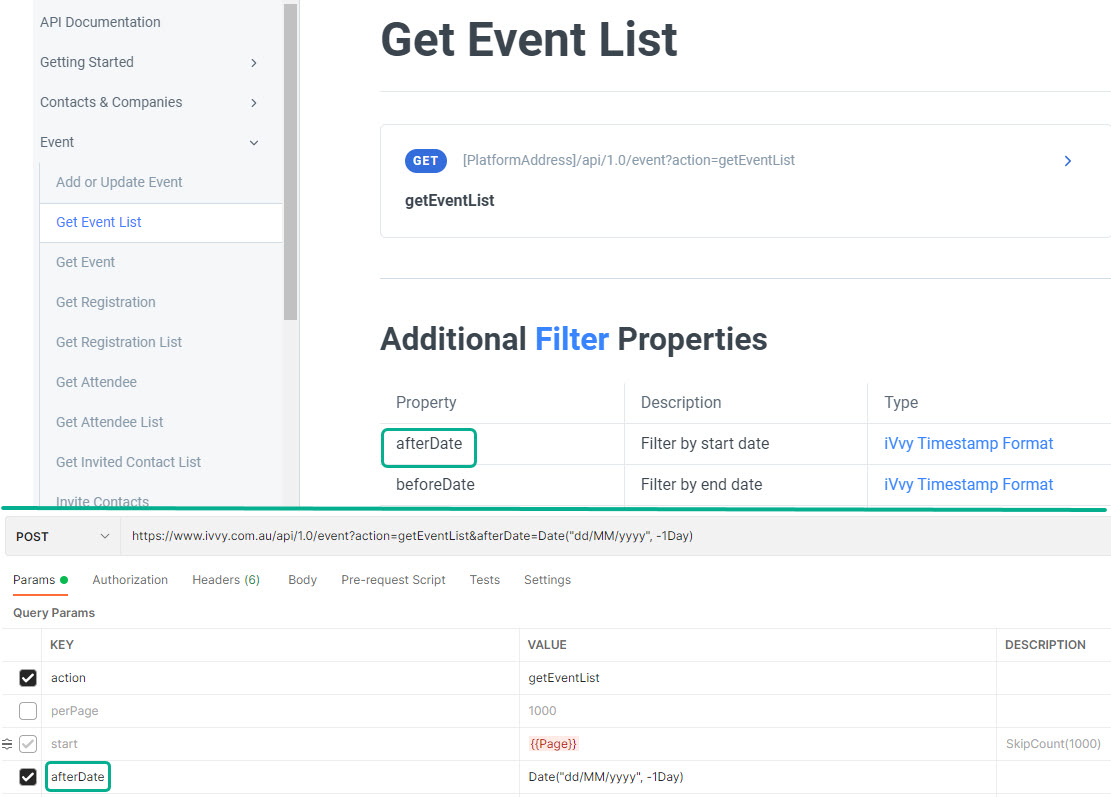
Date
Date allows you to filter by an offset of the current date. This can be useful to filter some APIs. A dynamic date is sometimes useful if not mandatory for API endpoints that require specifying a date, or to extract a smaller subset of rows as the REST connector does not support incremental loading yet.
Syntax:
{{Date(“FormatString”, Offset(s))}}
FormatString: Output Date format
Offset: Day or Hour can be used in the future (+) or past (-).
Description | Value | Variable |
One day in the past | -1Day | Date("dd/MM/yyyy",-1Day) |
One hour in the past | -1Hour | Date("dd/MM/yyyy HH ", -1Hour) |
One hour from now | +1Hour | Date("dd/MM/yyyy HH ", +1Hour) |
Combined offsets | 22 hours from now | Date("dd/MM/yyyy HH:mm:ss", -2Hours, +1Day) |
Retry-After policy
The Retry-After response HTTP header, provided by the API, indicates how long Data Hub should wait before making a follow-up request. Data Hub will retry on the following cases where this header is used:
When sent with a 503 (Service Unavailable) response, this indicates how long the service is expected to be unavailable.
When sent with a 429 (Too Many Requests) response, this indicates how long to wait before making a new request.
Tip

Data Hub has a built-in retry policy; however, you can now manually set an additional policy using one of the multiple status codes, which may be specific to the API, in combination with a fixed retry delay to circumvent this issue.
How to
When creating a new model from a REST data source, if you receive an error on the Select Data step, return to the Connect step and complete the following:
Enter the status error code into the Retry Status Code text box.
Enter a digit into the Retry Delay (seconds) text box.
Return to Select Data, and the table will not show the previous error.