Manage resources
Create a folder
You can add a new folder to any existing folder in the Resource Explorer.
Open the Resource Explorer.
Locate the folder you want to create the new folder in and either:
Click the ellipsis and select New Folder, or,
Right-click on the folder and select New Folder.
Type the name for the new folder, and click OK.
The new folder appears as a sub-folder within the folder selected in step 1.
Save, close and delete
Save and close
It is important to save changes to any resources in your Resource Explorer when finished editing.
When you have finished editing a resource, either:
Click Save, or,
Click the ellipsis and click Save As and enter relevant details to save a copy of the resource under another name.
Once saved, close the resource with either of the following actions:
Click x to close the current tab.
Right-click on the current tab and select Close.
Note
The second option also allows you to Close All or Close Other tabs.
Delete a resource
You can remove a resource from a folder or a whole folder from the Resource Explorer.
Open the Resource Explorer.
Locate the resource you want to delete and either:
Click the ellipsis and select Delete, or,
Right-click on the resource and select Delete.
Click DELETE.
Rename and change descriptions
Open Resource Explorer.
Click the ellipsis beside the resource you want to rename.
Click Rename.
Enter a new name in the Name field.
Click OK.
Options:
Add a description for the resource, or edit the existing description, using the Description text box.
Edit or add custom notes to the resource using the Design Notes text box.
Important
These notes allow resource creators to describe how a resource has been designed, especially if the design is not intuitive or if multiple designers will be working on a resource.
Cut, Copy, Paste
You can use the Cut, Copy and Paste functions to move or duplicate resources in the Resource Explorer.
Cut or Copy
Open Resource Explorer.
Click the ellipsis and select either Cut or Copy. or,
Select the resource and use hotkeys Ctrl + C (copy) or Ctrl + X (cut).
Note
To select multiple resources to cut or copy, hold Shift or Ctrl.
Paste
Select the destination folder for the resource.
Click the ellipsis beside the destination folder and click Paste or,
Click Ctrl + V.
Click Save.
Important
When a data source is moved in the Resource Explorer via a cut-and-paste operation, the data source's user name and password information is retained and will still appear in the data source. This behavior allows for easier administration if a data source resource needs to be moved into a new folder structure.
However, if the data source is copy-and-pasted or imported and/or exported, the user name and password information are removed, preventing unauthorized users from taking a functional copy of a data source for their use.
Search by name or resource type
Search for items in Resource Explorer using the Search box that appears at the top of each area.
Type the name of the resource or resource type you are searching for in the Search box.
The search function will begin automatically.
Tip
Searches are not case-sensitive.
To search for an exact term, enclose the term in double-quotes such as "Sales report."
When searching for partial resource names, do not enclose any terms in quotes. For example, the resource YTD Sales Report will not be shown if searching for "Sales Report."
Select a node (such as a Folder, Model, Dimension, or Measure Group) before entering a search term to search only within the selected node.
To clear the search box, click the x at the search box's end.
Import and export resources
A folder's import and export functions can easily share created reports, images, and resources. Any number of resources can be exported as a .zap file, which can then be imported into another Data Hub implementation.
Licensed solution packages can also be exported or imported. Solution packages contain proprietary resources licensed through your Data Hub account manager or partner.
Import
Important
Prerequisites
Any resource package file to be imported must be created in Data Hub and have the .zap extension (WML format). A .zap file is created using the Export Wizard.
To import a licensed package (for example, a ZAP solution), the server must have the required license.
Open the Resource Explorer.
Locate the folder you want to import the resource to and either:
Click the ellipsis and select Import, or,
Right-click the folder and select Import.
Select the .zap file that you want to import and click Open.
Export
Important
Prerequisites
For basic resources, the user must have the resource permission "Distribute. "
For solution packages, the user must have the organization permission "License Solution. "
Open Resource Explorer.
Locate the folder you want to export and either: Locate the folder you want to export and either:
Click the ellipsis and select Export, or,
Right-click the folder and select Export.
Select whether to Include supporting resources , then click DOWNLOAD.
View resource properties
Each folder contains properties that can be viewed, including general information (such as resource name and creation/modification information), currently defined module tags, related resources (both dependent and supporting), and user access settings.
Open Resource Explorer.
Locate the resource you want to view the summary for and either:
Click the ellipsis and select Summary, or,
Right-click the resource and select Summary.
In most cases, the following information is displayed in the summary:
Name and location of the resource.
A Compare placeholder for dragging and dropping a different resource for comparison purposes (as described Comparing Resources).
Various resource details. These vary between resource types and may include the following:
Cube connection information.
Any defined module tags as described in Using Modules.
Placeholder specifications (slicers, columns, rows, etc.).
(Data models only) Model-specific details (data sources, pipelines, etc.).
(Solution resources only) The contents of the solution's development folder.
Compare resources
You can compare resources to see the differences between two specific resources easily. This can be useful in the following scenarios (when you need to compare two versions of a resource):
Staging to production. Comparing a development version to an existing production version.
Team working on the model. Comparing the current version to a published version.
Two methods can be used to compare resources:
Summary tab method.
Resource Explorer method.
Summary tab method
You can compare two resources, even one created in a different Data Hub instance, by first opening one resource's Summary tab and then dragging and dropping another resource or uploading a .zap file into the tab's Compare placeholder.
Open the Resource Explorer and open the Summary for the first resource you want to compare.
Perform one of the following actions:
Open Resource Explorer and drag a second resource to the Compare placeholder.
Click Select File, select the .zap file you wish to compare and click Open.
When you are finished viewing the comparison information, close the tab.
Resource Explorer method
You can compare two resources by selecting them in the Resource Explorer and then selecting Compare from the right-click menu. When you use this method, neither of the resources actually has to be open, and the Summary view doesn't have to be accessed.
This method can be used with all resource types, both solutions, and non-solutions.
Open the Resource Explorer.
Select the first resource by clicking once.
Hold Ctrl and click to select the second resource.
Right-click one of the selected resources and select Compare.
When you are finished viewing the comparison information, close the tab.
View the resource comparison
Once you run the comparison, the results are displayed on a separate tab, as shown below:
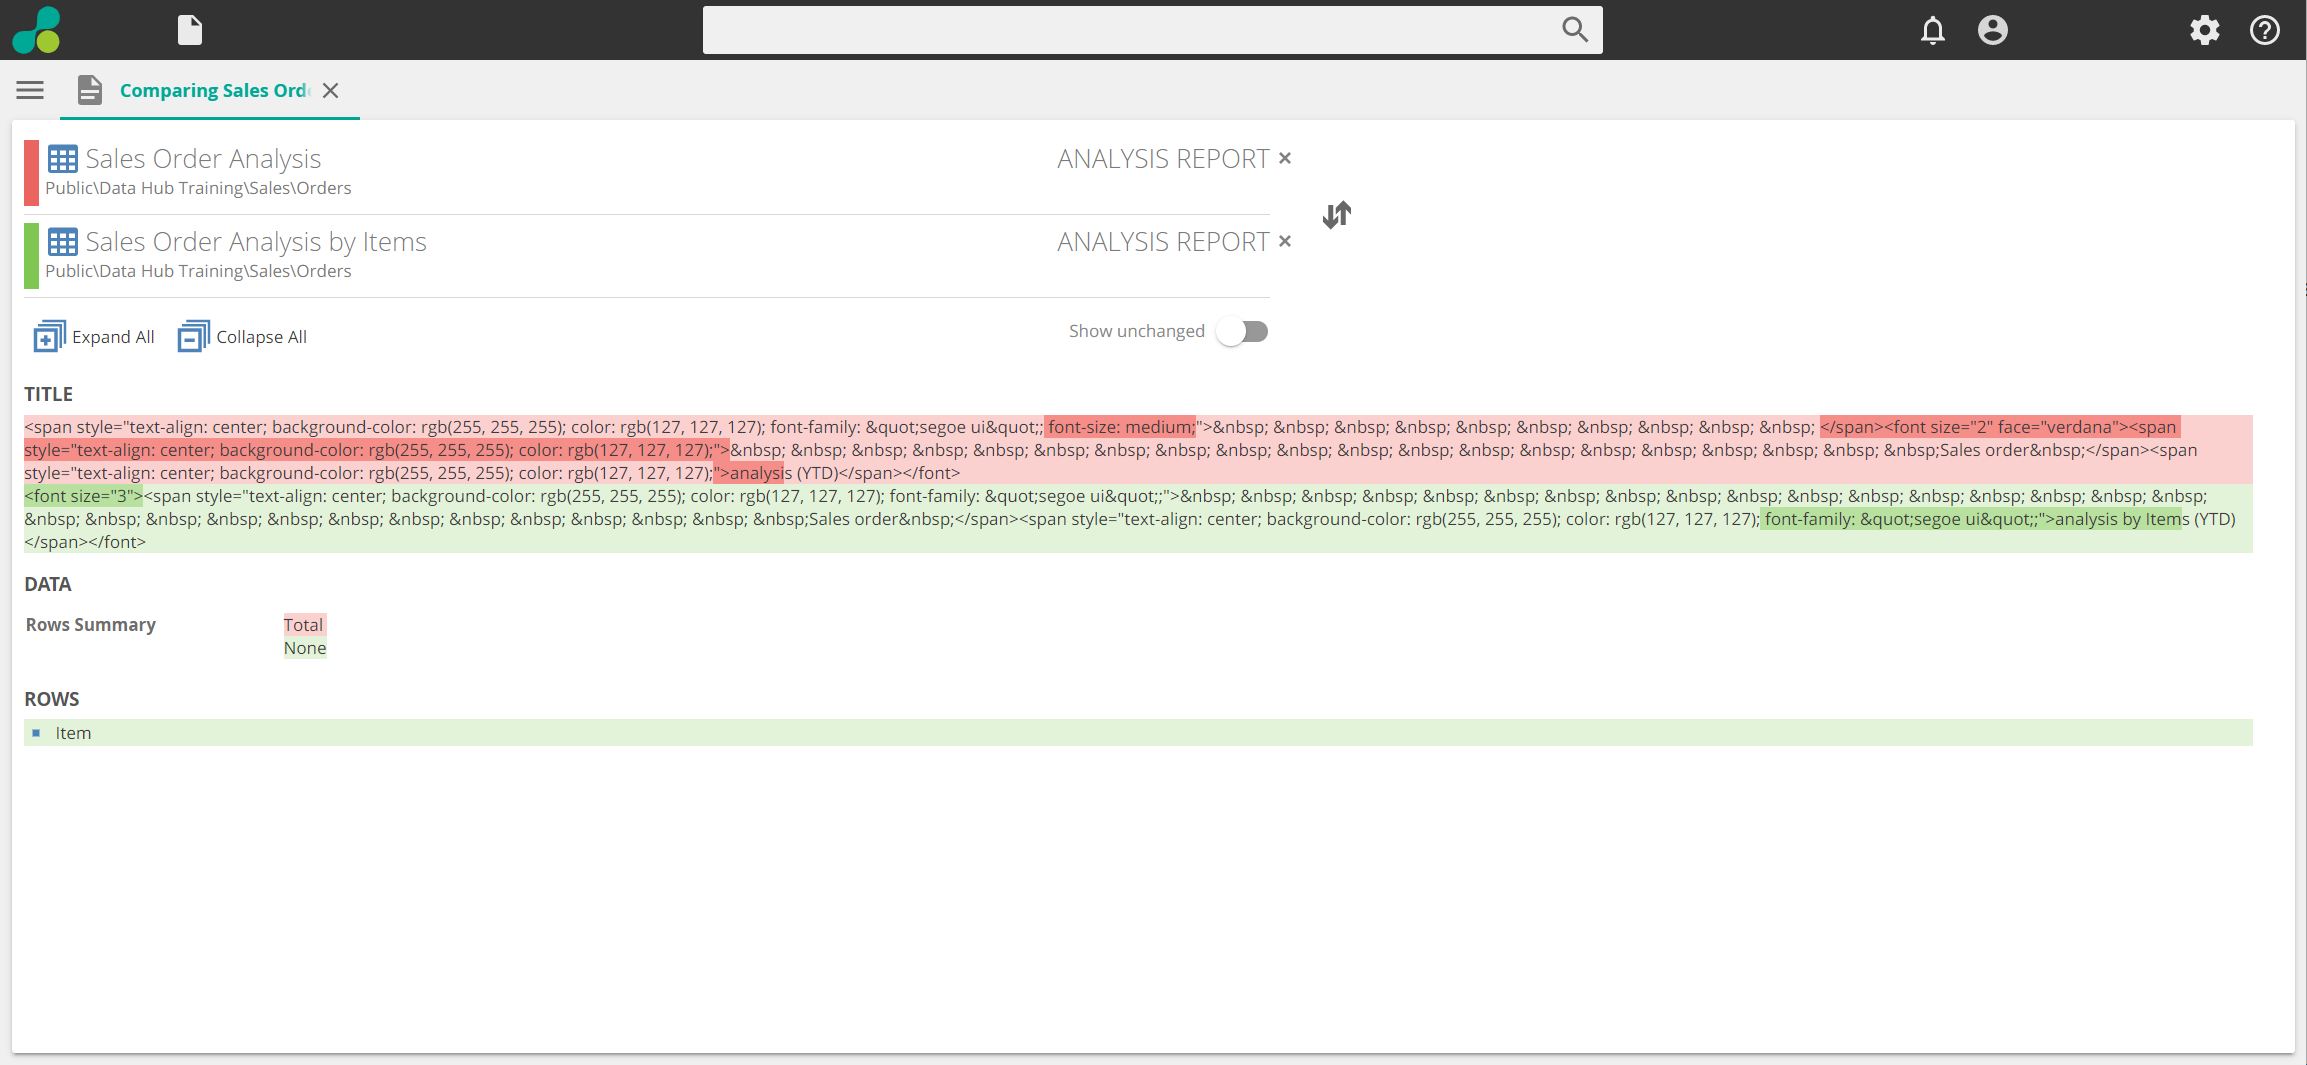 |
Although the displayed results will differ, based on the type of resources compared to the following general information and options are available:
At the top of the tab, the compared resources, their resource type, and location are listed in your folder structure.
Immediately below this list of resources are the differences found between the two. The displayed information, and the overall amount of information, will vary between comparisons, as it is based on the types of resources selected and the number of differences found.
View all unchanged model items by clicking the Hide unchanged button on the HOME ribbon. By default, only items that are different (changed) are shown.
Switch the resources' position using the arrow buttons to the right of the resource list.
Some entries in the list of details can be expanded for model resources by clicking the corresponding arrow icon to display additional information, as shown below using a Date pipeline.
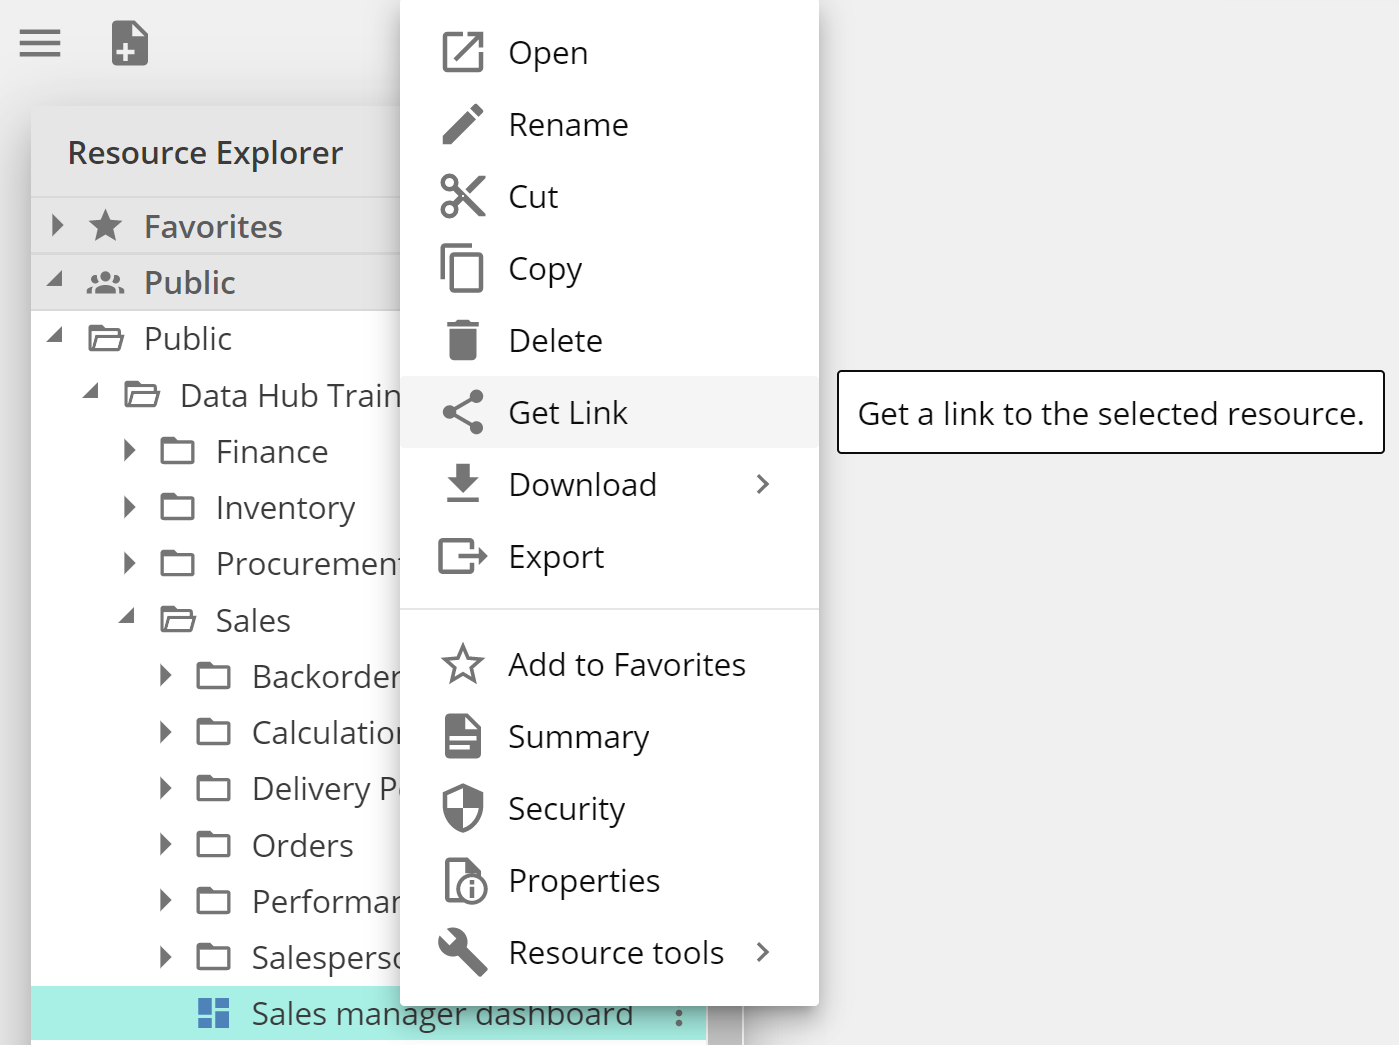
Get Resource Links
The Get Link feature is used to copy resource links for distribution or embedding in other applications.
In the Resource Explorer, right click any resource and click on Get Link.
 |
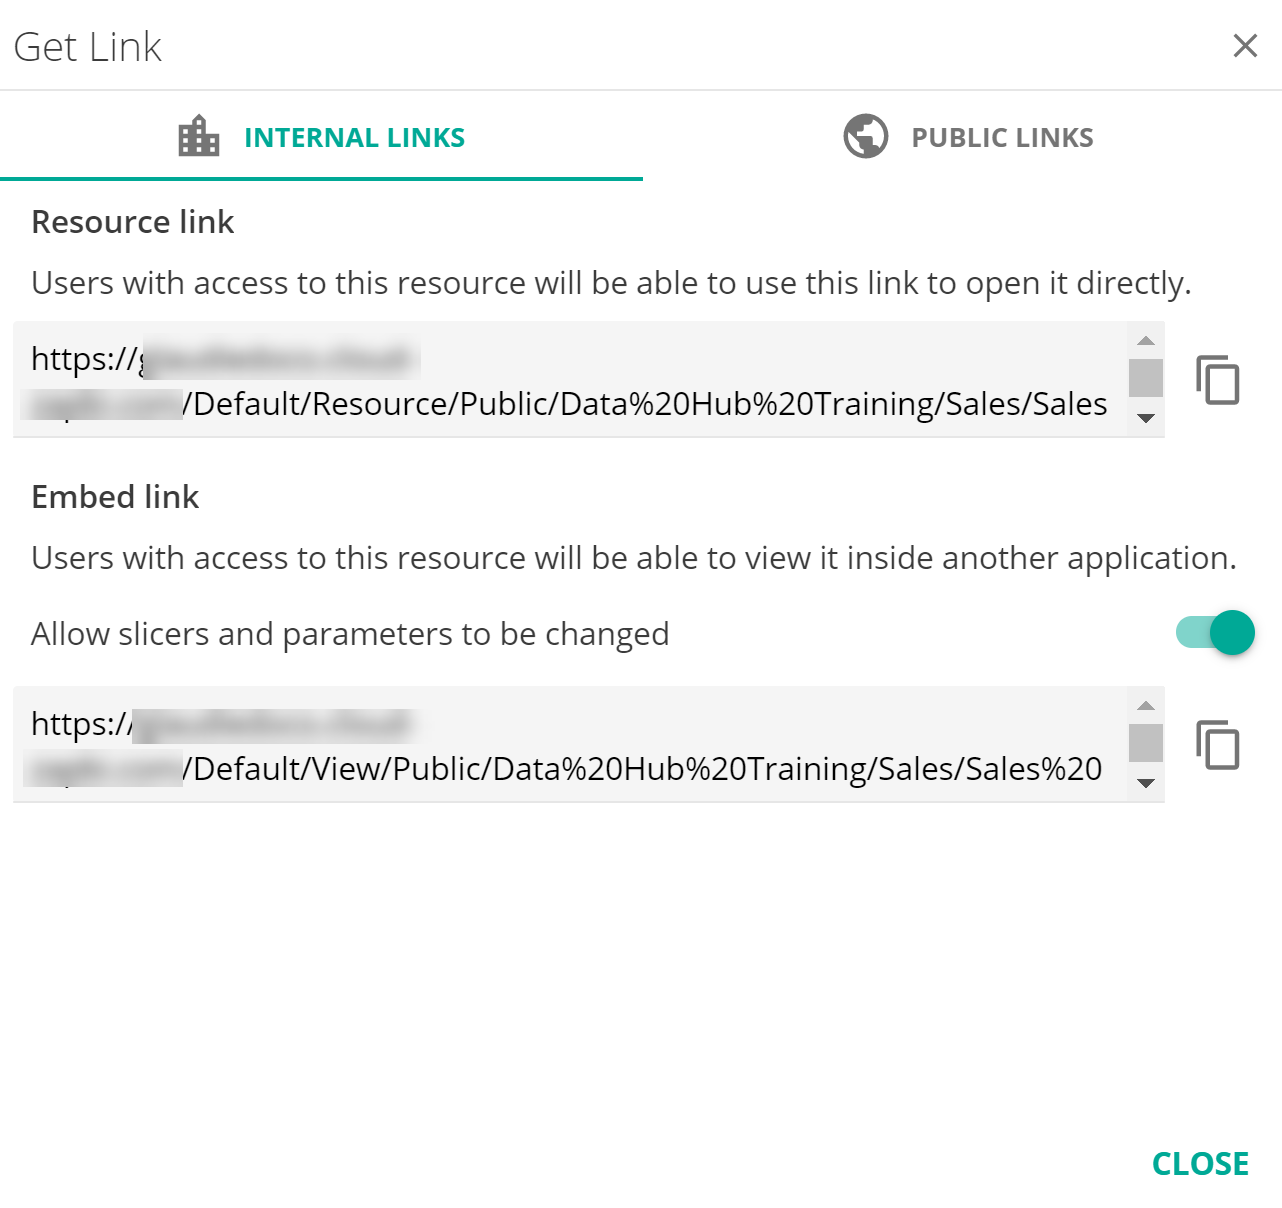
Internal links
Internal Links include Resource Links and Embed Links. Resource Links open resources in the main Design portal of Data Hub and Embed Links open resources in View mode in the View portal.
 |
Note
To be able to view a resource using those links, a user must at least be a Consumer user of Data Hub, and have access to the resource and also the Model it is based on.
You can still control whether slicers are visible in the Embed Link by turning the Allow slicers and parameters to be changed toggle slider ON.
Embed link is disabled if a resource type doesn't support embedding, for example: a Model resource, or the Allow embedding in other web pages application setting is disabled (on-premises).
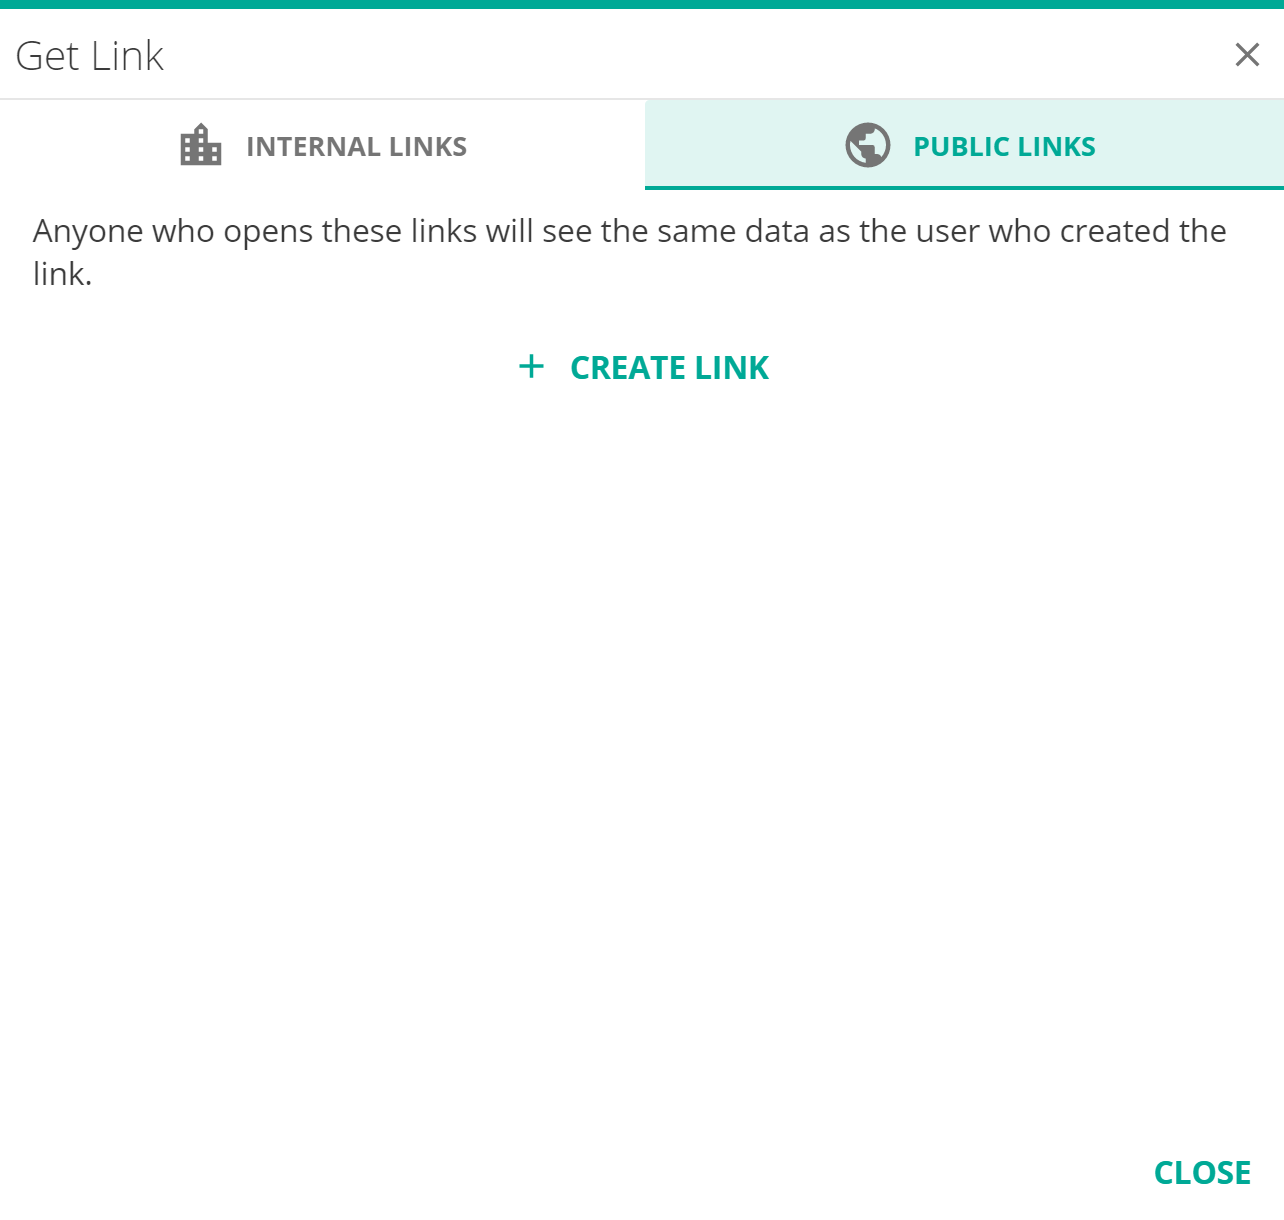
Public links
The PUBLIC LINKS tab of the Get Link dialog allows the creation of a link that can be used externally either through a distribution or in an embedding scenario. Public links are unauthenticated-access links, they do not require Data Hub users in order to be open, and run in a limited security context.
 |
The Public Links feature is License-restricted in Data Hub. It is included by default in any Enterprise (or Premium) plan, and is also available as an add-on but only in Professional (or Advanced) plans.
If your instance of Data Hub is not licensed to use the Public Links feature, then the PUBLIC LINKS tab of the Get Link dialog will be greyed out in the UI, disabled and therefore inaccessible.
Note
As the Controller of your data, your organization is responsible for governing and controlling its data. It is also your responsibility as a user with sufficient access to this data to ensure that confidential data is not shared externally.
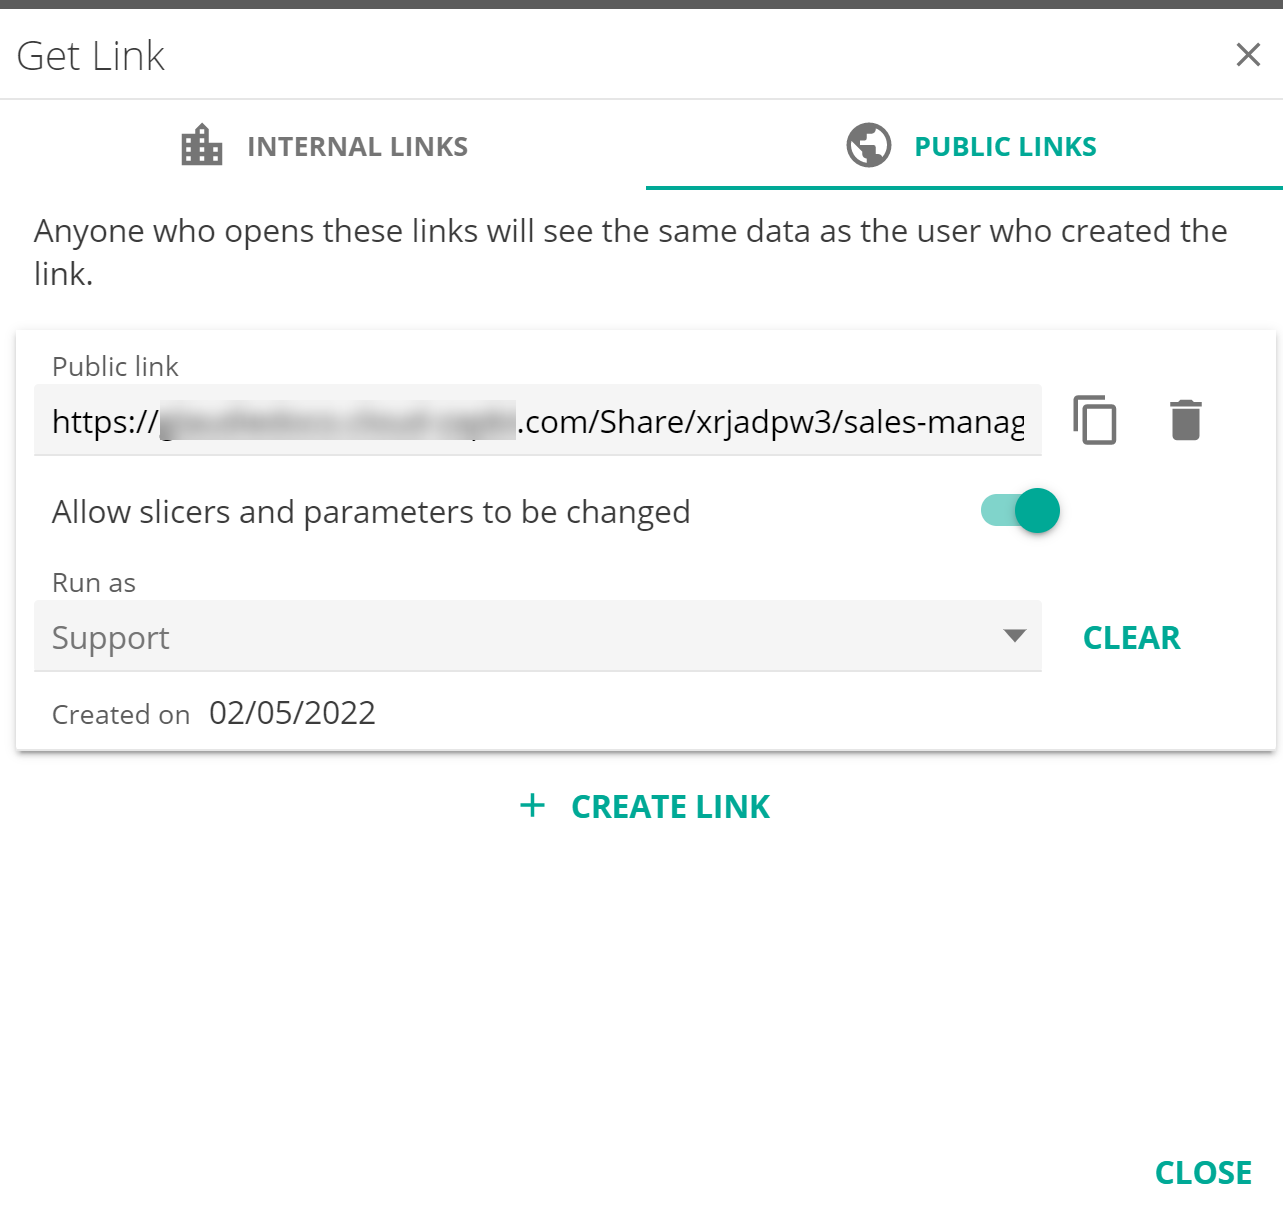
Clicking the PUBLIC LINKS tab shows the below screen, and lets you create a new Public Link.
|
A link to a resource that opens in View mode, in the same way that an Embed Link opens but view does not allow navigating outside of the resource.
A link that is publicly available. It does not require any user authentication, but instead it runs in the security context of the user who created the link. In this below example: Support. In other words, this means that everybody who opens the link will see the same output regardless of whether they are a Data Hub user or not.
A shorter version of the resource URL that, unlike Internal Links does not include the path to the resource, but instead replaces this resource path by /Share/<uniquecode>, for example: https://demo.zapbi.com/Share/xjbn75v1/chief-financial-officer-dashboard
 |
Public links allow creating as many Public links as required. Each link may run in a different user security context.
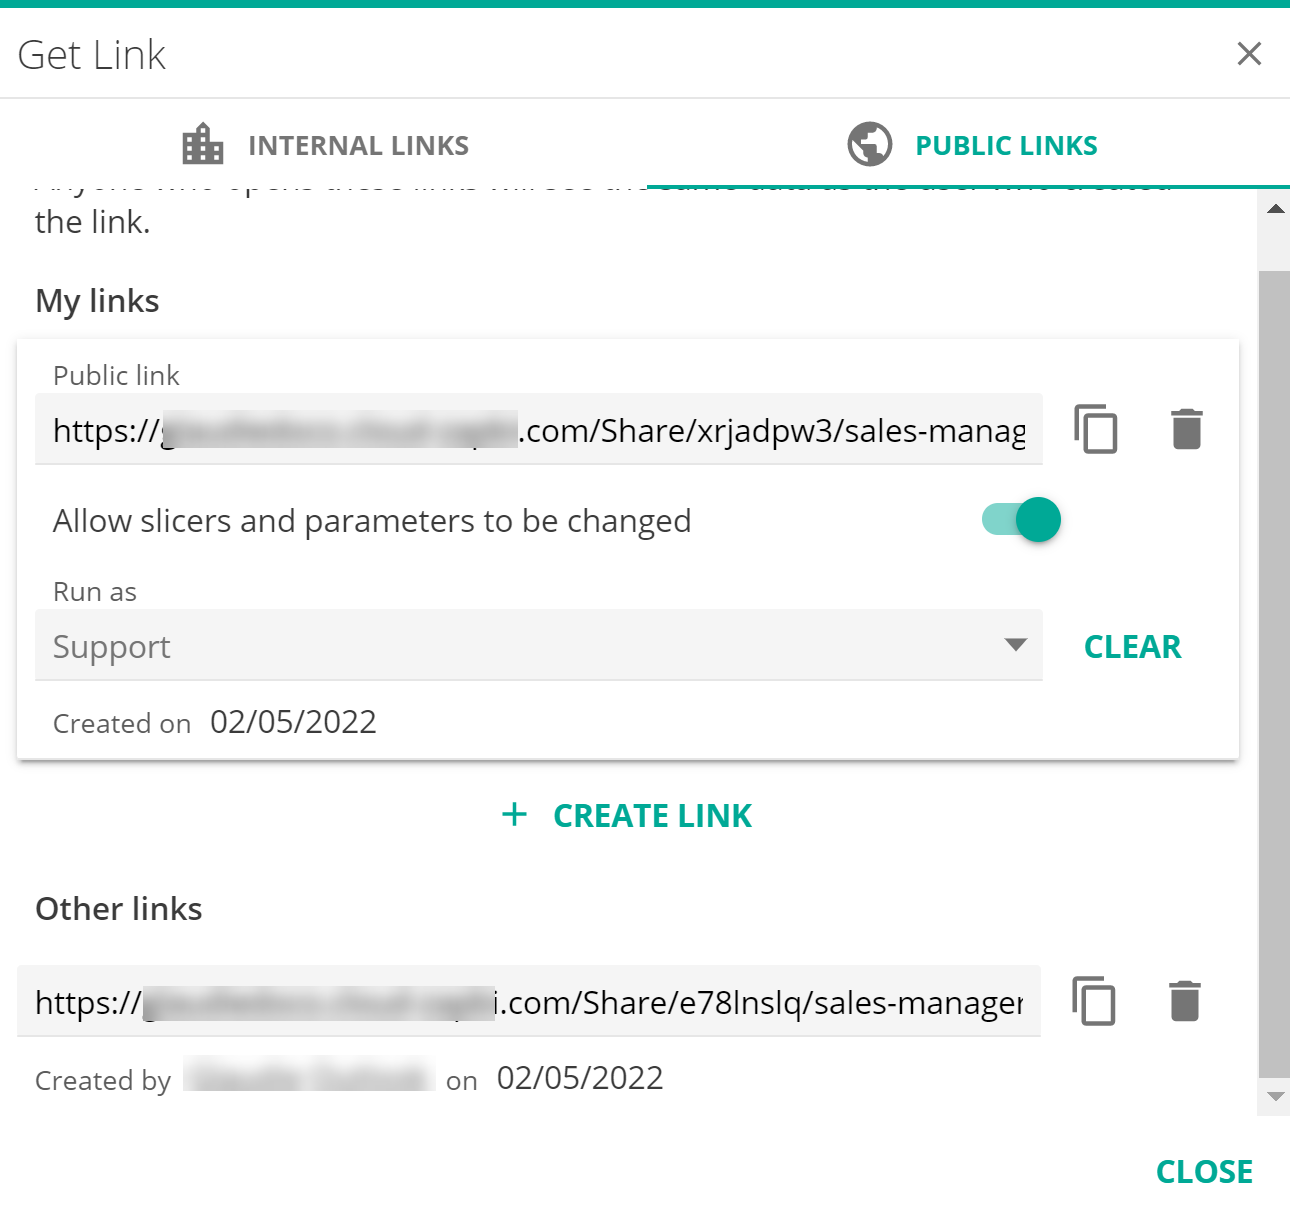 |
Only an administrator or Full Designer can create Public links running as a different user, to do this, the Run as feature should be used.
While Administrators can see other user-created links and Designers can see which other users have created links, Consumer users can only see their own links.
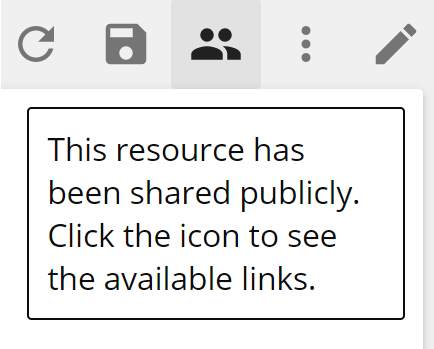
When a resource has a Public Link, Designers will see an extra icon in the resource toolbar indicating the resource has been shared publicly. Clicking the icon will open the Get Link dialog with the Public links tab selected.
 |
This Public Links feature is particularly useful in the below scenarios:
There is no Single-Sign-On experience available when embedding a Data Hub resource in a third-party software. A single Sign-On is required in embedded scenarios not to require a second authentication (ZAP’s) by users.
There is a large number of expected users viewing an embedded resource which makes it difficult to manage/administer from a user profile perspective.
Sharing specific resources externally with external users to the organization (such as: customers, suppliers or partners).
Distributing Links to external recipients through an automated publication rule.
Embedding non-confidential, public reports in public websites
Comparison between the 3 available links.
Resource link | Embed link | Public link | Notes | |
|---|---|---|---|---|
Opens in View mode | No | Yes | Yes | |
Resource navigation available | Yes | Option | No | |
Embeddable resources only | No | Yes | Yes | |
Resource slicing available | Yes | Option | Option | |
Consumer can access the link | Yes | Yes | Yes | |
Consumer user is required | Yes | Yes | No | |
ZAP-Authentication required | Yes | Yes | No | |
SSO supported in embedding scenario | Yes | Yes | N/A | |
Logged-in user security | Yes | Yes | No | |
Resource user security | Yes | Yes | No | |
Pricing | ||||
Per-user licensing/pricing | Yes | Yes | No | |
Feature licensing/pricing | No | No | Yes | |
Available as an add-on | Standard | Standard | Yes | |
Plan limits apply | No | Yes* | *ZAP’s Fair Use Policy applies | |
Availability in Plans | No | No* | *Not available on Standard/Basic. Included in Enterprise/Premium. Available as an add-on on Professional/Advanced. | |