Create a model from a data source
Excel will be used as a data source in the displayed example.
Create a new data model
Click New resource > Connect to my data.
Select source
-
On the Select Source tab, click the source you want to connect to. Click CONNECT.
-
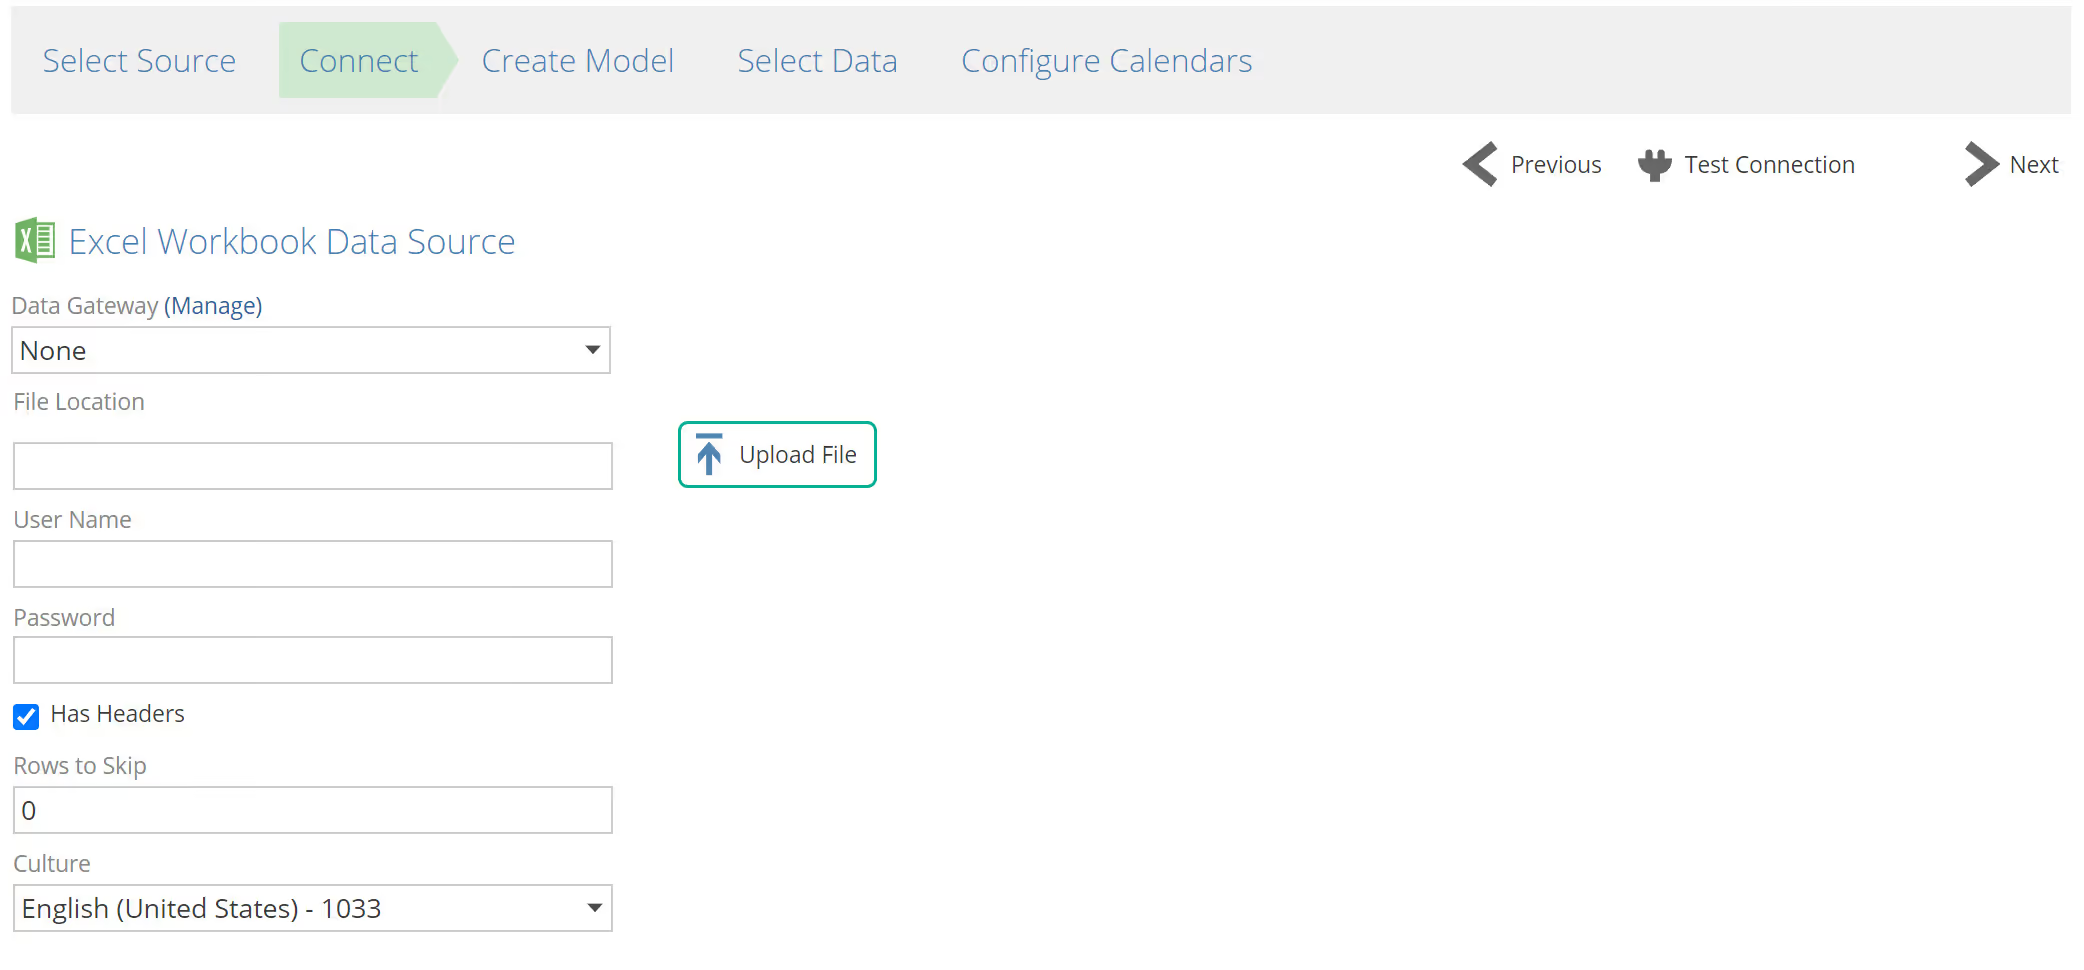
From the Connect screen, specify the connection details.
-
Click Upload file.
Connect
- Leave Data Gateway drop-down item as None unless connecting to an on-premise data source.
- Select Upload File and follow the prompts.
- Click Test Connection.
- Click Next.
Helpful Links
Create model
-
Change your Model Name if required.
-
Select the Model Server from the drop-down.

-
Change the Model Database Name if required.
-
Use the Deployment Type as displayed in the drop-down.
-
Click Create Model.
-
Click Next.
Helpful links
Select Data
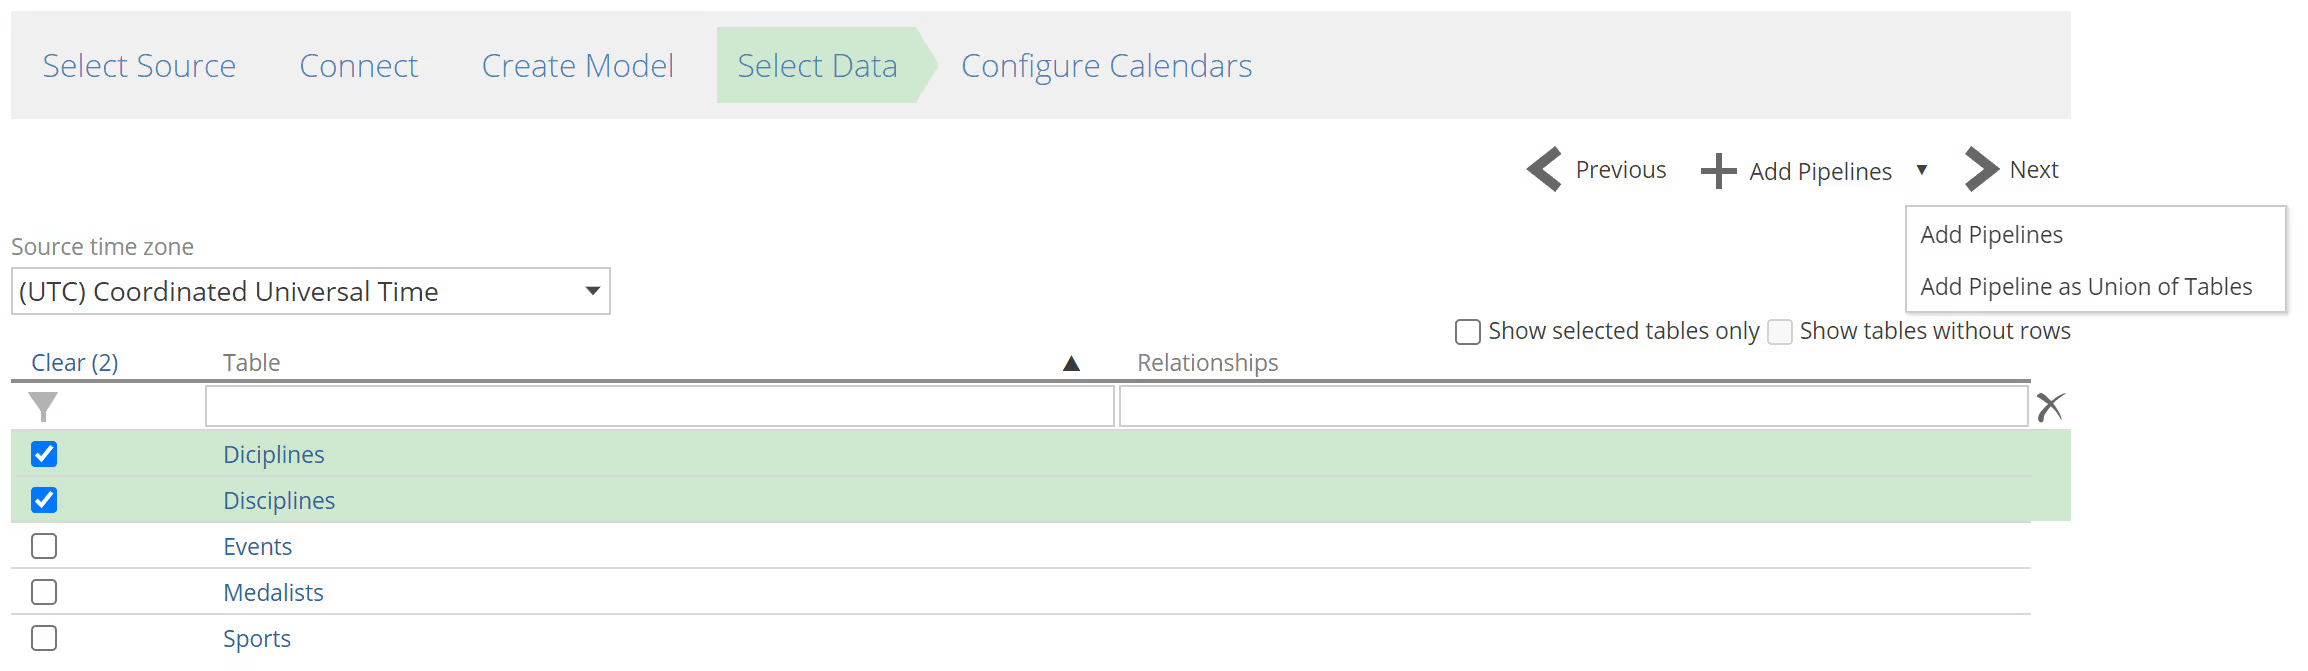
To add tables from the data source to the Data Model:
-
Select tables to be added as pipelines using the check box column.
-
To add the pipelines to the data model, there are two options:
-
Use Add Pipelines to add tables as individual pipelines.
-
Use the Add Pipeline as Union of Tables option from the Add Pipelines drop-down menu, to add a single pipeline created from a union of the selected tables.
-
-
Click Next.
Configure calendars
- Change the First Day and Last Day if required.
- Select the Date Format from the drop-down.
- Calendars are automatically created.
- Click Finish.
Process the model
- On the design panel, click Process Model and change settings as required.
- Click Process.
- Processing progress will be displayed in the status pane.