ADO.NET
ADO.NET provides a standard, SQL-based interface to access many different database systems. Data Hub offers a list of all ADO.NET drivers found on the installation server, together with a selection of drivers from RSSBus. You may also add your own drivers.
Note
None of the RSSBus drivers present in the list have been extensively tested so use them at your own risk. Consult the RSSBus website (www.rssbus.com) for details on the required connection strings and other parameters for RSSBus drivers.
RSSBus drivers for sources listed separately on the Select Source page, such as CRM, Salesforce.com, and SQLite, also appear in the list. ZAP recommends that you select these sources directly from the Select Source page rather than via the ADO.NET source.
Connecting to an ADO.NET data source
An ADO.net data source can be added to a new or existing model.
Select source
Under Files & Other select ADO.NET.
From the source type pop-up, click Connect.
Connect
Complete the following fields:
Data Provider Select the data provider that will be used to connect to the data source.
Note
You can add a new data provider by copying the data provider's .DLL file to the ResourcePlugins folder under the folder where Data Hub is installed, and then restarting Internet Information Server (IIS).
Connection String Enter the connection string that will be used by the data provider to connect to the data source. Refer to the documentation for the target data source to determine the correct format for the connection string. Consult the RSSBus website (www.rssbus.com) for details on the required connection strings and other parameters for RSSBus drivers.
Tip
Setting the Data Provider to RSSBus ADO.NET Provider for OData V2, and supplying a connection string of URL=http://services.odata.org/Northwind/Northwind.svc will connect to a sample Northwind database using OData. No login credentials are needed for this sample connection.
User Name Type the user name needed to connect to the specified data source.
Password Type a password for the specified user name.
Note
Some data sources may require log-in credentials to be specified as part of the connection string. In these cases, the user name and/or password may be able to be left blank.
Identifier Starts With Identifiers, such as column and table names, are automatically surrounded with delimiters. Enter the starting character that will be used when delimiting identifiers. For example, in SQL the identifier Sales Amount can be delimited as [Sales Amount], so the Identifier Starts With entry would be [.
Identifier Ends With Identifiers, such as column and table names, are automatically surrounded with delimiters. Enter the ending character that will be used when delimiting identifiers. For example, in SQL the identifier Sales Amount can be delimited as [Sales Amount], so the Identifier Ends With entry would be ].
Note
The default character for these settings is the double quote character ("). This delimiter works for many source databases, including SQL Server (square brackets also work for SQL Server).
Rows Limit Template Sometimes, a limited number of rows must be selected from a table, for example when generating a preview of the data in a pipeline. To implement this requirement, enter the template text which will be inserted into each SQL statement that is sent to the data source to select a limited number of rows. The template must include the #ROWS_LIMIT# parameter, which will be replaced with the number of rows requested from the data source.
Note
The required syntax depends on the requirements of the data source used. Consult the documentation for the data source to determine the correct syntax.
Rows Limit Position Select where the Rows Limit Template is inserted within each SQL statement that is sent to the data source.
Note
The position depends on the requirements of the data source used. Consult the documentation for the data source to determine the correct position.
There are two options: After Select - The template will be inserted after the SELECT keyword. For example, in SQL Server, if the template text to be inserted is TOP #ROWS_LIMIT#, and the rows limit is 5, the SQL statement after the parameter was replaced would be: SELECT TOP 5 [Sales Amount] FROM [Sales Orders]. End of Query. The template will be inserted at the end of the SQL statement. For example, in Oracle, if the template text to be inserted is where rownum <= #ROWS_LIMIT#, and the rows limit is 5, the SQL statement becomes: SELECT "Sales Amount" FROM "Sales Orders" where rownum <= 5.
Supports Aliasing with AS Check this option if the data source's SQL dialect supports aliasing using the AS keyword. For example, SELECT [SalesAmt] AS [Sales Amount].
String Concatenation Operator The operator used to concatenate string values. For example, the ANSI standard concatenation operator is '||' while Microsoft SQL Server uses '+'.
Wildcard Escape Character The character used to escape wildcards like '%' and '_' in LIKE expressions.
Optional - System Table Regular Expression Type a regular expression to filter out tables returned from the data source. This setting is optional. Tables whose names match the regular expression will not appear in data source's TABLES tab. Leave the text box blank to return all tables from the data source. For example, in PostgreSQL, the regular expression ^information_schema could be used to remove all tables whose names begin with "information_schema". For more information on regular expressions, refer to the following website: http://msdn.microsoft.com/en-us/library/az24scfc(v=vs.110).aspx
Date/Time Format String Allows you to specify the date/time formatting used by the data source. If the displayed (default) string is not suitable for your database (yyyy-MM-dd HH:mm:ss.fff), you can specify a custom C# format string, replacing the default string. For more information on this formatting, refer to the following website: https://msdn.microsoft.com/en-us/library/8kb3ddd4(v=vs.110).aspx
Note
If this setting is left blank, the default string, described above, is used.
Select Data
To add tables from the data source to the Data Model:
Select tables to be added as pipelines using the check box column.
To add the pipelines to the data model, there are two options:
Use Add Pipelines to add tables as individual pipelines.
Use the Add Pipeline as Union of Tables option from the Add Pipelines drop-down menu, to add a single pipeline created from a union of the selected tables.
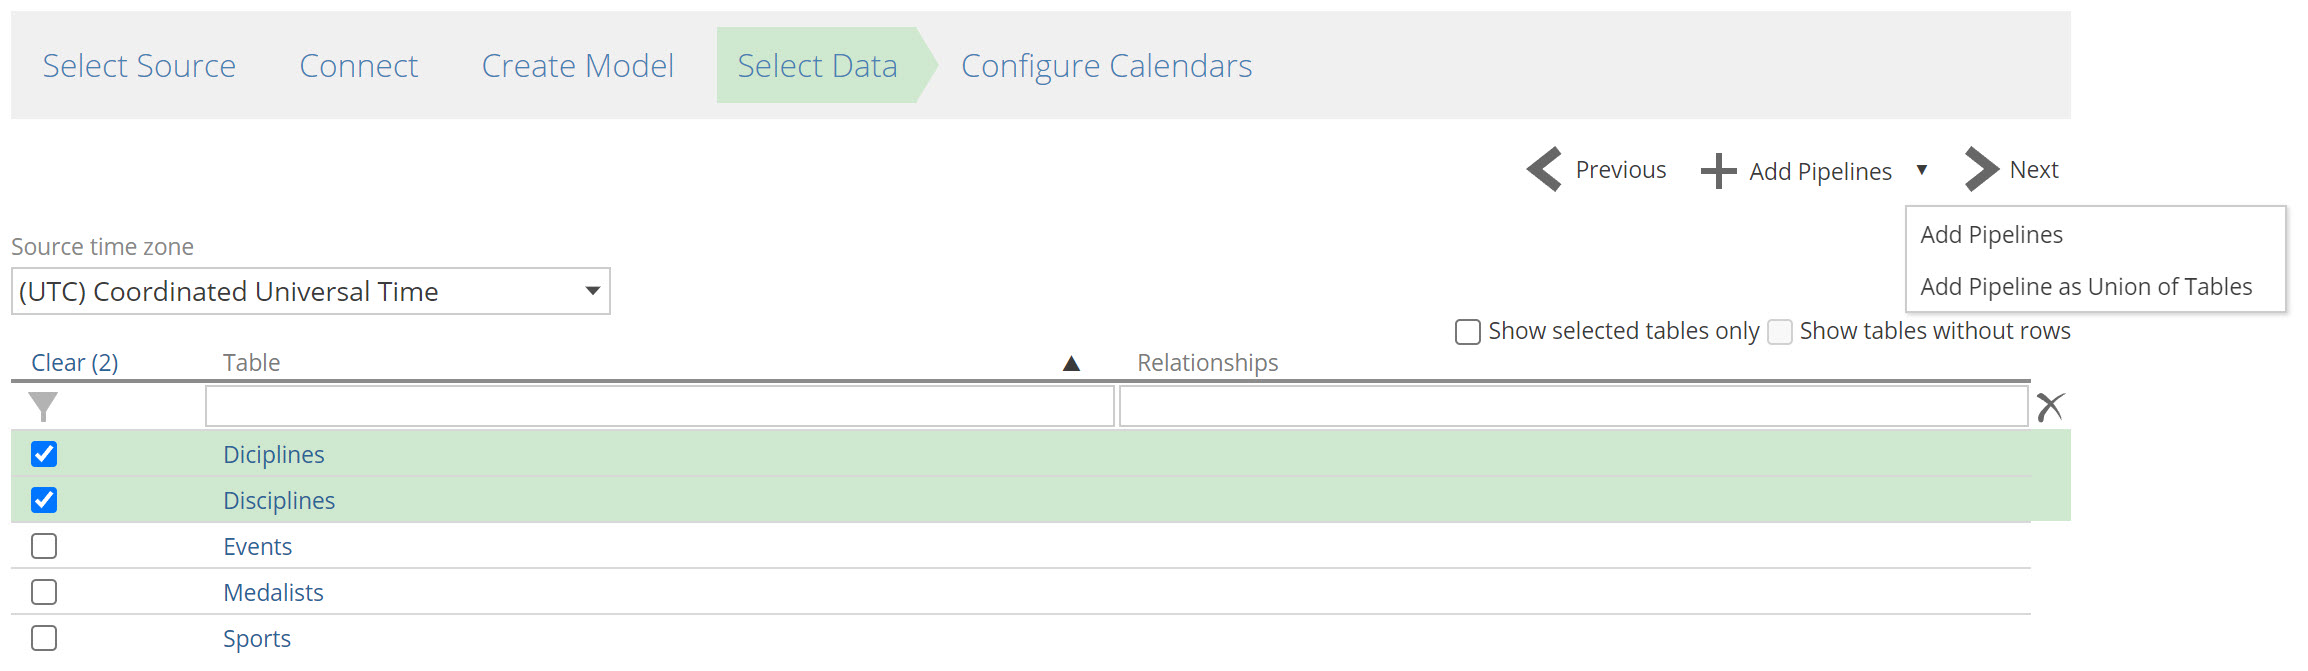
Click Next.