Zap Live for Excel
Zap Live is an Excel add-in that integrates Excel with Zap Analytics, enabling direct access to reports within Excel worksheets. This section covers installation, connection setup, and core functionality of the add-in.
Zap Live is currently only supported on Zap Cloud.
Loading a report in Excel
There are two ways to load a Data Hub report in Excel:
- Download a report from Data Hub as a Zap Live workbook.
- Load the report from within Excel.

Downloading a Zap Live workbook
-
From the Resource Options menu of an analysis report, select Zap Live in Excel.

-
Save the workbook to your computer.
-
Open the downloaded workbook in Excel. The Zap Live add-in will be installed if it isn't already.
noteThe sheet will appear empty until the report has finished loading.
-
Sign in to Data Hub if prompted (see Connecting to Data Hub from Excel).
-
The report will be loaded automatically.
Selecting a report from within Excel
-
If you haven't already, install the Zap Live add-in and connect to Data Hub.
-
Choose an analysis report by navigating to it in the resource explorer, or by typing into the Search input.

-
Double-click the report or click Load to bring it into Excel. The table data will be displayed within the current sheet.
Designing a custom query
Instead of loading existing reports from Data Hub, you can create your own custom queries directly within the Zap Live task pane.
Custom query design in Zap Live is a streamlined version of the query design experience in Data Hub, optimized for ad-hoc analysis within Excel.
For advanced, full-featured query design, consider building an Analysis report in Data Hub, which can then be managed in a central location and loaded into Excel using Zap Live.
When adding a new query, select Create custom query. This will display a Design tab, which you can use to build your query.

The Design tab will be empty to begin with. Select a model from the drop down to load its dimension tree. From here, you can drag measures, levels, members, named sets, and calculated members into the Rows and Columns placeholders below to add them to the query. The results will automatically be loaded into the query's sheet.

Elements in the placeholders can be moved within the placeholder, or to another placeholder, by dragging them around, or by clicking on them and choosing a Move option from the context menu.
Applying functions
Member, measure, and calculated member elements can have a range of time intelligence functions applied to them. To do this, click on the element in a placeholder, and select one of the Functions options from the context menu. Selecting a different function will replace the current function, while selecting an already-applied function will remove it from the element.

Adding filters
You can apply filters to your query to refine the data displayed in your reports. To add a filter, drag a member or level onto the Filters placeholder. Filters can be turned into configurable slicers by clicking on an element in the Filters placeholder and selecting one of the Slicer options from the context menu.

See the Slicer design reference for more information about the available slicer options.
Opening a custom query in Data Hub
From the More options menu at the top-right of the Zap Live task pane, select Open in Data Hub. This will open Data Hub in a new browser tab and create a new analysis report based on your custom query. From here, you can design much more complex reports using the full range of Zap Analytics features, and manage them in a central location.

Changes to this report will not affect the custom query in Zap Live, and vice versa. To use the customized report, save it in Data Hub, and then load it into Excel.
Designing the model in Data Hub
Similar to the dimension tree in Data Hub, if you have model design permissions, you can navigate directly to the pipeline that produces a measure group or dimension by right-clicking on it and selecting the Open pipeline… option. This will open the pipeline in a new browser tab, allowing you to view the model and make changes if necessary.
Global filters
Global filters allow you to filter data across multiple queries in the same workbook. To add a global filter, select Global filters from the queries drop down at the top of the Zap Live task pane. This will provide a Design tab similar to custom queries, with only a Filters placeholder available. Note that only a single data model can be used for global filters, and they will only apply to queries that use the same model.

Similar to filters in custom queries, global filters can be turned into configurable slicers. These slicers will appear in the Slicers tab of all affected queries, allowing you to change their selections from any query in the workbook.

Adding another report to Excel
Once you've loaded a Data Hub report in Excel, you can add more reports by selecting Add a new query... from the query dropdown at the top of the Zap Live task pane. You can switch between multiple queries by selecting them in the query dropdown.

You can only have one Zap Live query per sheet.
Working with Zap Live queries

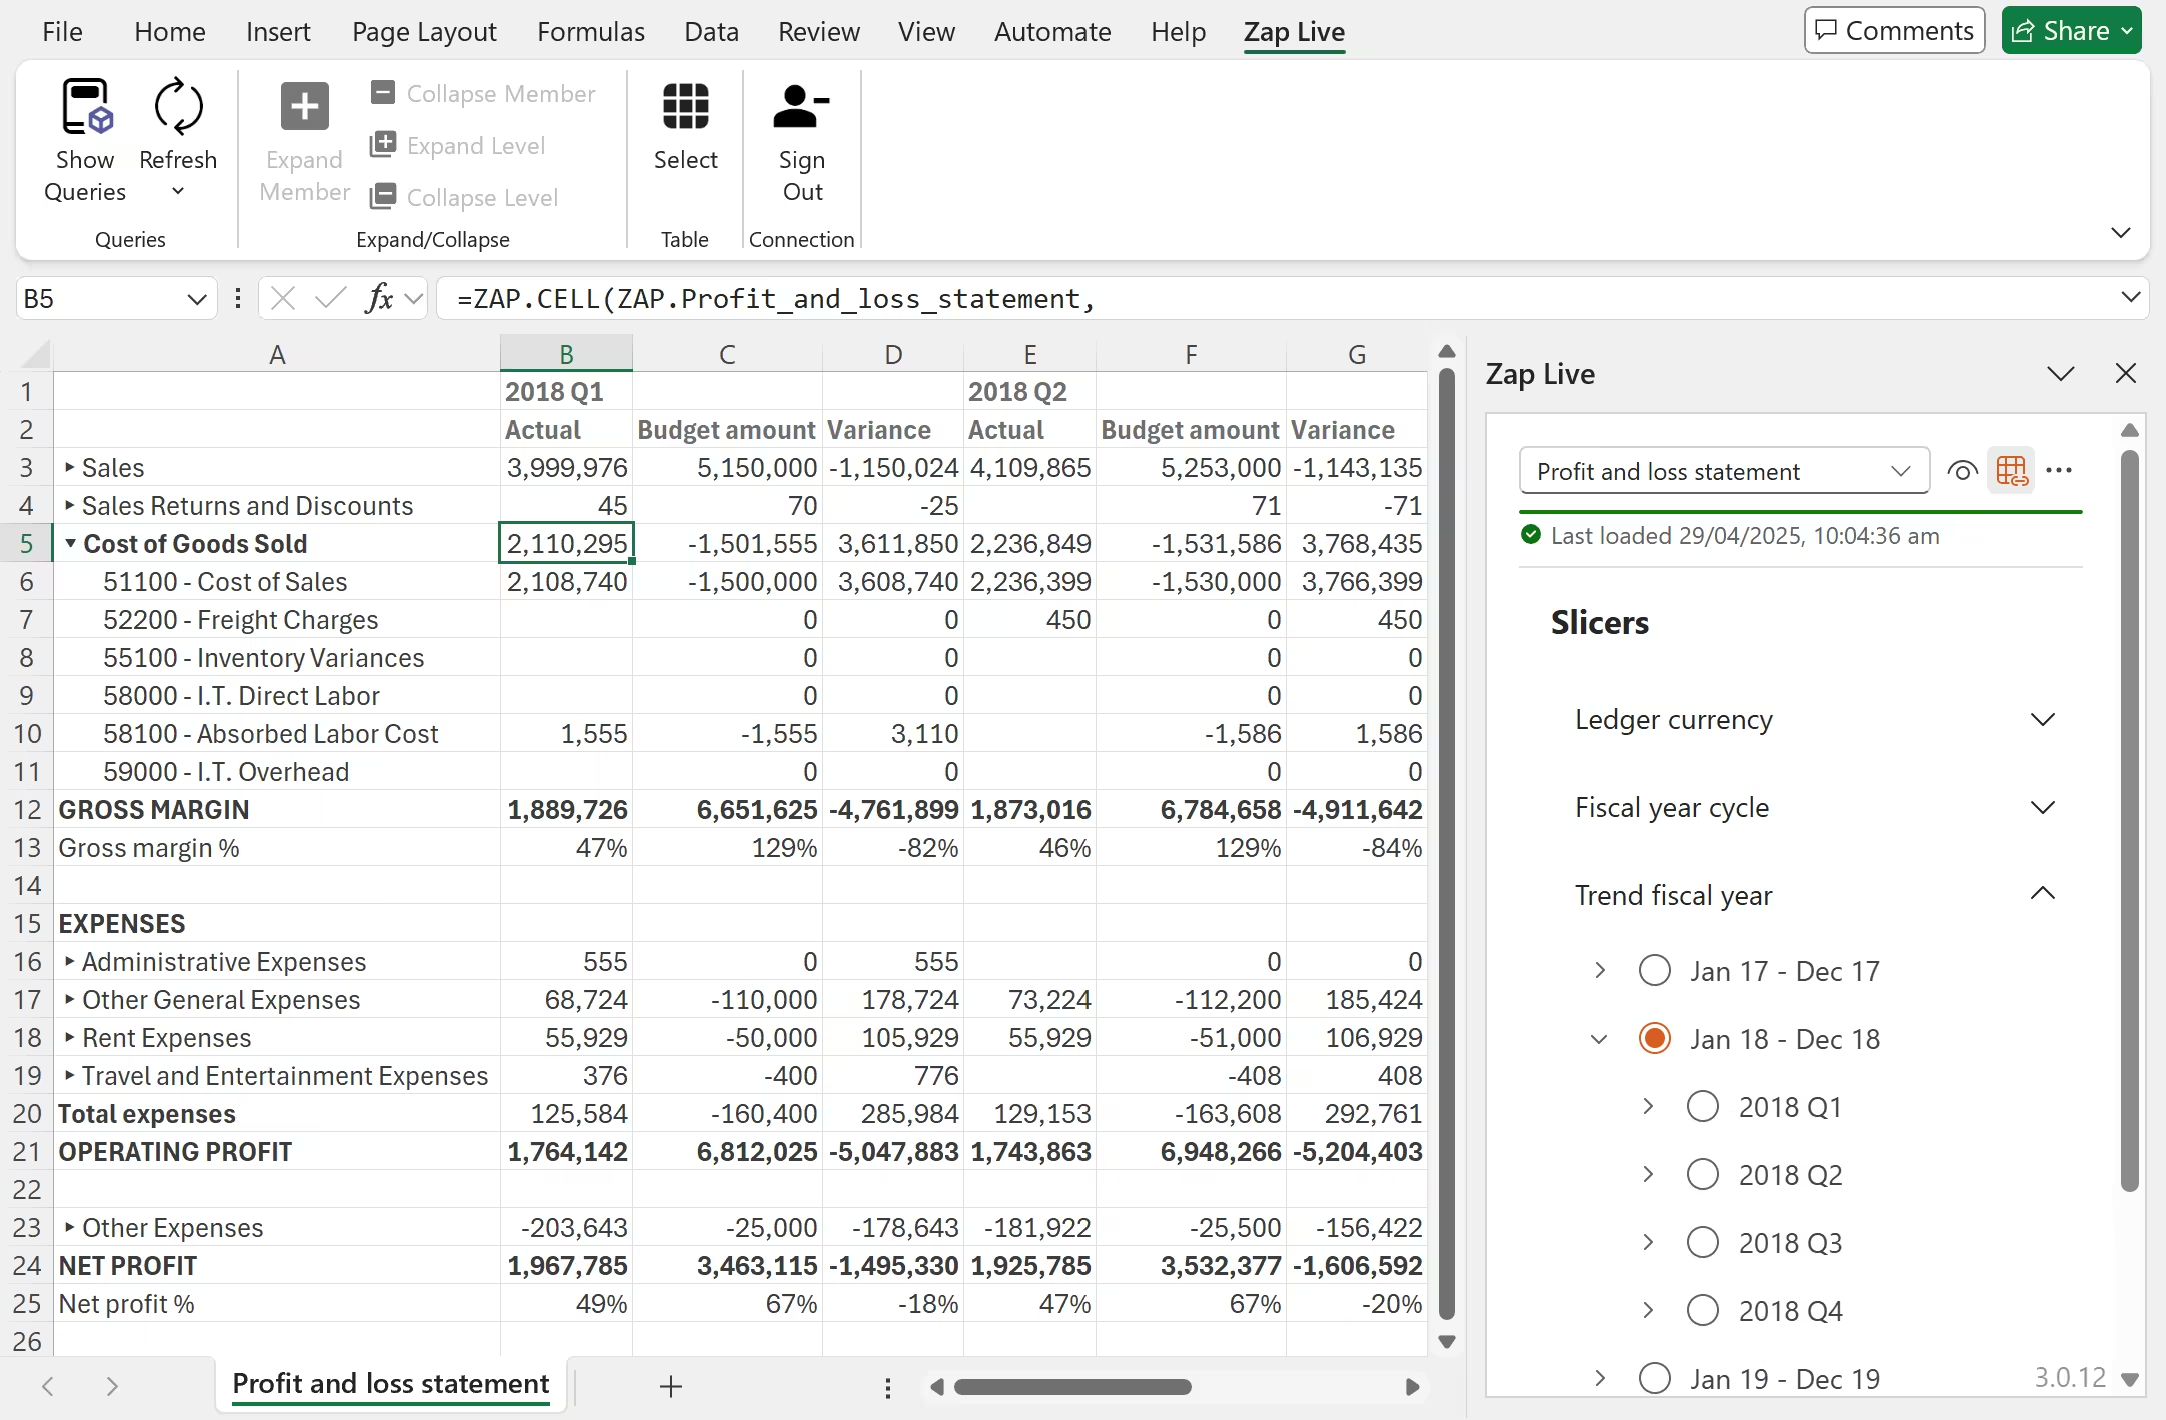
Zap Live consists of a task pane for loading reports and slicing data, and a ribbon for manipulating tables. This section explains how to access interface elements and perform common operations.
Refreshing data
The data displayed in Zap Live tables can be updated through the Refresh ribbon button. After pressing, the following refresh types are available:
- Refresh all to refresh all queries in the workbook.
- Refresh table to refresh only the currently selected table within the sheet.
The selected query will show a loading message while it is being refreshed.
Refreshing report data from source
At times, it might be required to refresh data directly from the data source. For reports that support on-demand refresh, this can be done in More options menu at the top-right of the Zap Live task pane, by selecting the Refresh data option.

This will open a dialogue that will trigger an on-demand refresh to fetch data from the source, and then refresh the query. See on-demand refresh for more information on configuring a report to support on-demand refresh.

Expand/collapse
Zap Live tables support hierarchical data display with expandable and collapsible rows, allowing users to control the level of detail shown.
Users can expand or collapse hierarchical data directly within Excel by clicking the arrow icon displayed in header cells.

Additionally, Zap Live enhances this functionality through dedicated ribbon controls. The Expand Member and Collapse Member options apply to a single member, while the Expand Level and Collapse Level options affect all members at the current depth in the hierarchy.
Accessing the task pane
The task pane can be opened at any time by clicking Show Queries from the Queries section of the ribbon. It shows the current report's name in the query dropdown, and the report's slicers (if it has any)
Slicing
Slicers provide interactive filtering capabilities for Zap Live tables. When a report loads into Excel, associated slicers from the Zap Analytics report become accessible in the Zap Live task pane.

Navigate to the Slicers section within the task pane to view all available options for the current report. Select specific values from the available options to slice the data. The table data updates automatically to reflect these selections.
Formatting tables
Zap Live tables can be formatted using the standard Excel formatting options, and when the query is refreshed, the formatting will follow the data it was applied to, rather than the position of the cells in the worksheet. This means that if you apply formatting to a cell in the table, and then expand or collapse the hierarchy, the formatting will remain on the same member or measure, even if it moves to a different row. Formatting applied to an entire row or column will follow that row or column, rather than the individual cells (see formatting reference for more details).
Only some formatting options are supported in Zap Live tables. See Restrictions for more information.
If you want to apply more complex formatting, you will need to disable the Automatic table option (see Customizing tables), or copy the table to another sheet (see Copying tables).
Customizing tables
The automatic nature of Zap Live tables prevents safely adding custom rows or applying custom cell formatting directly to the table. When these tables are updated during normal operations (such as expanding/collapsing hierarchies, refreshing data, or applying slicers), any manual customizations to the table will likely be overridden when the table is refreshed. Zap Live provides the Automatic table toggle to disable these structural and formatting table updates, while continuing to update the data of tables when refreshing queries.

Enabling Automatic table will immediately re-load the entire table to the sheet it was originally loaded in. The table will be loaded from cell A1 and overwrite any cells in its required range.
Copying tables
An alternative solution to customizing tables is to create a copy of the automatic data table that you can format and edit as required:
- Select a cell of the automatic table you wish to copy and click Select in the Table section of the Zap Data Hub ribbon.
- Copy this table (press ctrl + c or Right click > Copy).
- Paste this table onto another sheet (press ctrl + v or Right click > Paste).
The cells that have been pasted will contain member and measure formulas that query Zap Analytics directly, instead of cell references to the first sheet. This means you can now rearrange the original table without affecting the new one. You can now update the formatting of the copied cells or add new rows with Excel formulas to extend the report. Because this table is not interactive (you can no longer expand or collapse the rows), these cell references will be maintained when refreshing your data. Values will still be updated when refreshing or slicing the original table, but no rows will be added or removed.
Never use cell references to the original interactive table on the first sheet, as expanding or collapsing will break your formulas. A cell must be visible on the original table for data to appear in it in the copied table.
Zap functions
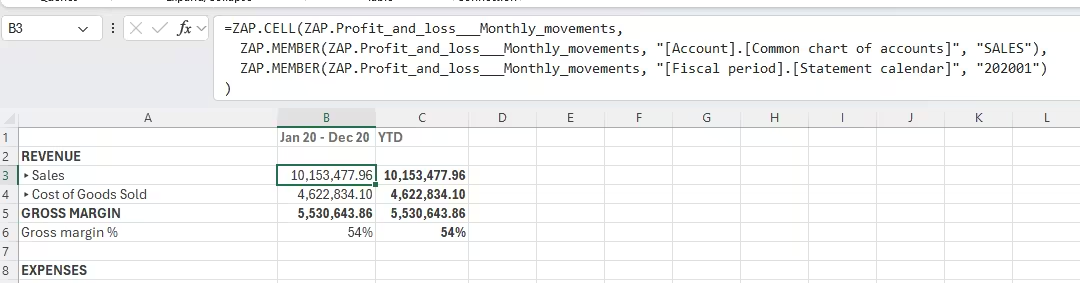
Zap Live tables are implemented using Zap.Cell, Zap.Member and Zap.Calculation functions in the cell formulas instead of raw values. This is primarily to ensure that references to these cells are correct after the table is refreshed.
If these functions are causing slow performance, tables can be loaded using raw values by toggling Cell functions in the task pane. If the query is not using an Automatic table, this setting will be disabled.
Cell functions are automatically disabled when loading large tables (1000s of cells). This can be manually reverted by toggling the setting.
Ending your session
To sign out of Zap Live, click Sign Out on the ribbon to disconnect from Zap Data Hub.