On-premise authentication
Overview
To deliver authentication, Data Hub supports various authentication providers. By default, the Windows authentication provider is used. The product ships with two other providers: ADFS and Microsoft Entra ID (formerly AzureAD), both of which use claims-based authentication.
Providers:
-
Active Directory (Windows) (Default) - Data Hub is configured to use Windows authentication; no additional configuration is required. Windows authentication recognizes local system users and groups configured on the webserver computer, as well as Active Directory users and groups configured for the web server's domain.
-
Microsoft Entra ID (formerly Azure Active Directory (Azure AD)) – Entra ID allows claims-based user and group management for Data Hub and other on-premises and cloud applications, such as Office 365 and Dynamics CRM Online. Once configured, users logging into Data Hub will be redirected to Microsoft Entra ID to authenticate.
-
Active Directory Federation Services (ADFS) - ADFS implements claims-based federated identity for Windows for Data Hub installations. ADFS enables single sign-on to authenticate users across security and enterprise boundaries.
-
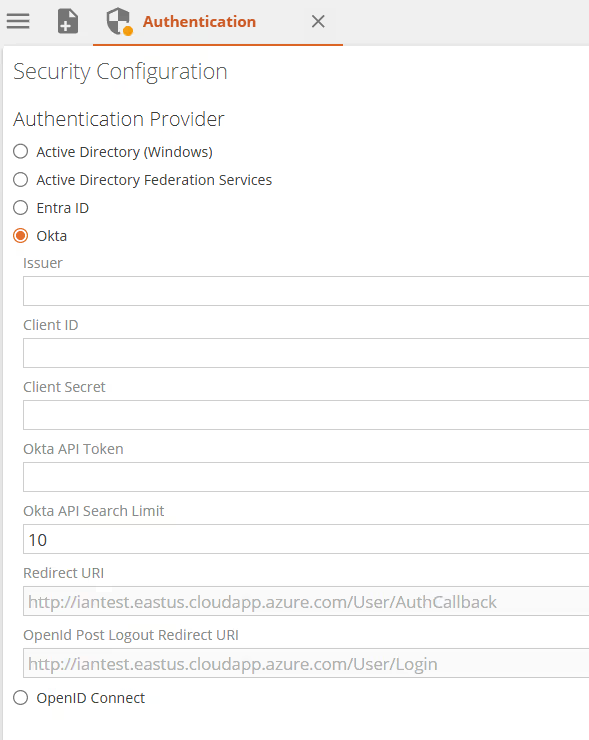
Okta - Data Hub uses Okta as identity provider which provides both user authentication support and users/groups management.
noteNested groups are not supported by Okta
-
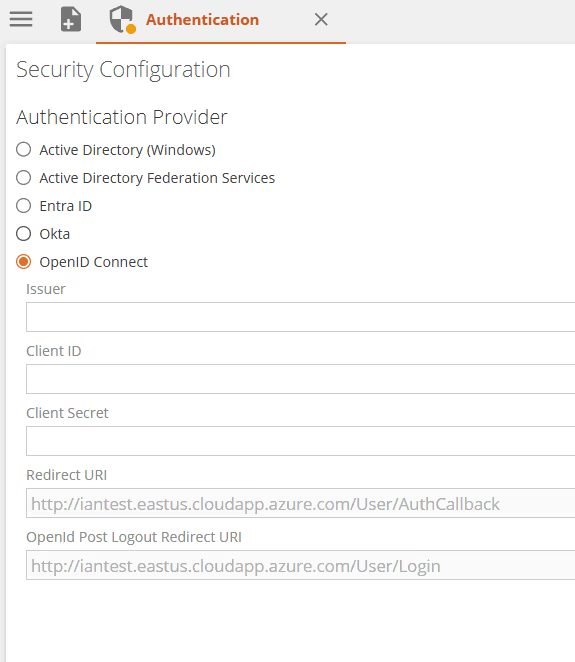
OpenID Connect - Generic support for other identity providers which support authenticating users using OpenID Connect, e.g. Azure AD B2C or Auth0.
noteWhile this provides an authentication layer for Data Hub, it won't support searching for users or groups with the identity provider. Only previously signed-in users and their related groups will show up in Data Hub users/groups search results.

Configure application authentication settings
Select your application authentication method using the Authentication area of the Settings tab.
- Windows (Active Directory) authentication – allows you to authenticate users within an Active Directory domain.
- Entra ID authentication – allows claims-based authentication using Microsoft Entra ID.
- Active Directory Federation Services (ADFS / WSFederation) authentication – allows claims-based authentication using Microsoft ADFS.
- Allow Anonymous Viewers check box – When selected, allows any unauthenticated users to view links that have been shared with them.
- The Allow Anonymous Viewers feature may require a specific license permission to use. Without permission, the check box may not be visible.
- Only resources in the Public folder (and its subfolders) may be shared with this feature.
- To share a resource or folder with anonymous viewers, its viewer access setting must be enabled, by displaying the resource's security screen, and then clicking the Viewer Access on the HOME screen.
- You may also need to override the inheritance of security permissions for the resource (Override on the security screen's HOME screen) before you can enable Viewer Access.
Authentication methods
Windows (Active Directory) authentication
Windows (Active Directory) requires no further configuration. Data Hub uses the application pool identity of the webserver it is installed on to access Active Directory to authenticate users. Local system users and groups configured on the webserver computer, as well as Active Directory users and groups configured for the web server's domain may be used.
The best practice for Active Directory authentication is to use the AGDLP nested group model to minimize administration.
Users from other domains may also authenticate if the appropriate trusts and group structures are set up.
The optional Active Directory Search Filter box lets you type an LDIF string to specify the distinguished name (DN) of the organization unit (OU) to use for Active Directory searches.
For example, to specify the US\Washington OU for the contoso.com domain, type: OU=Washington, OU=US, DC=contoso, DC=com.
Specifying a search filter may be useful if you have many users in your Active Directory, or your Active Directory is distributed across multiple sites connected by WAN links, in order to improve performance. Any filter specified here will be applied when you search for users and groups to add to a Data Hub policy in the Users and Groups screen.
Microsoft Entra ID (formerly Active Directory (AzureAD)) authentication
Entra ID allows claims-based user and group management for Data Hub and other on-premises and cloud applications, such as Office 365 and Dynamics CRM Online. Once configured, users logging into Data Hub will be redirected to Microsoft Entra ID to authenticate.
To use Data Hub with Entra ID:
-
Complete an application registration for Data Hub in the Azure portal to obtain the Tenant(Domain Name), Client ID and Client Secret values.
-
Provide Tenant, Client ID, and client secret values retrieved from the registration process here.

Use Active Directory Federation Services (ADFS) authentication
ADFS implements claims-based federated identity for Windows for your Data Hub installation. ADFS enables single sign-on to authenticate users across security and enterprise boundaries.
To use Data Hub with ADFS:
- Configure a relying party trust in the ADFS Management console, and the Federation Metadata URL and enter Realm URI (the Data Hub application's web address) into the appropriate boxes in the Configure Security Settings screen.

Detailed steps for configuring a relying party trust and obtaining the Federation Metadata URL and Realm URI values.
Okta
Open ID
Refresh user and group Information
If you are using Active Directory or Active Directory Federation Services (ADFS), you can manually force Data Hub to update the information displayed on the Users and Groups tab by clicking Clear Membership Cache on the HOME screen.
This action allows you to guarantee that you are viewing the most up-to-date user and group information.
If you do not want to wait for the database to automatically update new users or groups in Active Directory, you can force Data Hub to contact Active Directory and perform an IIS refresh to retrieve the new user or group information.
Configuration settings
Application registration in Azure
Follow the steps to create your application registration in your Azure AD Tenant
-
Select Azure Active Directory on the left hand menu.
-
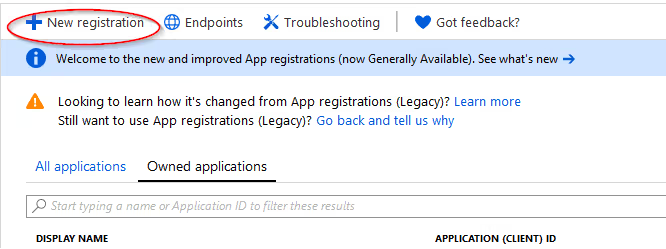
Select App registrations tab.

-
Click New application registration at the top.
-
Enter a Name for your azure application, e.g. Zap Data Hub.

-
Open the new application created to access the settings.
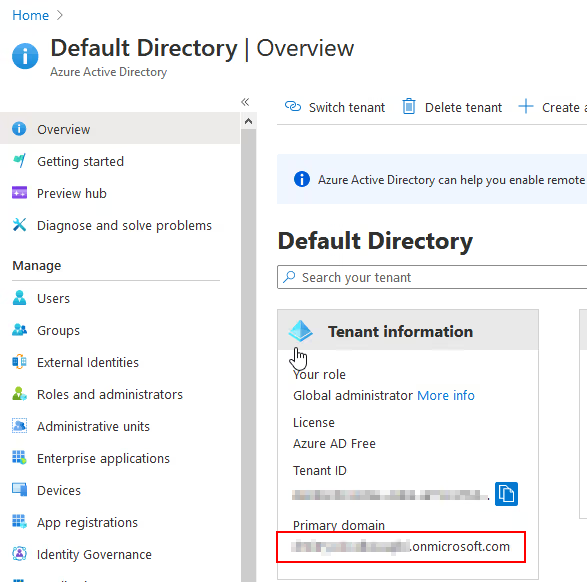
-
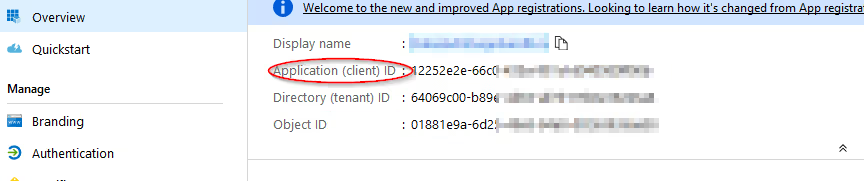
From the Home>Active Directory>Overview page copy your Primary Domain into the Data Hub Domain Name field on the authentication configuration screen.
-
From the Overview page of the published application copy the Application ID into the Data Hub Application (Client) ID field on the authentication configuration screen.
-
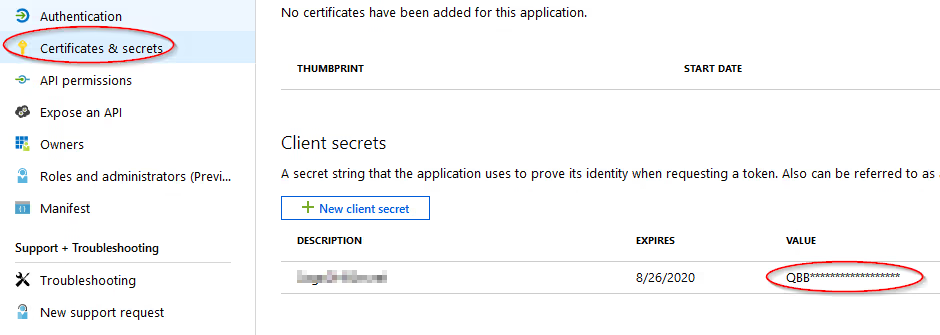
On the Certificates and Secrets tab create a new Client Secret, specify duration and copy Key Value into the Data Hub Client Secret field on the authentication configuration screen.
-
Click Save on the Data Hub authentication configuration screen.
-
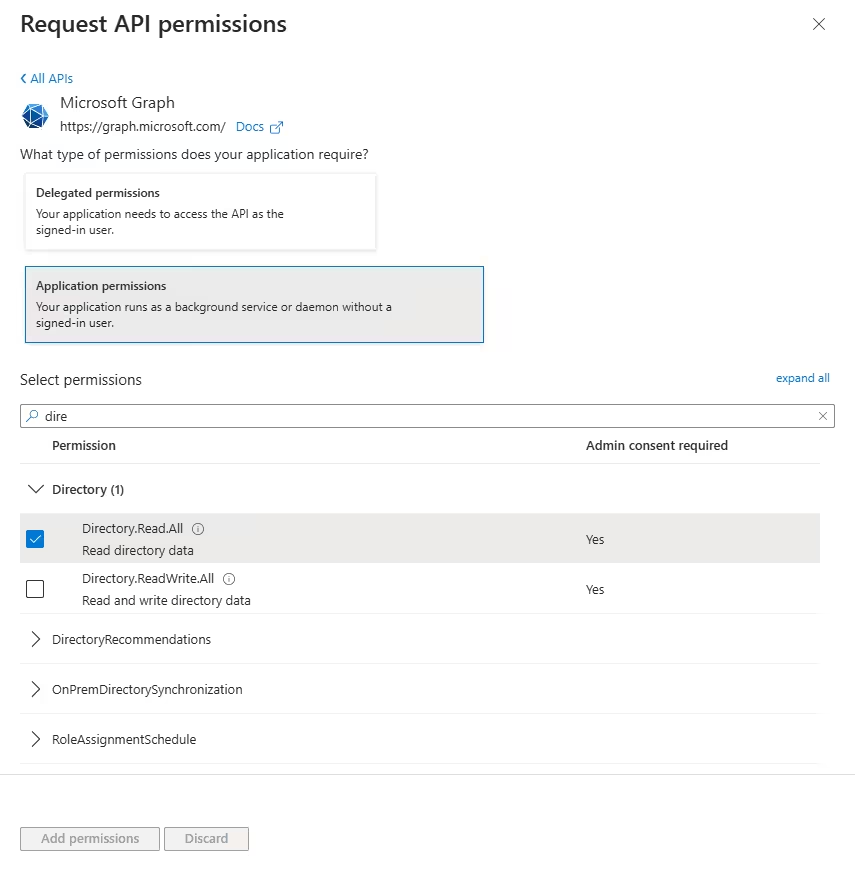
Back in Azure, on the API Permissions tab select Add Permission>Microsoft Graph>Application Permissions>Directory and add Directory.Read.All permissions.
 important
You must use Microsoft Graph and not Azure Active Directory Graph when adding API permissions on this step.
-
On the API Permissions screen select the Grant Admin Consent for Default Directory.
-
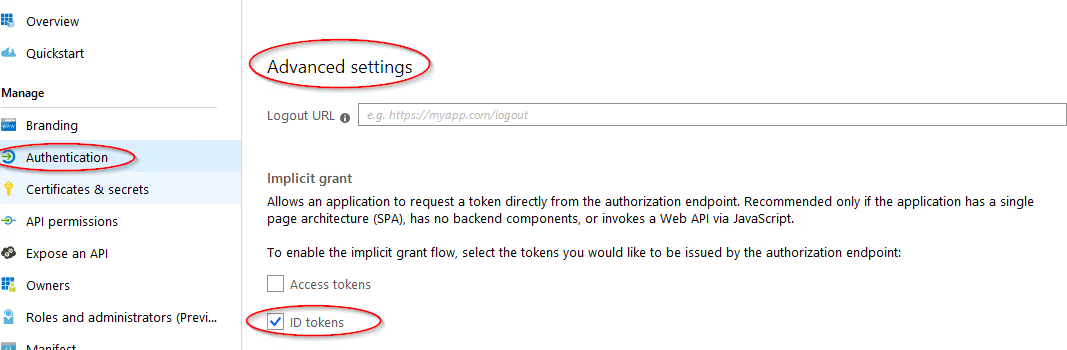
On the Authentication tab under Advanced settings section select ID Tokens.
-
Back in Data Hub, under Authentication in Application settings, add the following to the Redirect URIs:
https://Your_DataHub_instance_url/login.htmlandhttps://Your_DataHub_instance_url/User/AuthCallback -
Click Save.
ADFS configuration
-
Open AD FS 2.0 Management console.
-
Select Relying Party Trusts.

-
Select Add Relying Party Trusts....
-
Click Start.
-
Select Enter data about the relying party manually.

-
Enter a Display name e.g. Zap Business Intelligence and click Next.

-
Select AD FS 2.0 profile and click Next

-
Click Next, if not using an optional token encryption certificate.

-
Select Enable support for the WS-Federation Passive protocol. Enter the Data Hub web address in the Reply party WS-Federation Passive protocol URL e.g. https://try.zapbi.com/

-
Click Next.
-
Click Next through the following 3 screens.


-
Select Open the Edit Claims Rules dialog for this relying party trust when the wizard closes

-
Click Close.
-
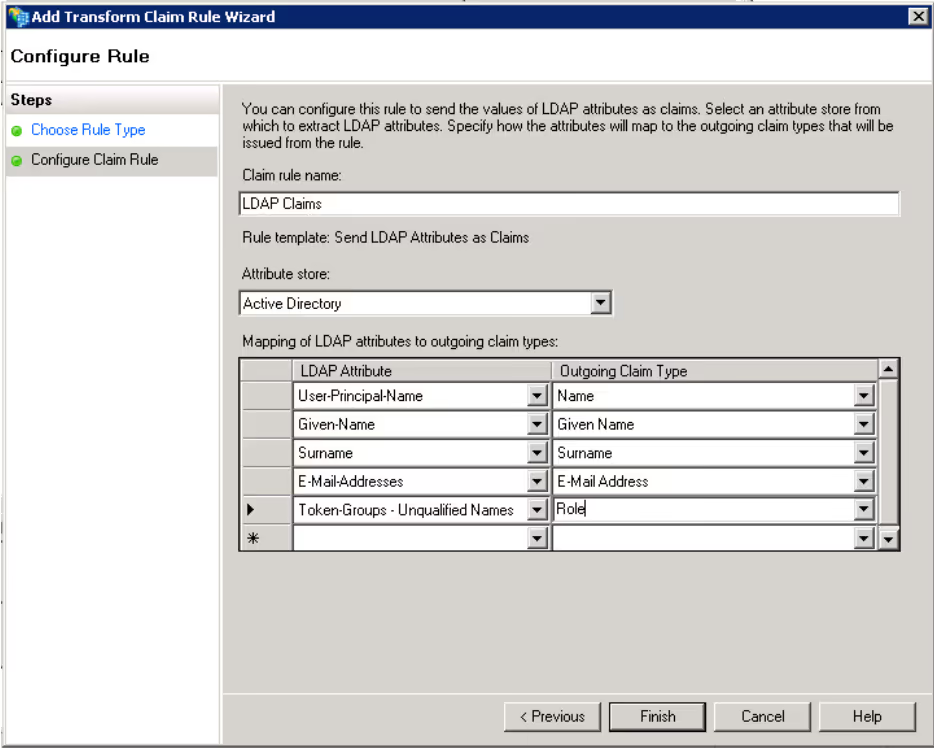
Click Add Rule on Issuance Transform Rule tab. Select Claim Rule template: Send LDAP Attributes as Claims.

-
Click Next.
-
Enter a Claim rule name e.g. LDAP Claims. Select Active Directory Attribute Store and configure the mappings as below:
-
Click Finish.
-
On the Zap Data Hub authentication configuration screen enter the Federation Metadata URL for the ADFS Server e.g. https://fs.company.com/FederationMetadata/2007-06/FederationMetadata.xml. Enter the Realm URI as the Zap Data Hub web address entered in the WS-Federation passive protocol URL.

-
Click save and login.